
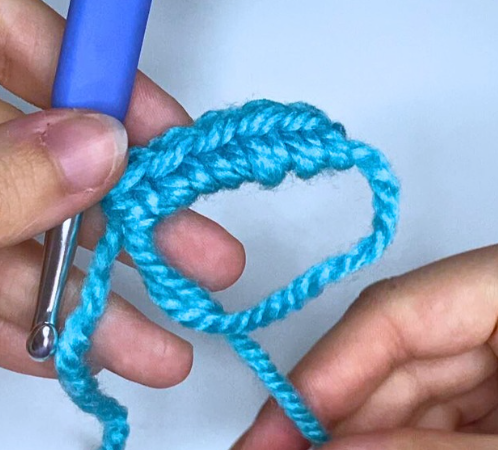
Learning how to crochet a magic ring (also known as a magic circle or adjustable loop) is the ultimate rite of passage for anyone getting into amigurumi, plushies, or circular crochet projects. Unlike standard chain loops that leave an open hole in the center of your work, the magic ring allows you to pull the central loop completely shut, creating a tight, seamless center that keeps polyester fiberfill stuffing hidden inside.
While the magic ring can feel a bit fiddly or confusing for absolute beginners during their first few attempts, mastering this foundational technique will instantly elevate the quality of your crochet projects. In this comprehensive, beginner-friendly guide, you will find a clear step-by-step walkthrough, troubleshooting tips for tricky yarns, alternatives for chenille and velvet yarn, and answers to common magic ring questions.
Why You Should Master the Magic Ring for Amigurumi
If you have ever crocheted a plushie, hat, or coaster that starts in the round, you know how crucial a clean starting point is. Here is why learning the magic ring is essential for every crocheter:
- Zero Center Hole: Traditional chain-2 or chain-4 loop methods leave a visible opening at the top or bottom of your work. A magic ring closes completely tight to prevent white stuffing from leaking out.
- Adjustable Tension: You can adjust the size of the working loop as you stitch your first round, making it significantly easier to insert your hook into working stitches.
- Essential for Amigurumi & Plushies: Almost every 3D amigurumi pattern—from cute animals and ocean creatures to flowers and keychains—begins with a magic ring.
- Professional Finish: Mastering this technique gives your handmade creations a polished, clean, and store-bought aesthetic.
Watch the Video Tutorial
If you prefer learning visually, follow along with my full video tutorial here:
What is a Magic Ring in Crochet?
A magic ring is an adjustable loop of yarn that you crochet your first round of stitches into. Once your stitches are worked, you pull the tail end, and the loop tightens completely shut. It is essential for making spheres, animal heads, and limbs in amigurumi without awkward gaps at the bottom.
Pro Tips and Common Magic Ring Mistakes to Avoid
Even experienced crafters occasionally struggle with a sticking or breaking magic loop. Here are the key technical tips to keep in mind for smooth execution:
Working Over Both Strands
The single most important rule when working your first round of single crochets into a magic ring is ensuring that your hook goes under both the main loop and the short yarn tail. If you only stitch over one strand, the loop will fail to pull closed when you yank the tail.
Managing Tension in Round 1
Do not pull the magic ring completely closed until you have finished working all required stitches for Round 1 (usually 6 single crochets for standard amigurumi). Keeping the loop slightly open while stitching makes it much easier to identify and work into your very first stitch when starting Round 2.
Securing the Tail Permanently
Simply pulling the tail tight is not enough to keep your plushie safe long-term. Always weave the remaining yarn tail securely through the inside loops of Round 1 using a tapestry needle before stuffing your project. This prevents the center from unraveling after repeated washing or handling.
Magic Ring Alternative for Chenille and Velvet Yarns
Working a traditional magic ring with super bulky plush yarn (like Katia Alabama, velvet, or blanket yarn) can sometimes cause the yarn to snap or shed its fibers when you pull the tail tightly. If you encounter friction while pulling velvet yarn closed, try this popular alternative method:
- The Chain-2 Method: Chain 2 stitches using your plush yarn and hook.
- Work into the First Chain: Work all of your Round 1 single crochets (e.g., 6 sc) directly into the first chain you created (the chain farthest from your hook).
- Pull Gently: Gently tug the yarn tail to close any small remaining gap. This method creates zero friction and prevents fluffy plush yarn from snapping!
Explore Patterns
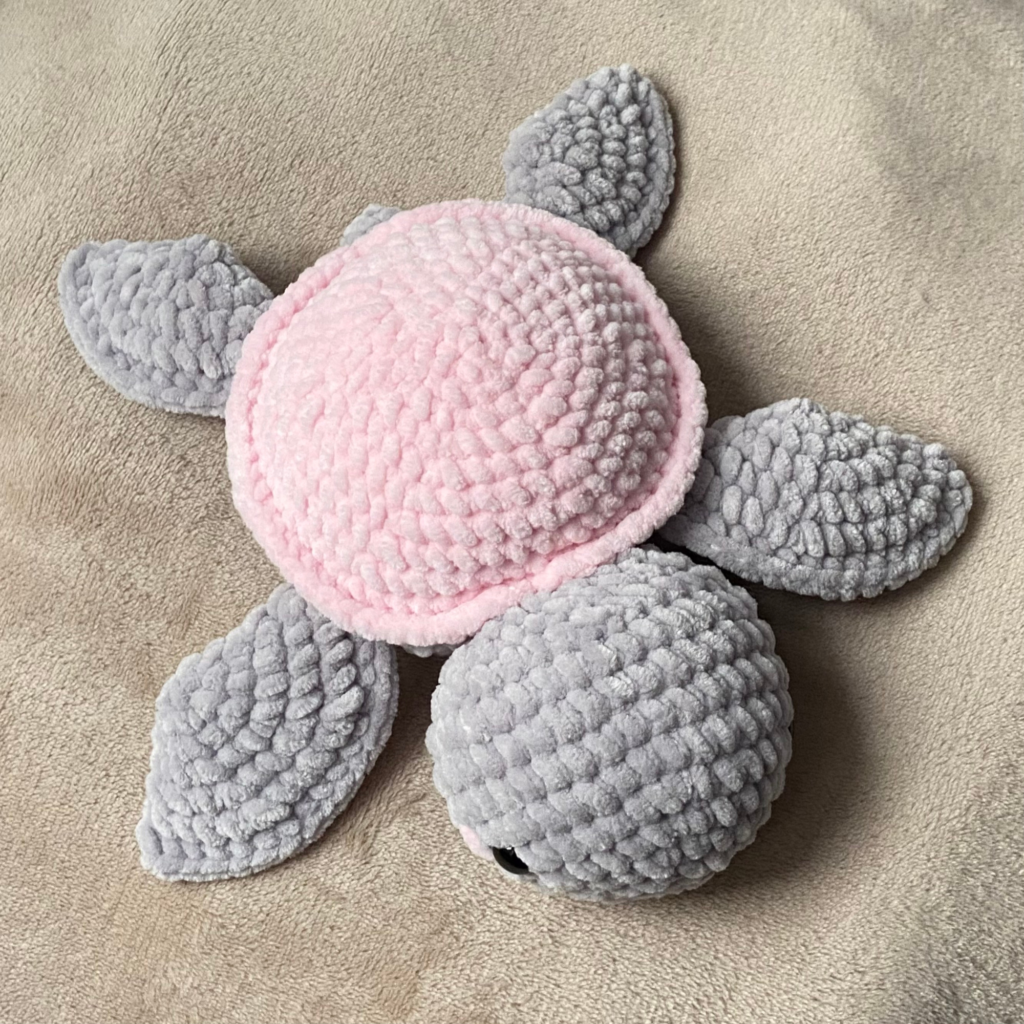
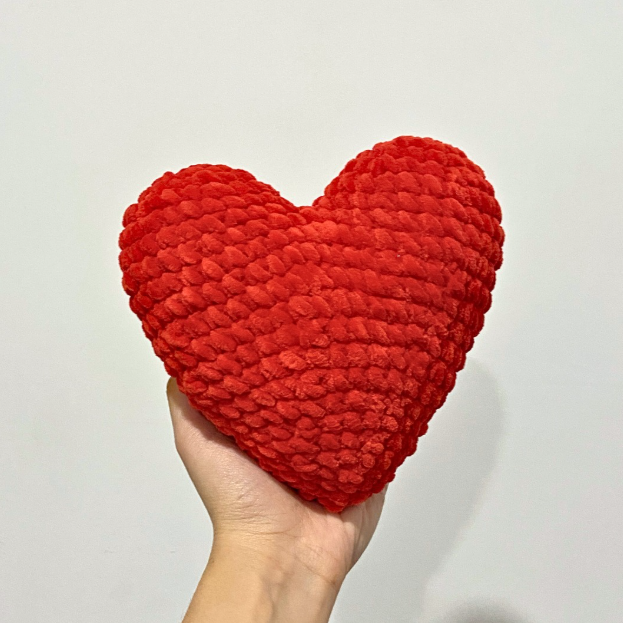
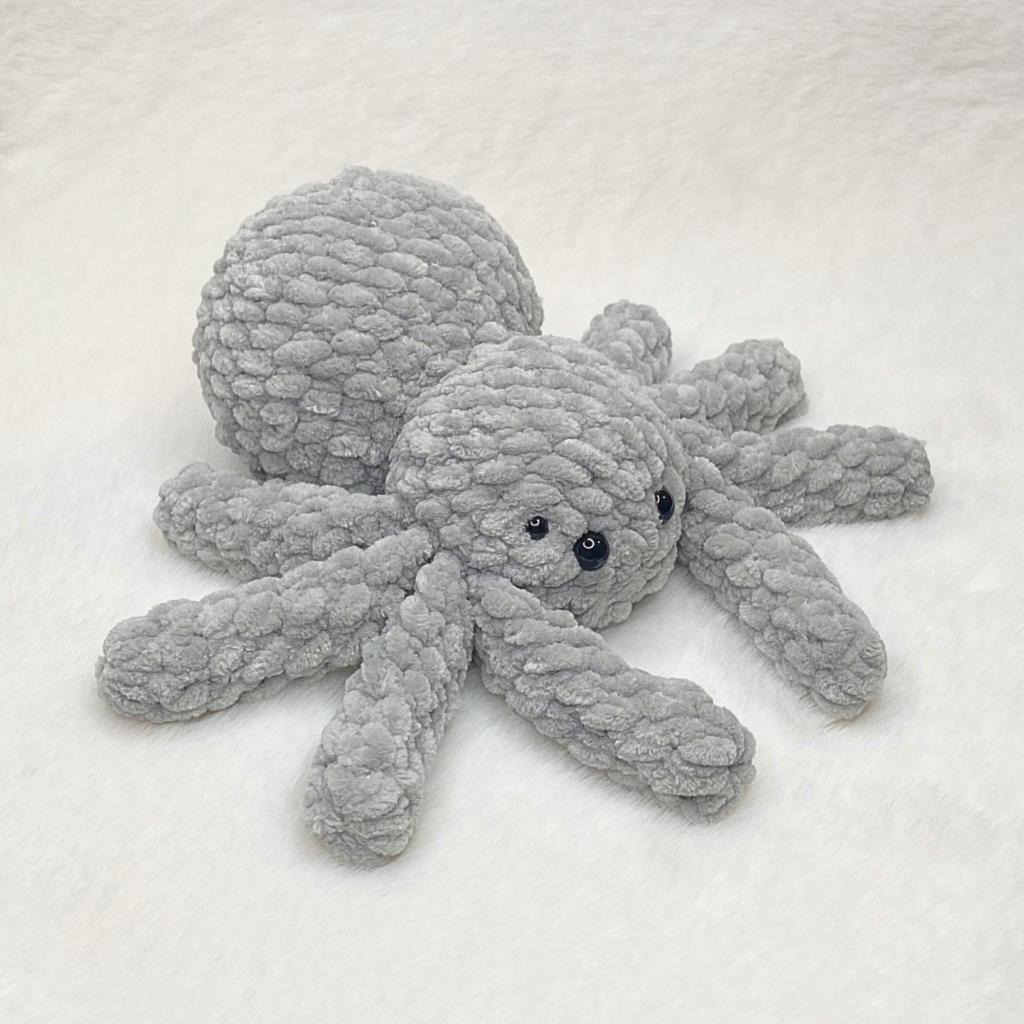
Take a look on these amigurumi patterns so you can practise the magic ring:
Step-by-Step Instructions: How to Crochet a Magic Ring (MR)
Here is the exact breakdown to get it right every time:
Step 1: Position and Form the “X”
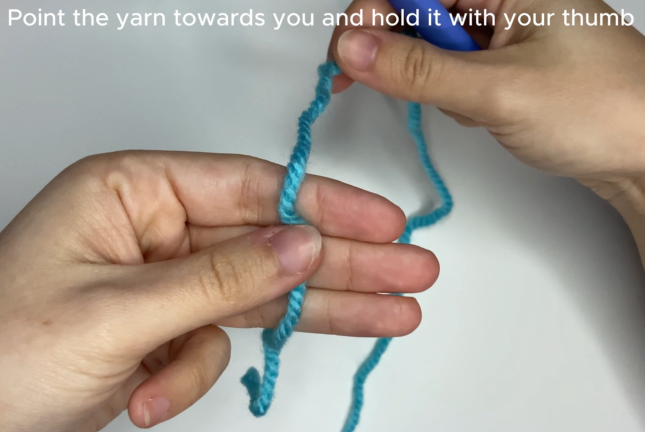
- Place the yarn end in your hand, pointing it toward you, and hold it securely with your thumb.
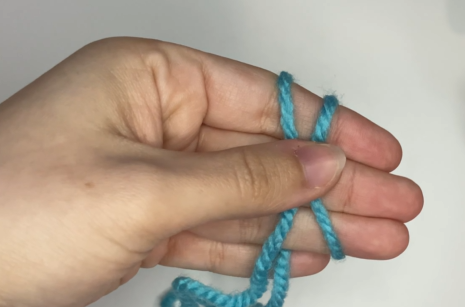
- Wrap the working yarn around your fingers to form an “X” shape on top, and hold it down with your thumb again.
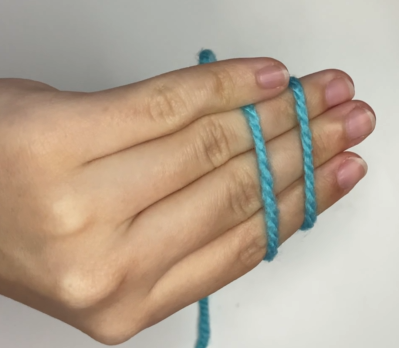
- Keep the yarn secured behind your fingers with your index finger.
Step 2: Create the Loop
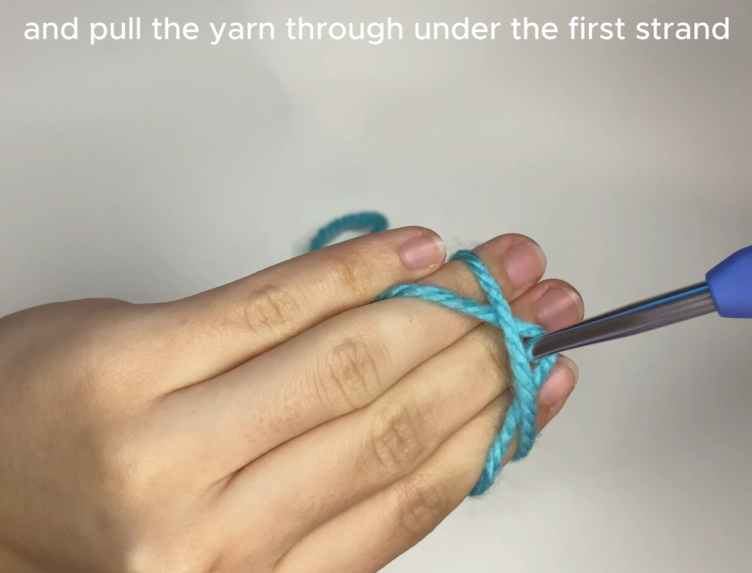
- Pass your crochet hook under the first strand of yarn, go over the second, and pull the yarn through.
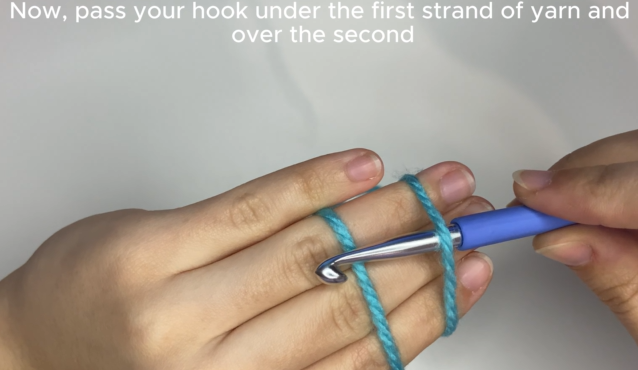
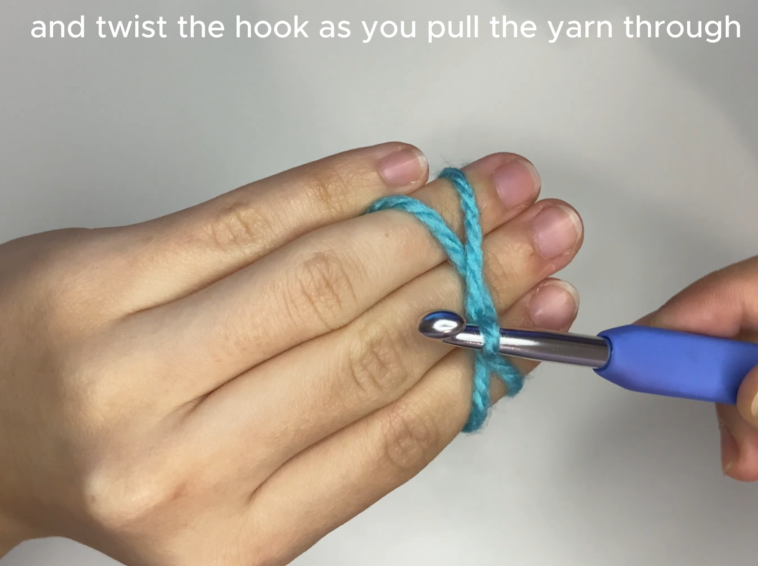
- Twist your hook as you pull the yarn through to lock the loop.
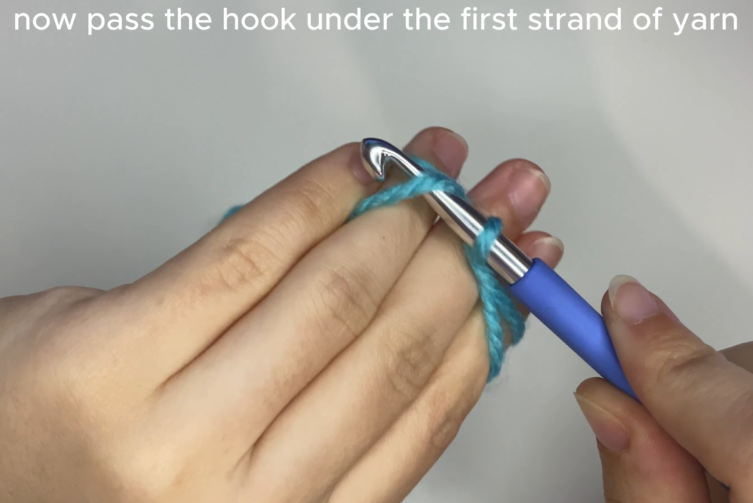
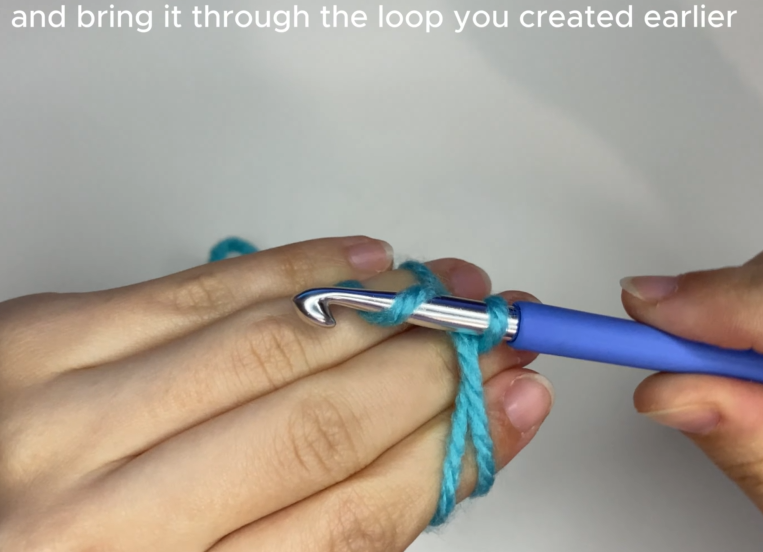
- Bring the hook under the first strand again and pull it through the newly created loop. You will now have a neat, adjustable circle of yarn.
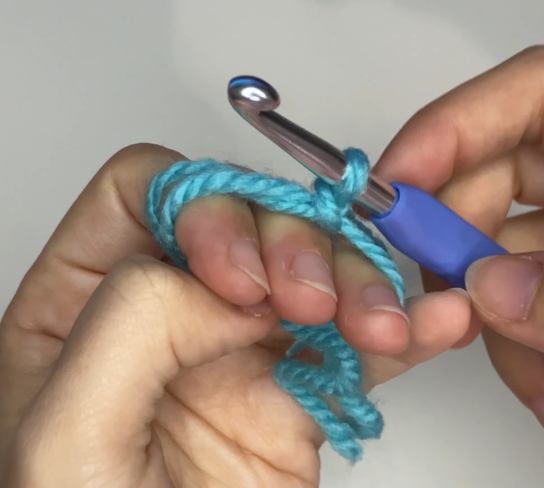
Step 3: Work Your Stitches
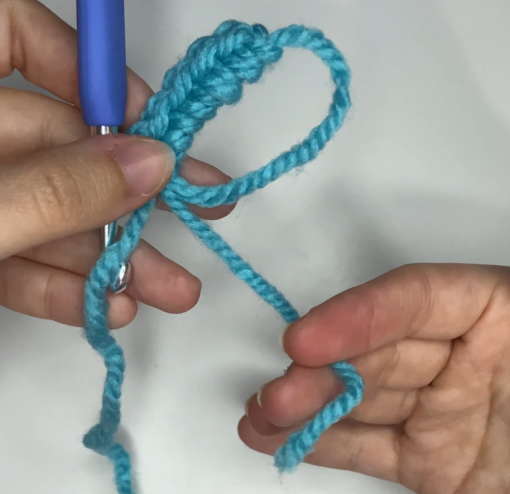
- Hold the loop steady between your fingers on both hands.
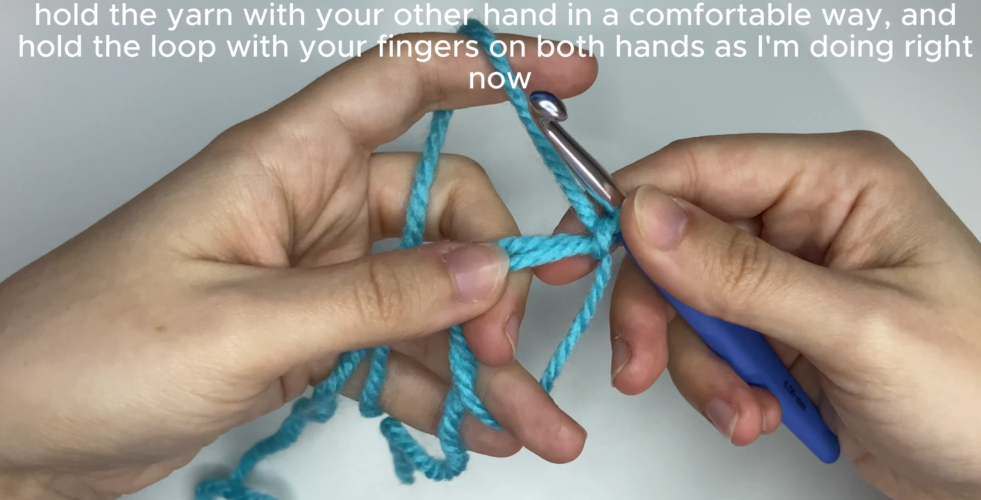
- Insert your hook directly into the center of the circle, yarn over, and pull a loop through.
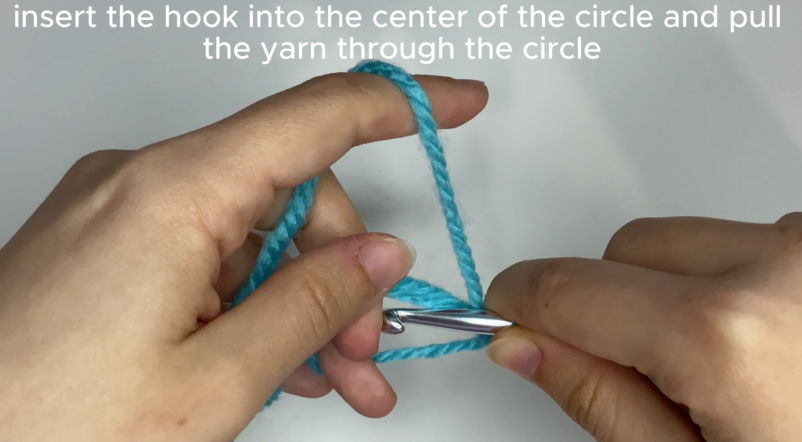
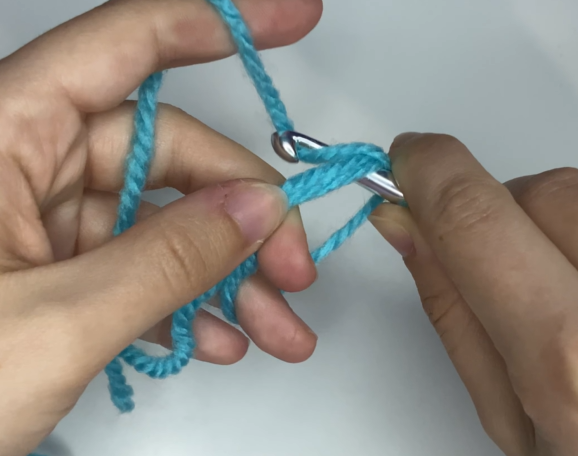
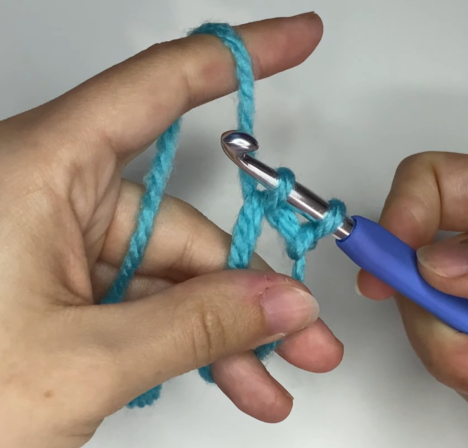
- Complete your first single crochet stitch by yarning over and pulling through both loops on your hook.
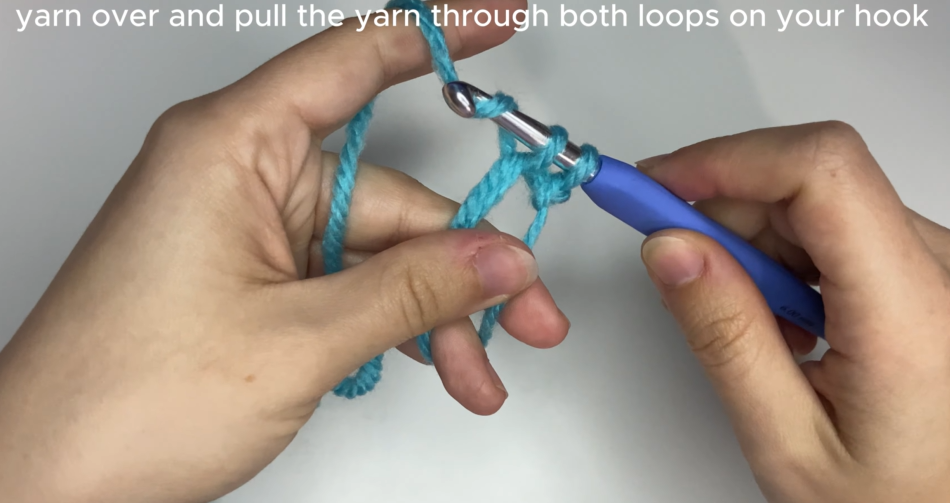
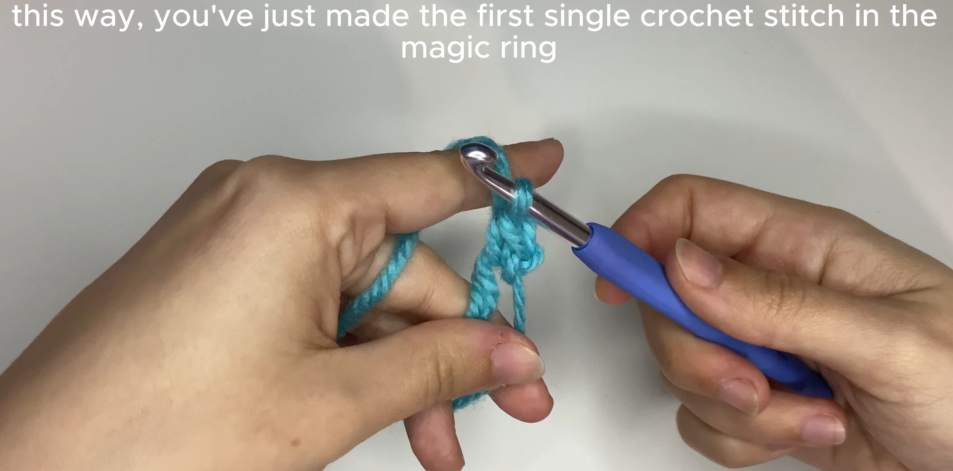
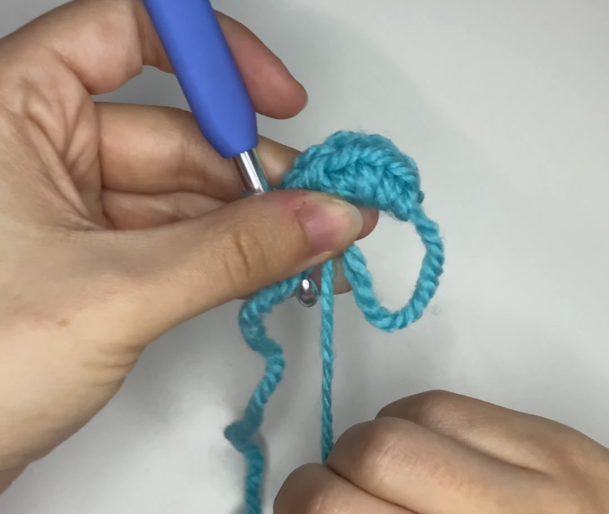
- Continue working single crochet stitches into the circle until you reach the number required by your pattern (for example, 5 or 6 stitches).
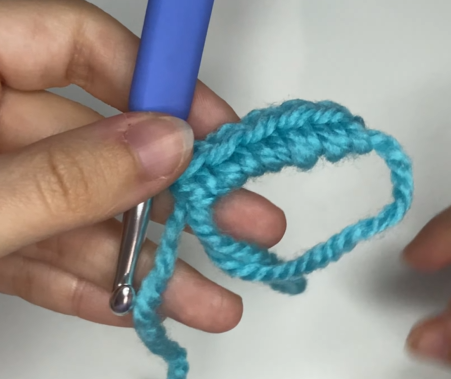
Step 4: The Magic Pull (How to Close It)
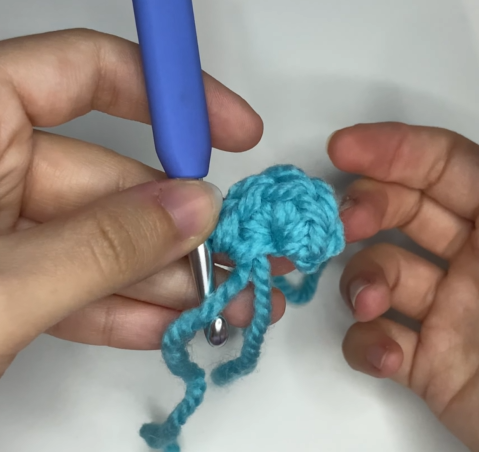
- Push the tail end slightly out of the circle.
- Hold your stitches with one hand and gently pull the loose tail end with your other hand to close the ring tightly.
Frequently Asked Questions About The Magic Ring
If your ring gets stuck, you likely missed stitching over the yarn tail during Round 1, or the tail wrapped around the working yarn. Make sure your hook goes under both strands for every single crochet worked into the ring.
Yes! You can substitute a magic ring by chaining 2 and working your first round of single crochets into the second chain from your hook, or by chaining 3, joining with a slip stitch to form a ring, and working into that ring.
After pulling the ring closed, use a tapestry needle to weave the yarn tail in several directions through the back of the stitches in Round 1. Splitting the yarn fibers with your needle creates a friction lock that keeps the ring secure forever.
Practise Tips and Master Sequence for Amigurumi Success
If you are new to working in the round, do not be discouraged if your first couple of attempts feel awkward or turn out loose. Creating a clean magic ring relies heavily on muscle memory and getting used to maintaining light tension on the short tail while wrapping your working yarn. A great way to practice without wasting plush material is to spend ten minutes working five consecutive magic rings using standard smooth cotton yarn. Once your hands get comfortable with the motion and loop placement, transitioning to chenille, velvet, or bulky yarn will feel significantly smoother, allowing you to kick off any amigurumi project with speed and confidence.
Ready to Practice? Explore our crochet patterns
Now that you’ve mastered the magic ring, it’s time to put your skills to practice! Check out my collection of beginner-friendly, cute digital amigurumi crochet patterns in my online store and start your next plushie project today.