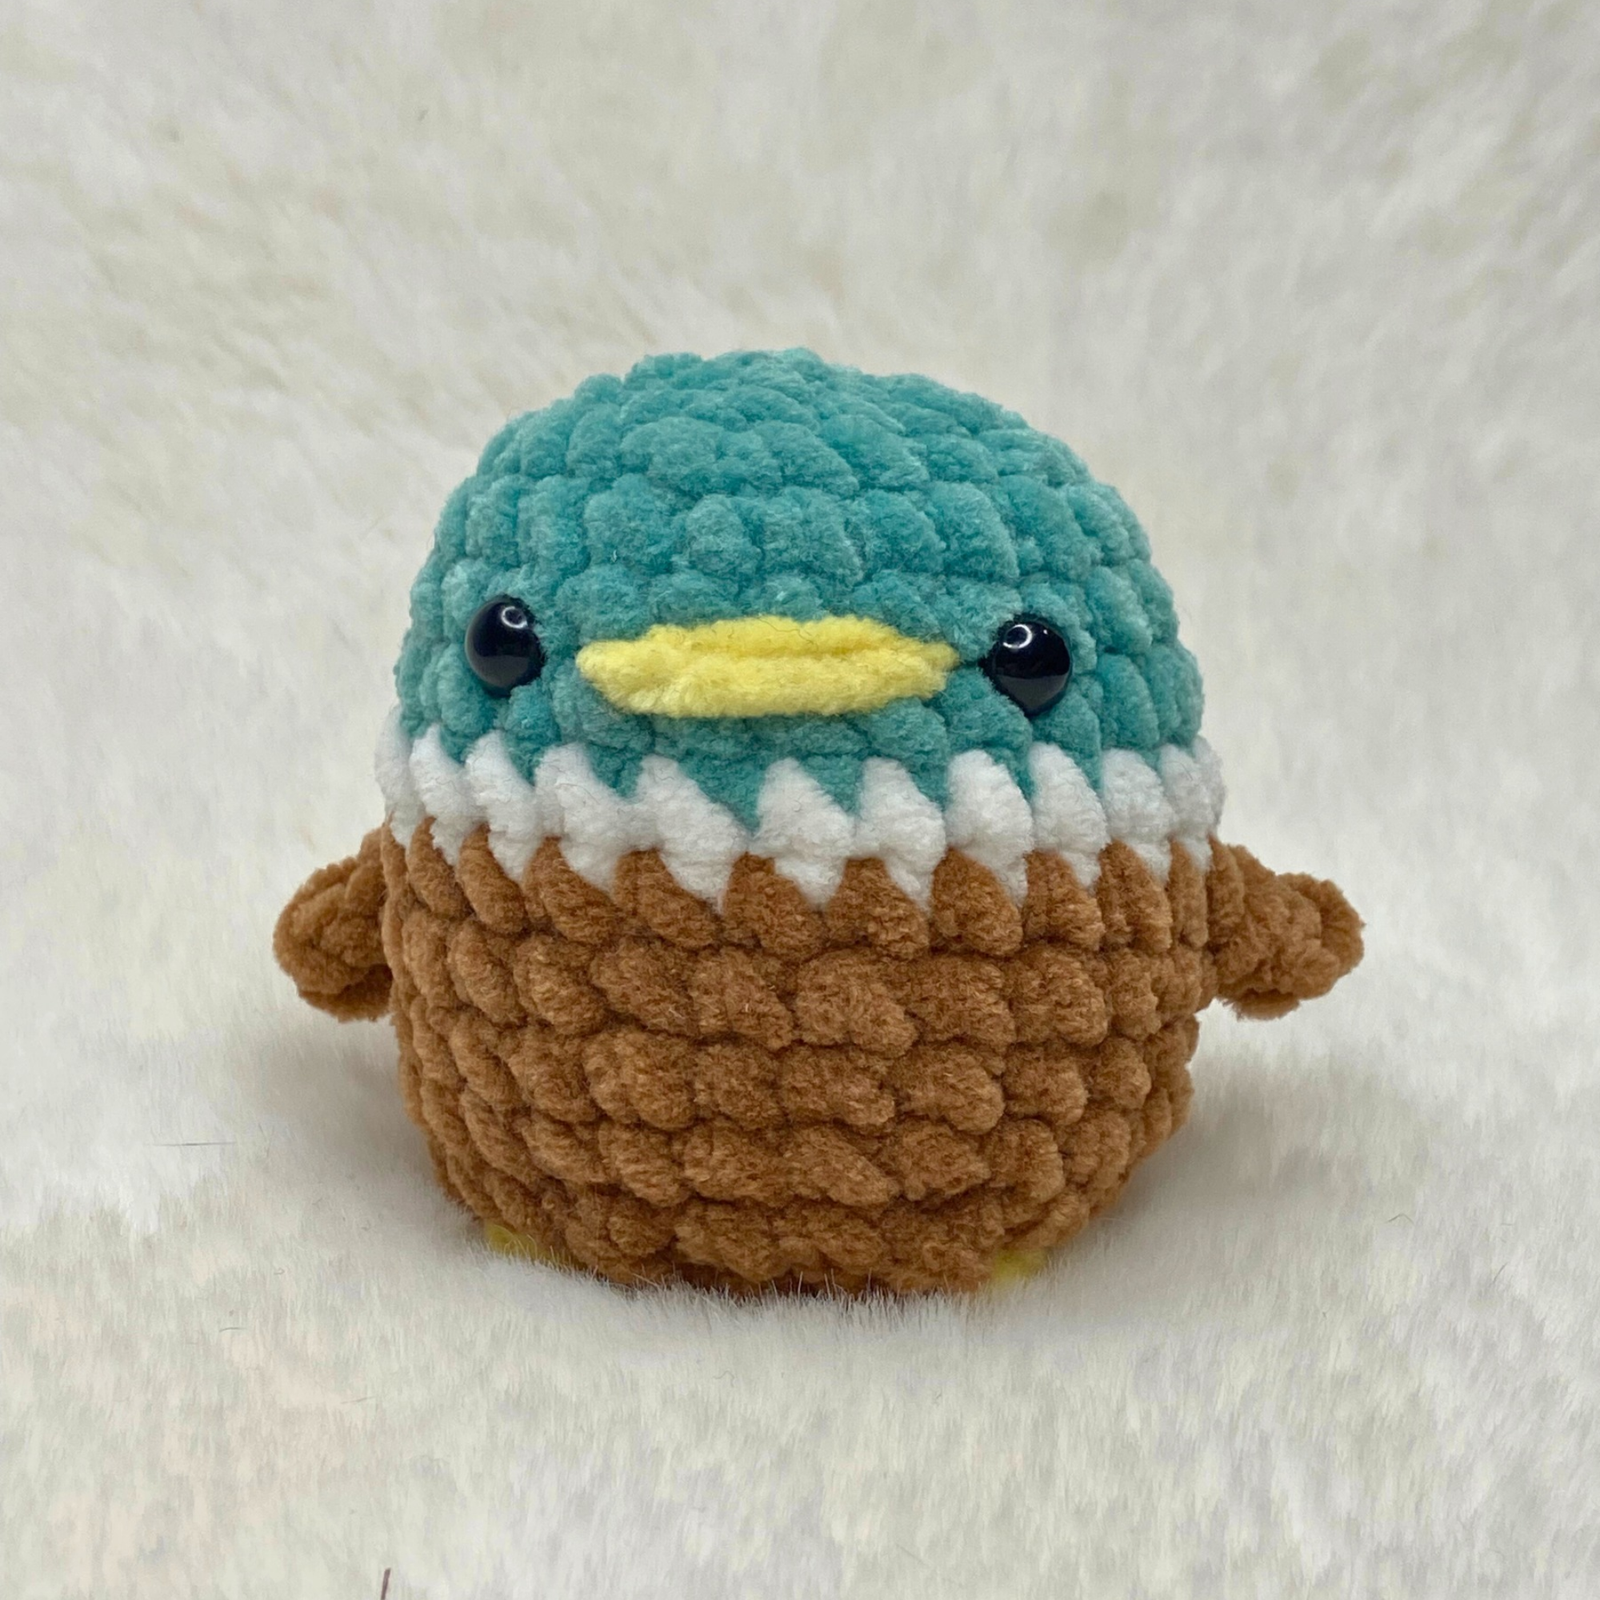
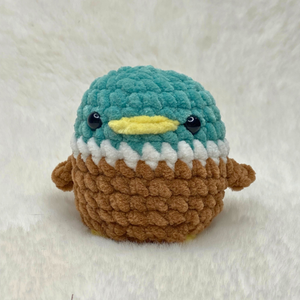
Welcome to another adorable free amigurumi tutorial! If you love quick, low-sew or completely no-sew crochet projects, you are going to fall in love with this chubby little Crochet Mallard Duck Plushie.
Keep scrolling for the free pattern or purchase the ad-free printable PDF pattern on Etsy (50% off)
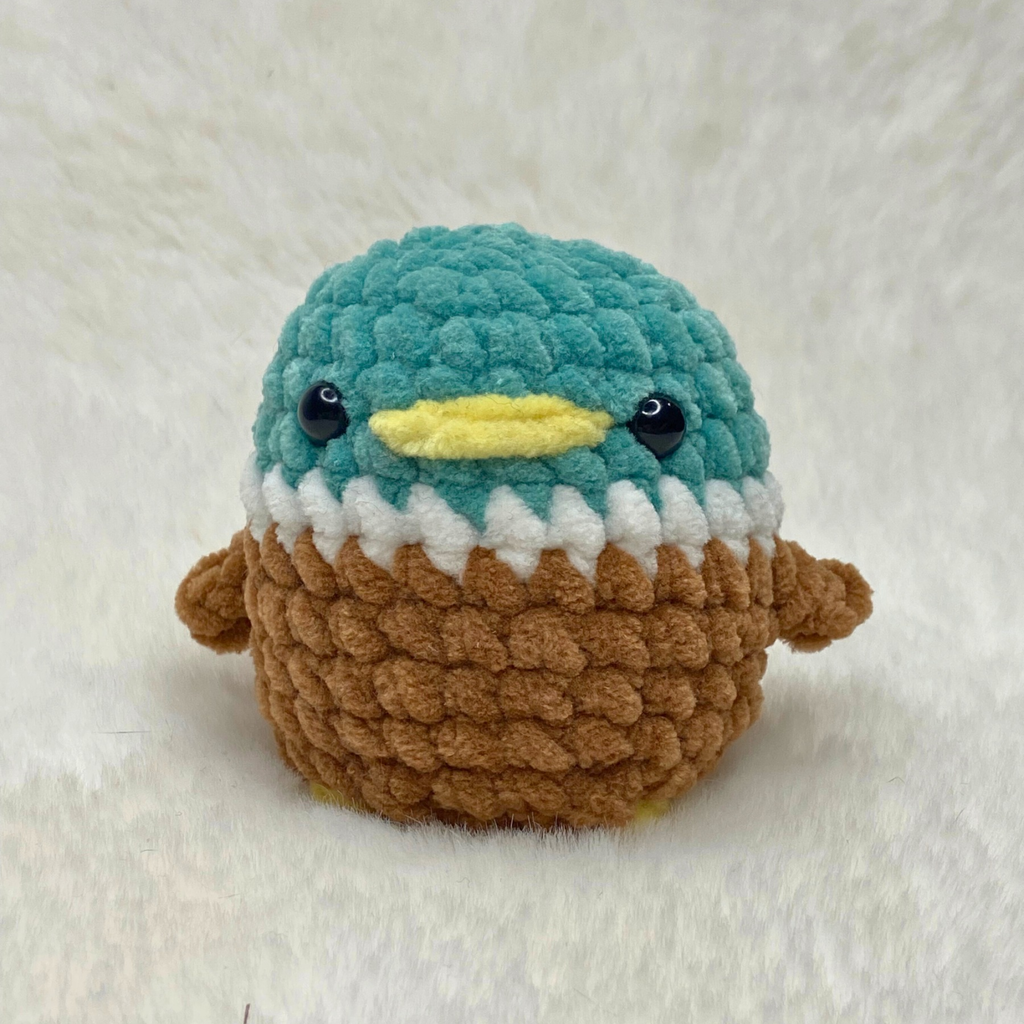
There is nothing quite as satisfying as finishing a plushie in under an hour without having to pull out your sewing needle to attach arms, legs, or tails. This pattern is worked in one continuous piece, utilizing textured stitches like bobbles for the feet and an clever color-changing method to create a realistic duck body complete with a emerald head, a crisp white collar ring, and a cozy brown body.
Whether you are crafting for an upcoming market bake-sale, making quick inventory for your Etsy shop, or looking for a relaxing weekend project, this free no-sew duck crochet pattern is beginner-friendly, fast, and undeniably cute.
Why You Will Love This No-Sew Duck Amigurumi Pattern
- 100% No-Sew Body Construction: The head, neck ring, body, and feet are all worked continuously in one piece. The only embroidery required is a quick 2-minute beak detail embroidered using a tapestry needle!
- Quick & Low Yarn Consumption: Requiring small amounts of three main colors, this pattern is an ideal scrap-buster for leftover chenille or velvet yarns.
- Market Prep Winner: Thanks to its high speed and minimal assembly, you can easily make 4 to 6 of these ducks in a single evening, making it a profitable plushie for craft fairs.
- Beginner Friendly: Made primarily with fundamental single crochet stitches, simple increases, and basic decreases, supplemented by step-by-step guidance for bobble stitch feet.
Customizing Your Duck: Color Variations & Sizing Guide
One of the best features of this no-sew amigurumi pattern is its incredible versatility! While the classic green, white, and brown palette creates a traditional Mallard duckling, you can easily tweak the yarn colors and hook sizes to create a whole flock of unique duckies for your craft markets or online shop.
Creative Color Combinations to Try
- Classic Yellow Rubber Ducky: Replace the green, white, and brown sections completely with bright canary yellow yarn for the entire head and body. Keep the beak and bobble feet in a soft orange or coral yarn. This option is a massive bestseller for baby showers and nursery decor!
- Pastel Spring Ducklings: Swap the natural tones for soft pastel shades like mint green, lilac lavender, or pastel pink for the head and body. Pastel plushies perform exceptionally well on Pinterest and TikTok during spring and Easter seasons.
- White Pekin Farm Duck: Use crisp white plush yarn for the main head and body, skipping the white collar color change altogether. Pair it with a vibrant mustard orange beak and feet for a farmyard classic look.
- Cozy Autumn/Fall Duck: Experiment with rich rust orange, mustard yellow, and deep forest green yarn to create cozy fall-themed ducks that align perfectly with autumn market displays.
How Yarn Weight Affects Your Finished Size
This pattern is originally written using super bulky (#6) chenille yarn paired with a 4.5 mm crochet hook, which yields a cozy, squishy plushie measuring approximately 3.5 to 4 inches (8 to 10 cm) in height. However, one of the best things about amigurumi design is that you can scale this finished size up or down effortlessly just by altering your yarn weight and hook size, without changing a single stitch in the instructions!
If you want to create a miniature keychain version or a tiny desk buddy, switch to a medium worsted weight (#4) cotton or acrylic yarn with a 3.0 mm to 3.5 mm crochet hook and 5 mm safety eyes. This produces a pocket-sized duckling about 2 inches (5 cm) tall. For a medium-sized plushie using chunky velvet or plush (#5) yarn, a 4.0 mm hook with 7 mm safety eyes will give you a neat 3-inch (7.5 cm) result.
On the other hand, if you want to craft a giant huggable plushie, opt for jumbo blanket yarn (#7) using an 8.0 mm or 9.0 mm hook with large 12 mm to 14 mm safety eyes. This effortlessly expands your duck to an impressive 7 to 8 inches (18 cm) tall using the exact same pattern! As a general rule for amigurumi, always choose a hook size that is 1.0 mm to 1.5 mm smaller than what the yarn label recommends. Working with a smaller hook creates tight, dense stitches that prevent the polyester fiberfill stuffing from showing through your stitches.
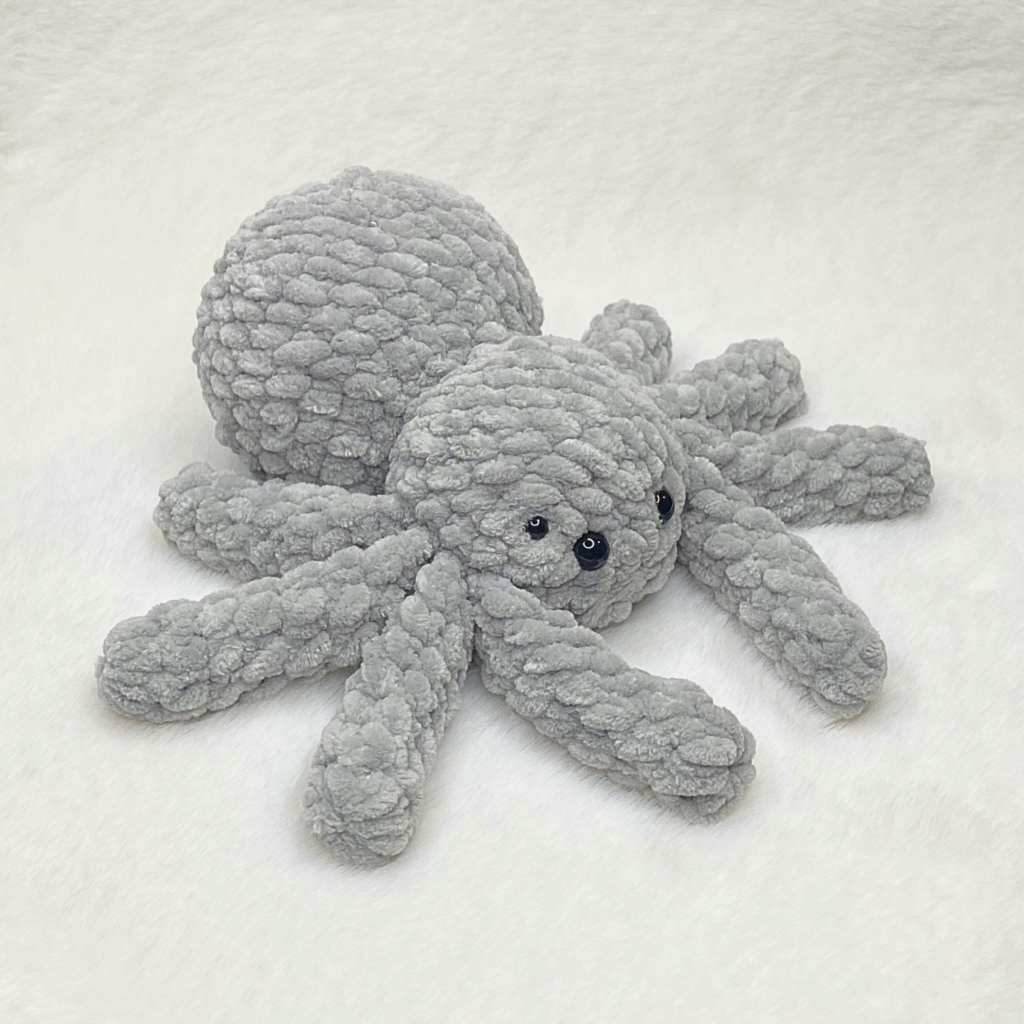
More Patterns
If you’re looking for more patterns, take a look:
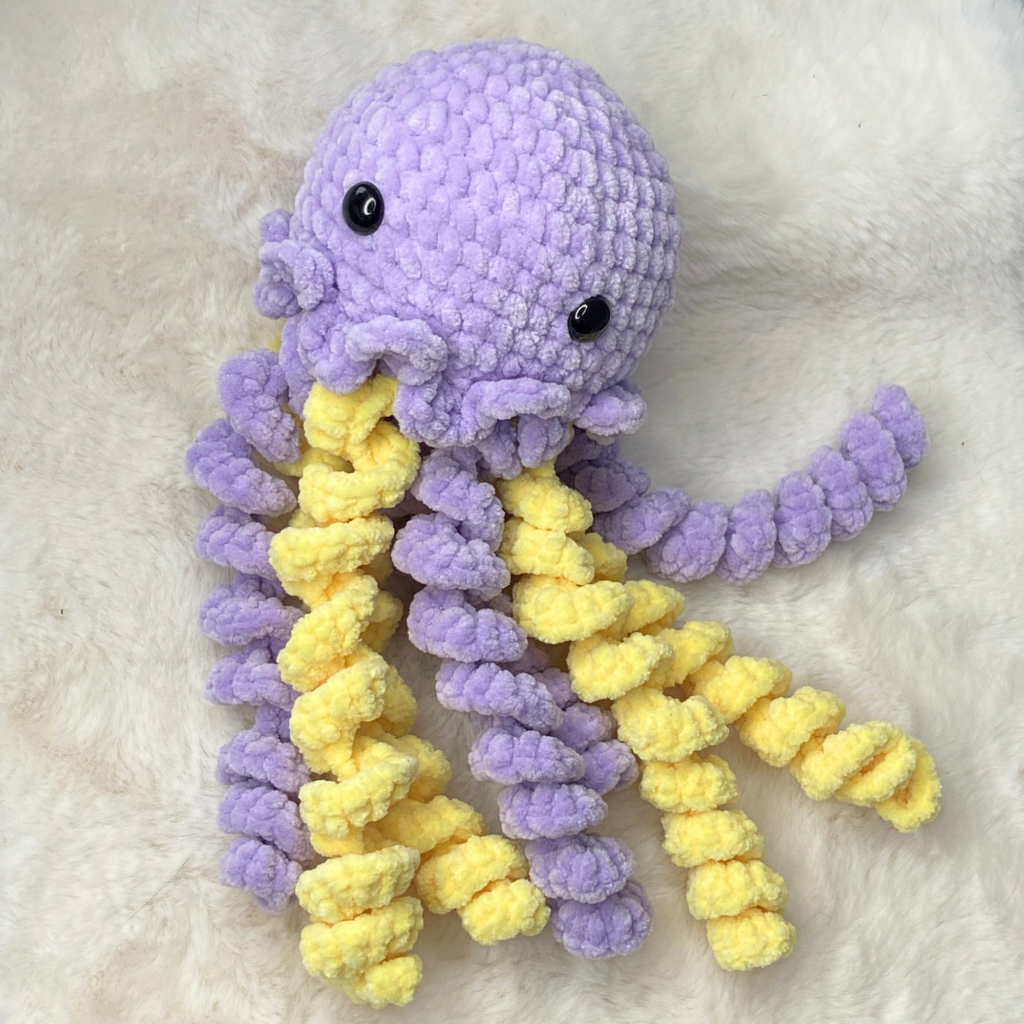
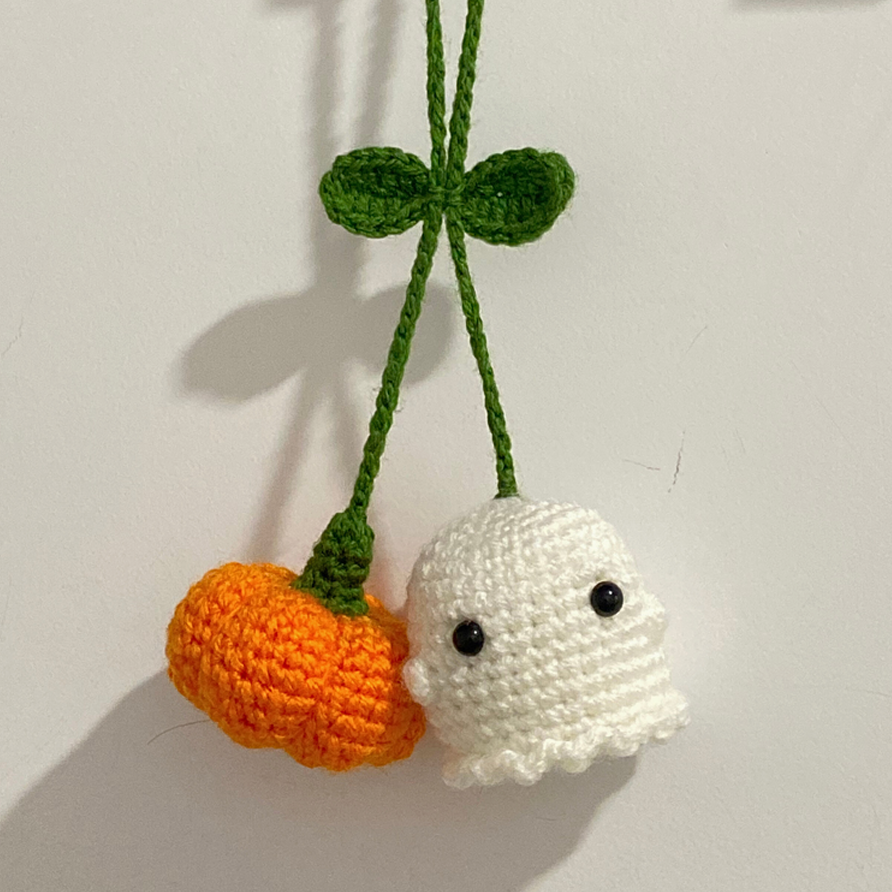
Materials & Tools Needed
To create this plush duck with the exact velvety, squishy texture shown in the tutorial, super bulky plush yarn is highly recommended. However, you can substitute worsted weight cotton or acrylic yarn with an appropriately sized hook for a miniature keychain version!
- Yarn Requirements (Super Bulky / Chenille):
- Green Yarn: For the duck head (e.g., Hobbii Baby Snuggle or plush chenille equivalent).
- White Yarn: A small amount for the thin collar ring detail.
- Brown Yarn: For the main body section.
- Yellow Yarn: Small amount for the bobble feet and embroidered beak.
- Crochet Hook: 4.5 mm crochet hook (or recommended size for your yarn weight).
- Safety Eyes: 1 pair of 7 mm black safety eyes (adjust size if using lighter or heavier yarn).
- Polyester Fiberfill: Stuffing for plushies.
- Stitch Markers: Essential for keeping track of continuous spiral rounds.
- Yarn Needle: Blunt tapestry needle with a large eye.
- Scissors: Sharp craft scissors.
Crochet Abbreviations & Pattern Notes
This pattern is written in US Crochet Terms. It is worked in continuous spiral rounds without joining at the end of each round unless explicitly stated.
- MR: Magic Ring
- St/Sts: Stitch/es
- Sc: Single Crochet
- Inc: Single Crochet Increase (2 single crochet stitches in the same stitch)
- Dec: Single Crochet Decrease (invisible decrease recommended)
- BO: Bobble Stitch (see stitch guide below)
- Ch: Chain stitch
- CC: Color Change
- FLO: Front Loops Only
- R: Round
Special Stitch Technique: The Bobble Stitch Foot (BO)
The feet of this little duck are created during Round 14 using the Bobble Stitch (BO) in yellow yarn.
- Yarn over with yellow yarn and insert your hook into the designated stitch.
- Yarn over and pull up a loop (3 loops on hook).
- Yarn over and pull through the first 2 loops on your hook (2 loops remaining).
- Repeat this process in the same stitch until you have 5 loops on your hook.
- Color Change Transition: Before closing the bobble stitch, drop the yellow yarn and grab the brown yarn. Yarn over with brown and pull through all 5 loops on your hook to complete the yellow bobble stitch and smoothly transition back to brown!
Pro Tip for Color Changes: Always knot your yarn tails inside the plushie every time you make a color transition to ensure the tension stays secure and threads don’t pull through when stuffed.
Subscribe for a free PDF pattern!
Get the Ad-Free Printable PDF Pattern!
Prefer to download or print this pattern? You can now download the ad-free, printable PDF version of this pattern directly on Etsy! Instant download are available on Etsy right after purchase.
Shop the Crochet Duck PDF Pattern on EtsyFree No Sew Duck Crochet Pattern
Duck Head & Body (Worked in one piece)
Start using Green Yarn.
- Round 1: Work 6 sc into a Magic Ring [6].
- Round 2: Work 6 increases [12].
- Round 3: (1 sc, 1 inc) x 6 [18].
- Round 4: (2 sc, 1 inc) x 6 [24].
- Rounds 5–7: Sc in all 24 stitches [24] (3 rounds total of 24 sc).
- Note: On the 24th stitch of Round 7, execute a Color Change (CC) to White yarn on the final yarn-over.
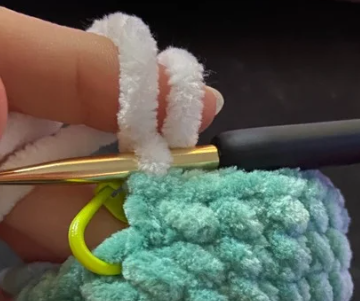
Switch to White Yarn.
- Round 8: Sc in all 24 stitches in white yarn [24].
- Note: On the 24th stitch of Round 8, execute a Color Change (CC) to Brown yarn on the final yarn-over.
Placing the Safety Eyes: Insert 7 mm safety eyes between Rounds 6 and 7, placed approximately 6 stitches apart on the front of the green head section.
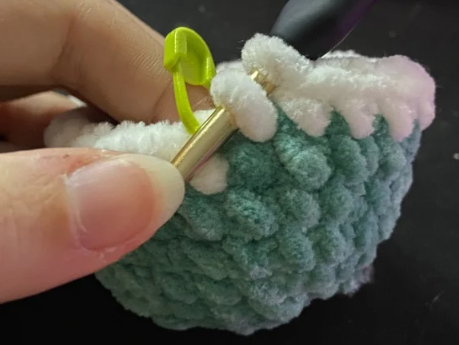
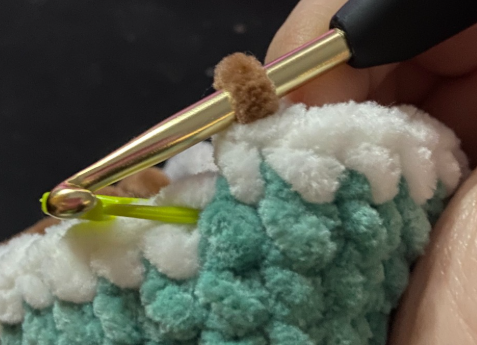
Switch to Brown Yarn.
- Round 9 (Creating the Wings): 6 sc, ch 2, work 1 inc in the first chain from the hook, continue back onto the main round with 12 sc, ch 2, work 1 inc in the first chain from the hook, 6 sc in the main round [24].
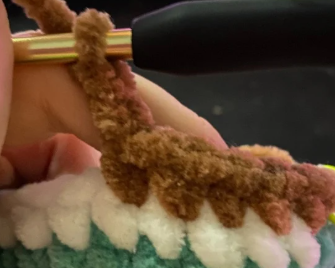
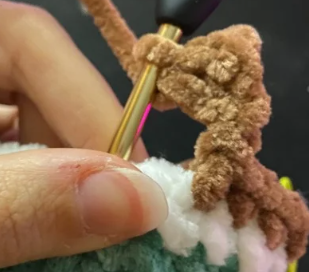
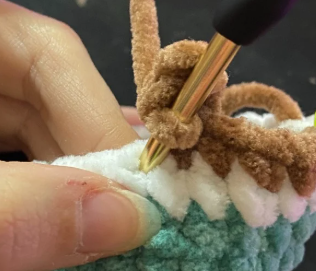
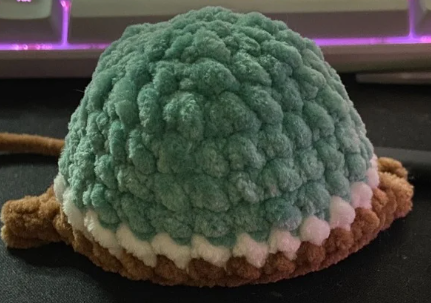
- Rounds 10–12: Sc in all 24 stitches [24] (3 rounds total).
- Round 13: (2 sc, 1 dec) x 6 [18].
- Round 14 (Creating the Feet): 1 sc, 1 dec, 1 sc, 1 dec, CC to Yellow yarn in the previous stitch, 1 BO (leave 5 loops on hook and CC back to Brown yarn to close the bobble), 1 dec, 1 sc, 1 dec, CC to Yellow yarn in the previous stitch, 1 BO (leave 5 loops on hook and CC back to Brown yarn to close the bobble), 1 dec, 1 sc, 1 dec [12].
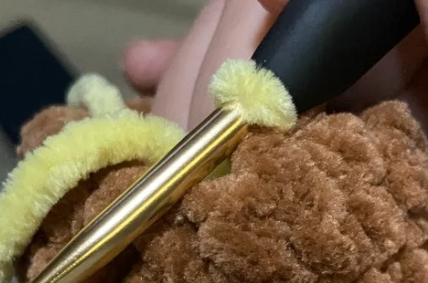
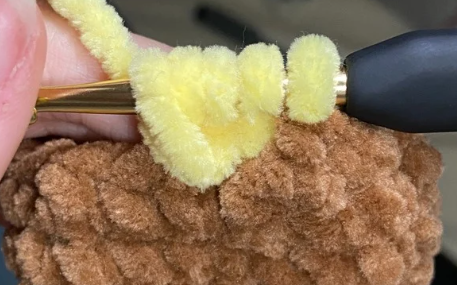
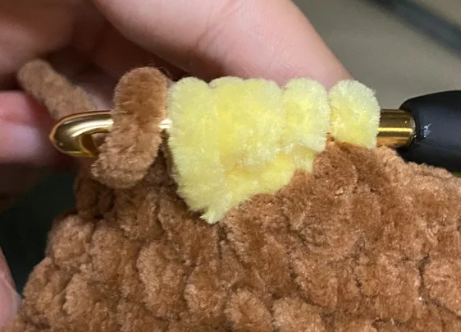
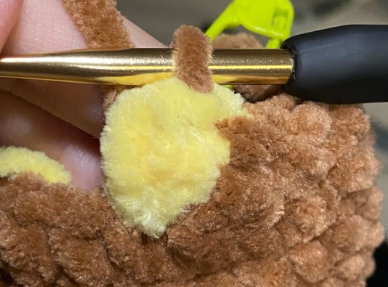
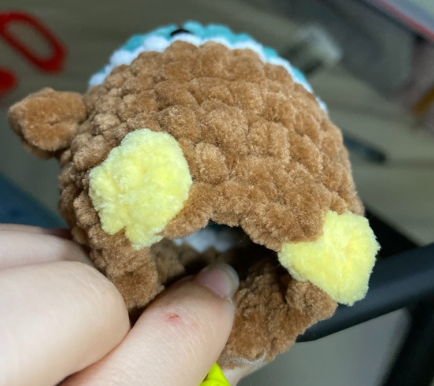
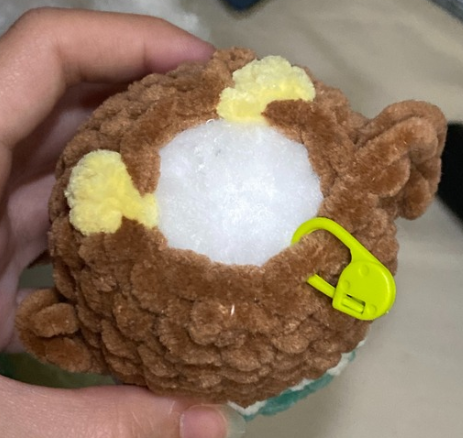
Stuffing the Body: Firmly stuff the head and body with polyester fiberfill stuffing. Make sure the head shape is nice and round, but do not overstuff the bottom so the duck can sit flat on its bobble feet.
- Round 15: Work 6 decreases [6].
Fasten off leaving a tail. Using a tapestry needle, weave the yarn tail through the Front Loops Only (FLO) of the remaining 6 stitches. Pull firmly to cinch the hole tight, secure with a knot, hide the end inside the plushie, and cut excess yarn.
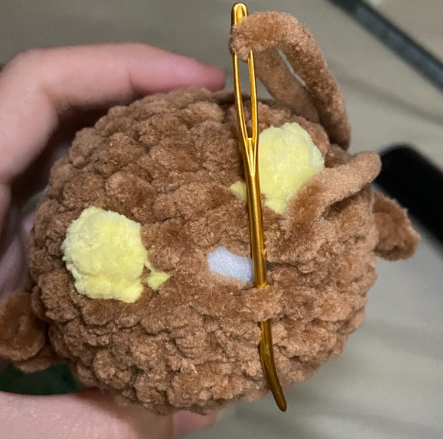
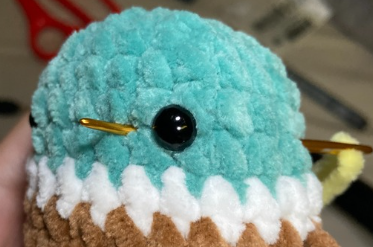
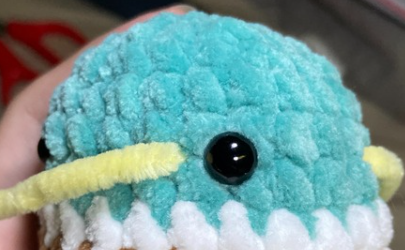
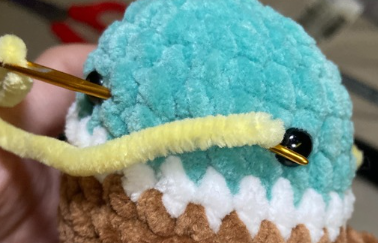
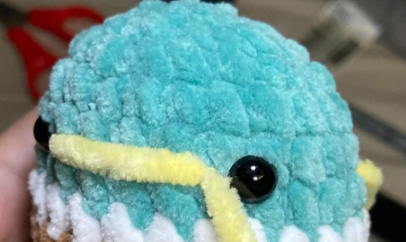
Embroidering the Beak Detail
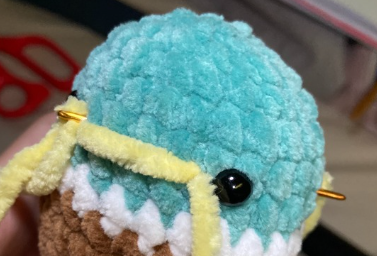
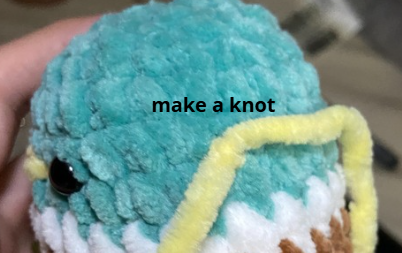
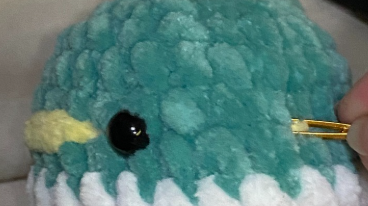
Now we will embroider the beak using Yellow Yarn. Follow these steps for a clean, sharp look:
- Thread a tapestry needle with a strand of yellow chenille or cotton yarn.
- Insert Needle: Enter through the back of the duck’s head and exit at the stitch directly adjacent to the left edge of the right safety eye.
- Form the Beak Line: Insert the needle into the stitch adjacent to the right edge of the left safety eye, then exit back through the exact same hole at the back of the head where you originally entered.
- Finish: Tie a firm knot with the two yarn tails at the back, pull slightly so the knot pops inside the head structure to hide it, and trim any remaining yarn.
Assembly & Finishing Touches
Congratulations! Your No-Sew Crochet Duck is completely finished! Give your duck a gentle squeeze to shape it into a perfectly round, squishy plushie.
Expert Tips for Perfect Chenille Plushies
- Avoiding Gaps When Working No-Sew Wings: When making the chain extensions for the wings in Round 9, keep your tension slightly snug. This prevents small gaps from forming where the wing reconnects to the main body stitches.
- Invisible Decrease Magic: Always use the invisible decrease method (working only in the front loops of the two stitches being decreased). This keeps the brown body smooth and prevents fiberfill stuffing from poking through the holes.
- Securing Safety Eyes on Plush Yarn: Because chenille yarn stretches easily, consider placing a small piece of felt on the inside of the head behind the safety eye washer for extra security if making this plushie for young children.
Frequently Asked Questions (FAQ)
Can I make this pattern with regular acrylic or cotton yarn?
Yes! You can use medium worsted weight (#4) yarn with a 3.0 mm or 3.5 mm crochet hook. The resulting duck will be smaller (keychain size), but the proportions will remain identical.
How do I prevent chenille yarn from snapping when pulling the magic ring?
Chenille yarn can break easily if pulled too hard. A great trick is to create your Magic Ring using 2 chain stitches instead: chain 2, then work 6 single crochets into the 1st chain stitch. Alternatively, start the Magic Ring using a matching color in smooth worsted cotton yarn, then switch to chenille on Round 2.
Is this crochet pattern suitable for beginners?
Absolute beginners who know how to single crochet, increase, decrease, and change colors will find this project simple and rewarding. The step-by-step photos provided for the wing extensions, bobble feet, and beak embroidery make it stress-free!
Can I sell the finished duck plush?
Yes, you can sell the finished plushie in small quantities, but use your own photos on your listing. It isn’t allowed to resell my digital pattern itself, nor photos or the written instructions.
And that’s it!
I hope you enjoyed crocheting this free duck crochet pattern just as much as I loved designing it. If you decide to make one, I would love to see how it turns out—don’t forget to tag me on Instagram (@crochetbysilvia) so I can admire your cute amigurumi!
Don’t doubt to check our other free crochet patterns.
—Happy crocheting!
This pattern is for personal use only. You may not copy, reproduce, alter, publish, or distribute this pattern in any format (including video tutorials). If you wish to share this pattern, please share a link to it rather than reprinting it on your site or blog.
You are welcome to sell finished items made from this pattern in small quantities, but do NOT use my photos as your listing or promotional photos.
Want to make more cute ocean friends? Check out my free squid crochet pattern or my free jellyfish crochet pattern!