
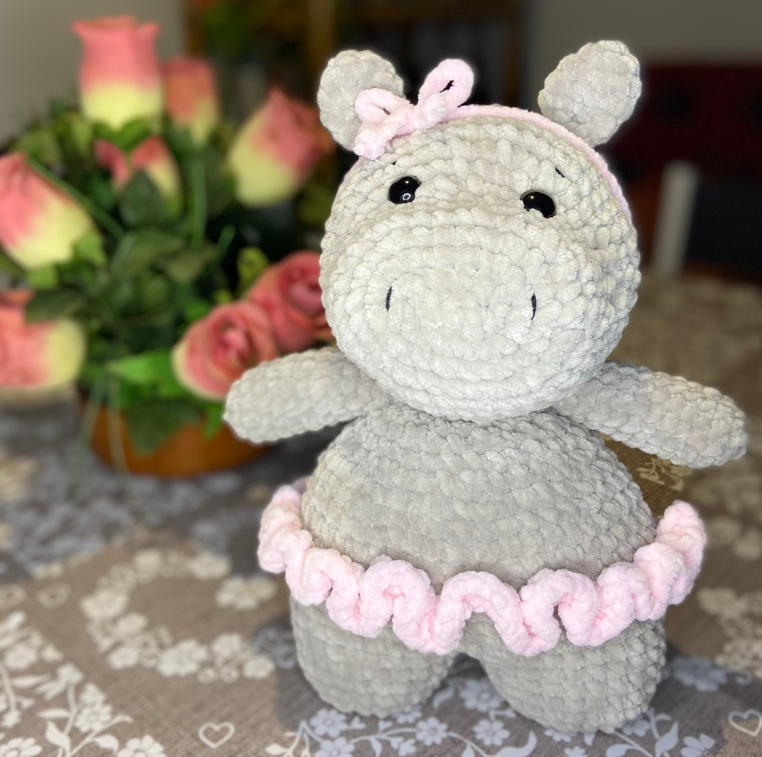
Looking for a adorable, squishy, and beginner-friendly animal project? This free plush hippo crochet pattern is an absolute delight to craft! Featuring a sweet rounded snout, tiny side ears, a chubby body, and cute little legs, this soft hippo plushie is one of the most heartwarming designs to add to your amigurumi collection. Whether you are prepping inventory for local craft markets, making a charming nursery room decoration, or crafting a cozy gift for a toddler, this tutorial comes together smoothly.
Hippo amigurumi plushies have become a timeless favorite among crafters and handmade enthusiasts. Working with plush chenille or velvet yarn gives the hippo an irresistibly soft texture and a cuddly, store-bought finish. In this step-by-step walkthrough, you will find a full breakdown of materials, yarn substitution options, techniques for shaping a broad snout, and clear row-by-row instructions to craft your very own hippopotamus.
Why You Should Crochet a Plush Hippo Today
Safari and zoo animals are constant bestsellers in the handmade plushie community. Here is why adding this cute hippo to your project queue is a great choice:
- High-Demand Market Item: Cute chubby animals are proven head-turners at craft fairs, baby showers, and online handmade shops.
- Low-Sew Construction Focus: The body and head can be worked seamlessly or with minimal joining, making the assembly fast and stress-free.
- Fantastic Scrap Buster: Requiring modest amounts of grey, pastel purple, pink, or blue yarn, this pattern is ideal for using up leftover plush yarn skeins sitting in your stash.
- Great for Skill Building: Crafting a hippo allows you to master oval magic ring starts, wide-snout shaping, and attaching small symmetrical limbs securely.
Design and Technique Tips for Hippo Snout and Body Shaping
Creating a recognizable hippo relies heavily on getting the characteristic wide, flat snout attached seamlessly to the main head piece.
Mastering the Wide Oval Snout
Rather than starting with a standard circular magic ring, the hippo snout is often started by working around a foundation chain. This creates an oval shape that forms a broad muzzle. To ensure the snout sits flat against the face, maintain an even tension along both sides of the central chain and place your increases evenly at the curved ends.
Stuffing and Limb Symmetry
Stuff the snout firmly before sewing it onto the head so it maintains its prominent shape without collapsing. When attaching the four small legs to the bottom of the body, use stitch markers or sewing pins to align them evenly before stitching. This ensures your hippo sits upright on flat surfaces without wobbling.
Yarn Substitutions and Aesthetic Variations
Customize your plush hippo’s size and style easily by experimenting with different yarn weights:
- Worsted Weight Cotton Yarn: Using cotton yarn with a 2.5 mm or 3.0 mm hook creates a firm, compact hippo with sharp stitch definition that makes a durable toy or desk buddy.
- Super Bulky Plush or Chenille Yarn: Swapping to chenille yarn (like Katia Alabama or Hobbii Baby Snuggle) with a 3.5 mm or 4.0 mm hook yields an ultra-soft, squishy plushie that feels velvety to touch.
- Chic & Pastel Color Schemes: While classic slate grey or dusty lavender are traditional favorites, “pastel hippos” in soft blush pink, sky blue, or mint green create charming, whimsical nursery gifts.
More Patterns
If you’re looking for more, take a look on these patterns:

Materials Needed
- Yarn of preference: Chenille/blanket yarn (the designer used Baby Snuggle Solid from Hobbii). You will need two colors: main color for the hippo (grey) and accent color for the skirt and bow (pink).
- Detailed accents: Thinner black cotton yarn for the facial details (eyebrows and nose holes).
- Crochet hook: Size matching your yarn choice (a 4.5mm hook was used for the chunky chenille yarn).
- Safety eyes: 10mm safety eyes (adjust size depending on your yarn scale).
- Stuffing: Polyester fiberfill for plushies.
- Stitch markers
- Scissors
- Tapestry needle
Abbreviations (US Terminology)
- MR: Magic ring
- St: Stitch
- Ch: Chain
- Sl st: Slip stitch
- Sc: Single crochet
- Inc: Increase (2 sc in the same stitch)
- Dec: Decrease (sc 2 stitches together)
- Dc: Double crochet
- FO: Fasten off
Final Size
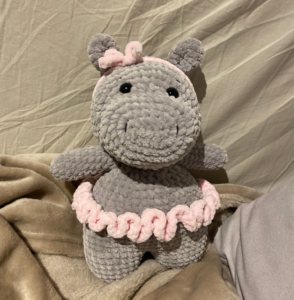
Final size: 29 cm x 20 cm (11.4 in x 7.9 in) using a 4.5 mm hook and the suggested yarn. Size may vary depending on your tension and materials.
Join the community & get a free pattern!
Free Hippopotamus Crochet Pattern
Crocheting the legs & body
We will start by making two legs. Once completed, we will join them directly to continue working the body in the round, meaning zero sewing is required between the legs and the body!
Legs (Make 2)
Round 1: 4 sc in a MR (4)
Round 2: x4 inc (8)
Round 3: x8 inc (16)
Round 4: (1 sc, 1 inc) x8 (24)
Rounds 5-7 (3 rounds): sc all around (24)
For Leg 1: Sl st, FO, and leave a short tail.
For Leg 2: Do not cut the yarn!
Bring both legs together and join them by working a slip stitch between the marked corresponding stitches of each leg.
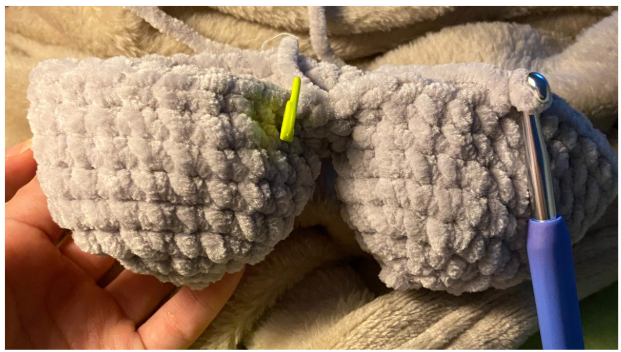
Continue crocheting around the outer perimeter of both legs to form the main body base:
Rounds 8-17 (10 rounds): sc all around (48 sc total: 24 from the first leg + 24 from the second leg) (48)
Round 18: (4 sc, 1 dec) x8 (40)
Round 19: sc all around (40)
Round 20: (3 sc, 1 dec) x8 (32)
Round 21: sc all around (32)
Round 22: (2 sc, 1 dec) x8 (24)
Round 23: sc all around (24)
Round 24: (1 sc, 1 dec) x8 (16)
Sl st, FO leaving a long tail for sewing later, and firmly stuff the body.
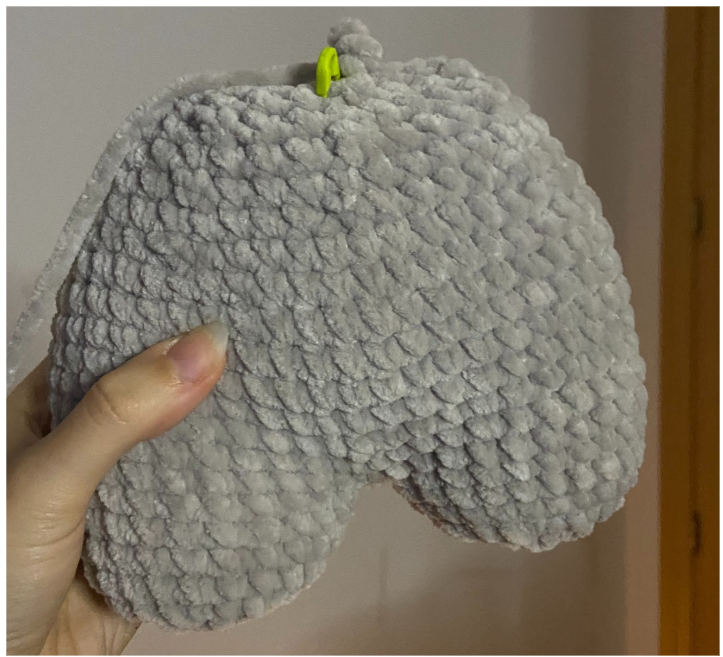
Crocheting the Head
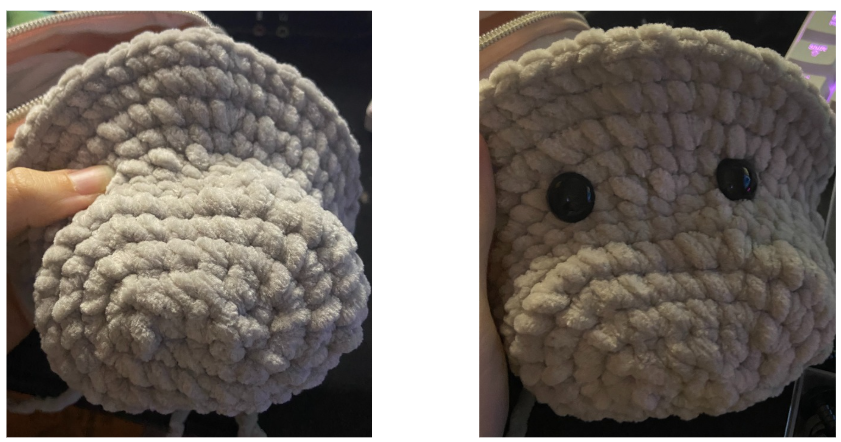
The head is worked starting from the snout foundation chain outward.
Start with a simple slip knot, then ch6.
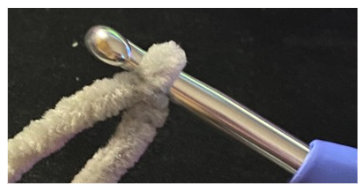
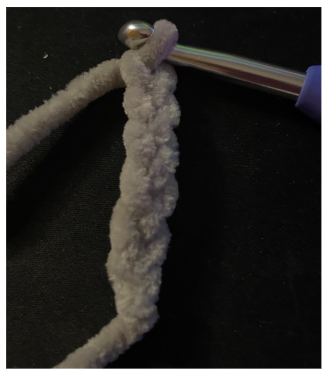
Round 1: Starting in the second chain from the hook, work 1 sc, place a stitch marker. Work 1 sc in each of the next 3 chains, then 4 sc into the very last chain. Working down the opposite side of the chain, work 3 sc, and finish with 3 sc into the same final chain. Sl st to the marked stitch. (14)
Round 2: (3 sc, 4 inc) x2 (22)
Round 3: [3 sc, (1 sc, 1 inc) x4] x2 (30)
Round 4: [3 sc, (2 sc, 1 inc) x4] x2 (38)
Rounds 5-6 (2 rounds): sc all around (38)
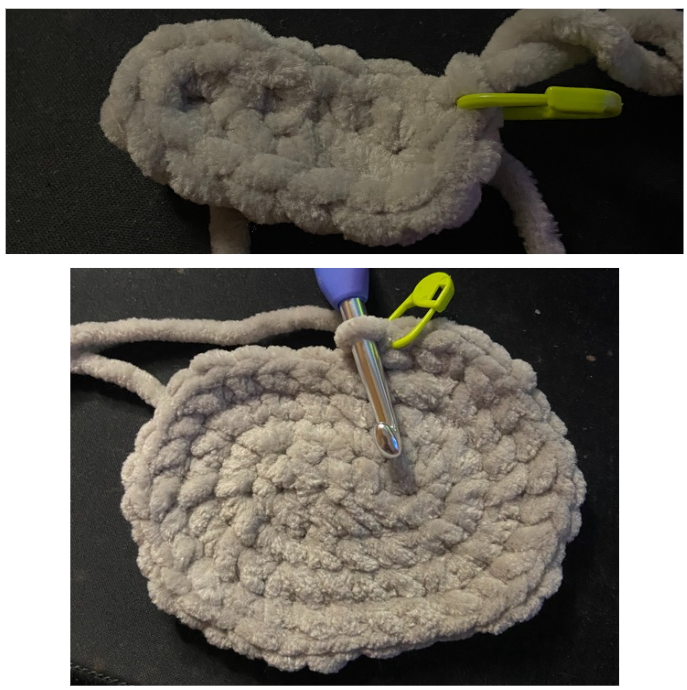
Round 7: 7 sc, 1 dec, 1 sc, 1 dec, 5 sc, 4 inc, 5 sc, 1 dec, 1 sc, 1 dec, 7 sc (38)
Round 8: sc all around (38)
Round 9: 7 sc, 1 dec, (1 inc, 1 sc) x10, 1 dec, 7 sc (46)
Round 10: sc all around (46)
Round 11: 9 sc, 1 inc, 26 sc, 1 inc, 9 sc (48)
Rounds 12-16 (5 rounds): sc all around (48)
Round 17: (6 sc, 1 dec)x6 (42)
Round 18: (5 sc, 1 dec)x6 (36)
Round 19: (4 sc, 1 dec)x6 (30)
Insert your 10mm safety eyes securely between Round 7 and Round 8, spaced approximately 8 stitches apart.
Round 20: (3 sc, 1 dec) x6 (24)
Add stuff inside.
Round 21: (2 sc, 1 dec) x6 (18)
Round 22: (1 sc, 1 dec) x6 (12)
Add more stuffing.
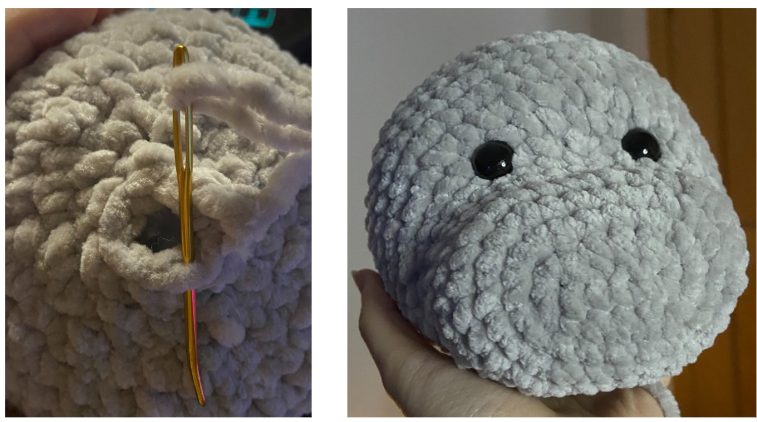
R23: x6 dec (6)
FO, weave the tail yarn through the front loops of the remaining 6 stitches using your tapestry needle, and pull tight to close the hole completely.
Crocheting the Arms (Make 2)
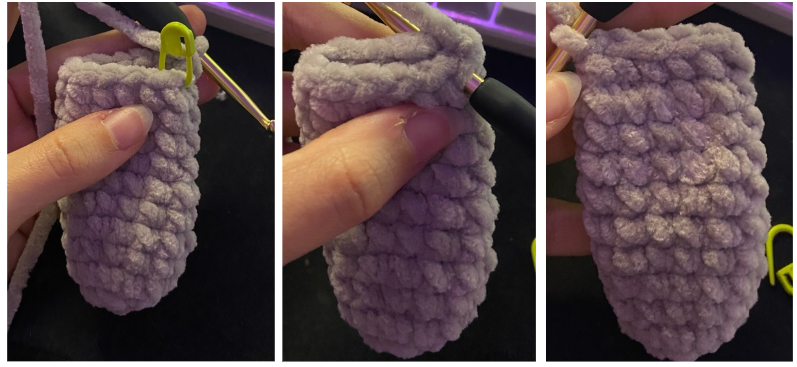
Round 1: 4 sc in a MR (4)
Round 2: x4 inc (8)
Round 3: (1 sc, 1 inc) x4 (12)
Rounds 4-10 (7 rounds): sc all around (12)
Lightly stuff, flatten the opening, and sew across both sides through the stitches to close. Leave a long tail for sewing to the body.
Crocheting the Ears (Make 2)
Round 1: 6 sc in a MR (6)
Round 2: x6 inc (12)
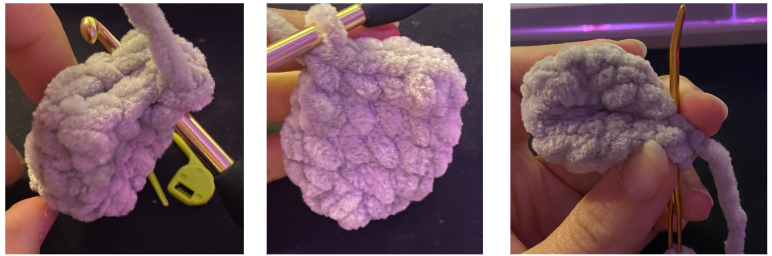
Rounds 3-4 (2 rounds): sc all around (12)
Round 5: (1 sc, 1 dec) x4 (8)
Fold flat and single crochet across both sides to close. Do not stuff. Pinch the base of the ear to create a folded shape and secure it with a few stitches.
Tail & Accessories
Tail
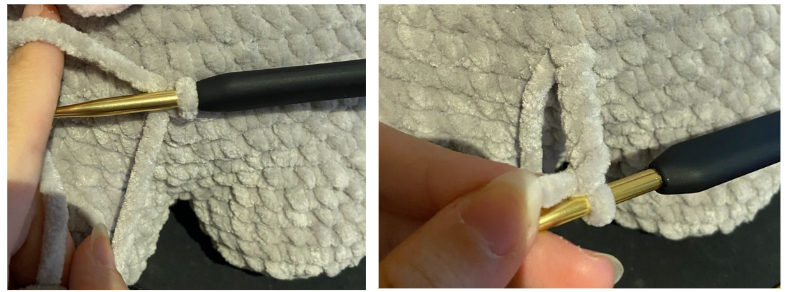
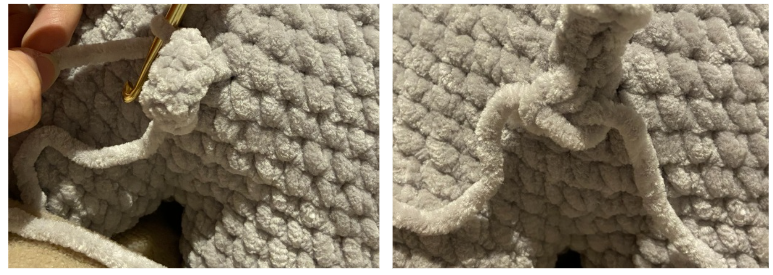
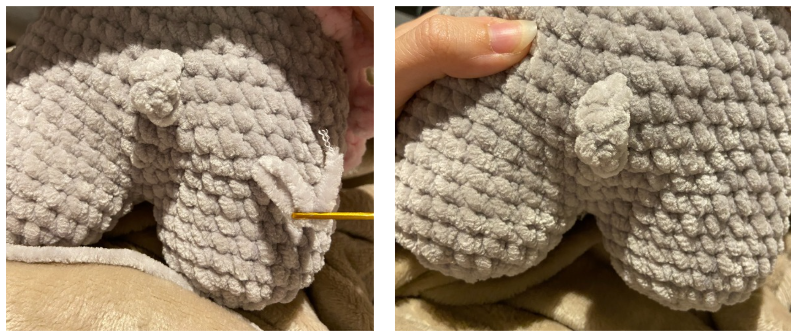
Join yarn to the back of the hippo body and ch6.
Starting from the second chain from the hook, work 5 sc back down the chain. Secure with a knot, hide the yarn ends inside the plushie.
Tutu Skirt
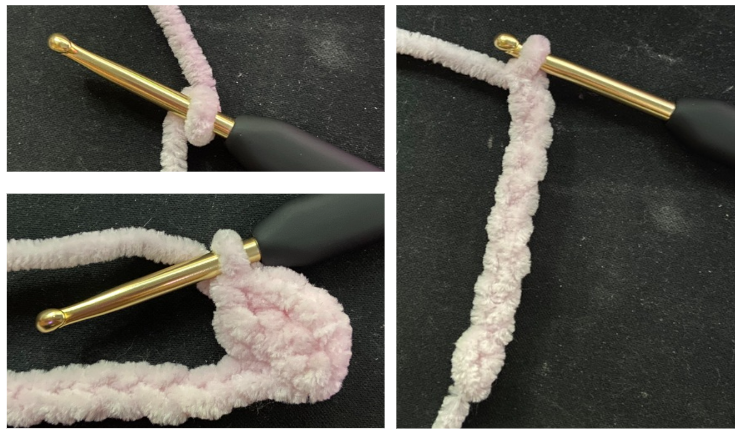
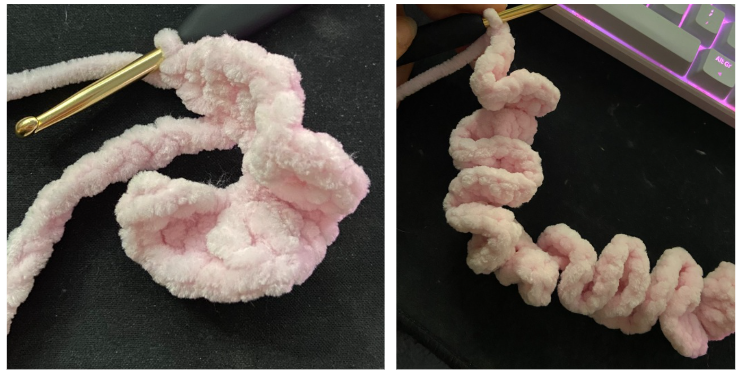
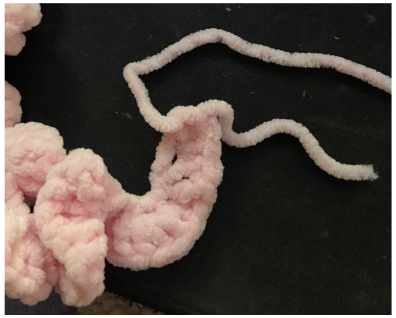
Using your pink accent yarn, ch48.
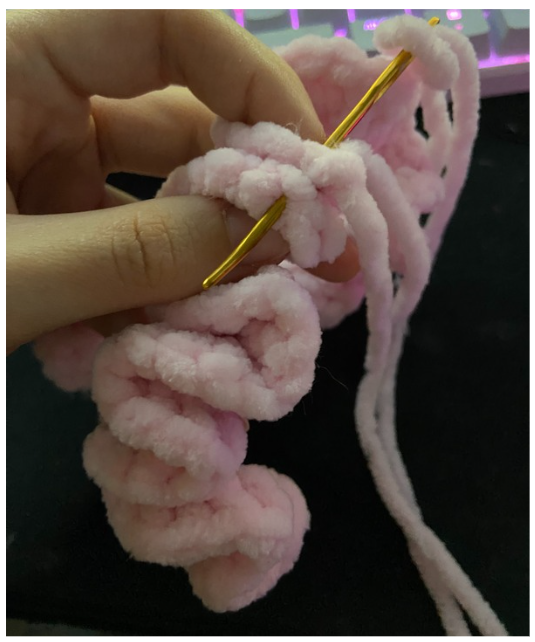
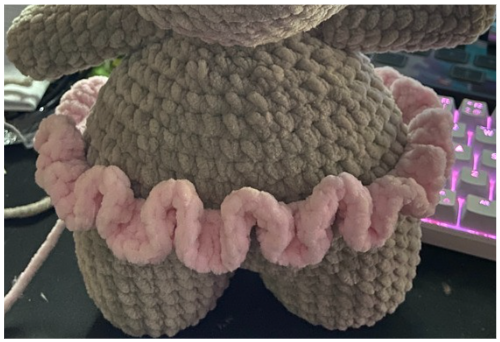
Work 3 double crochets (3 dc) into every single chain across the entire length. This naturally creates a fun, ruffled corkscrew shape!
Wrap it around the hippo’s waist, sew or tie the ends securely, and weave in the ends.
Head Bow
Chain 75 to 80 stitches (make it as long as needed to comfortably tie a cute bow).
Wrap and tie it around the top of the hippo’s head just like shoelaces.
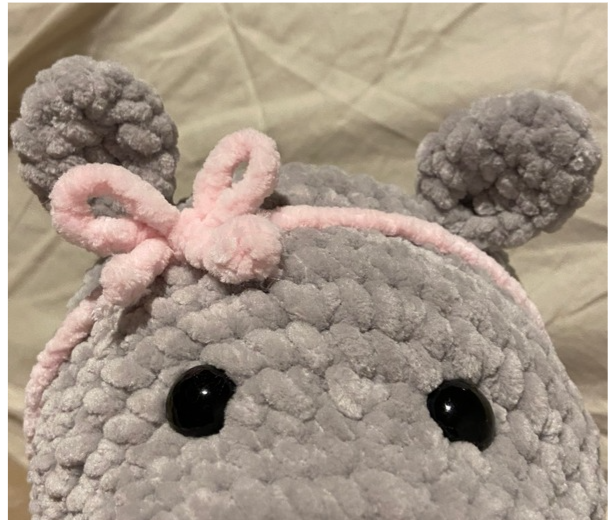
Assembling & Details
Body Assembly:
Sew the completed head securely onto the top of the body. Attach the arms to the upper sides of the body, and sew the pinched ears to the top of the head.
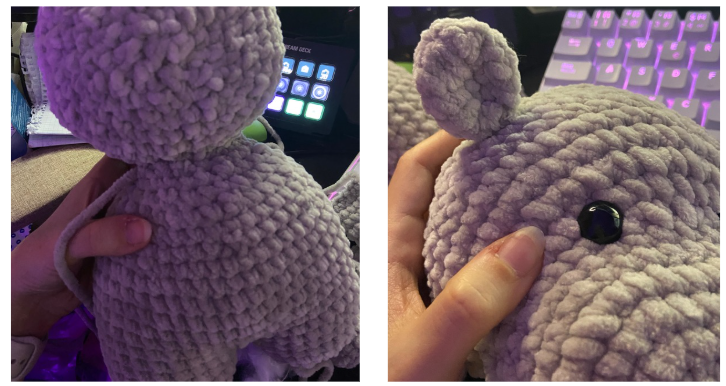
Facial Features:
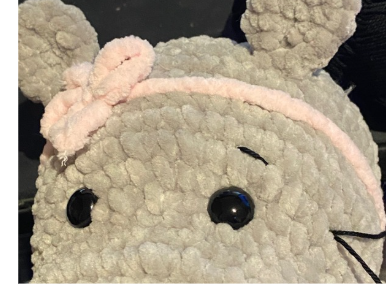
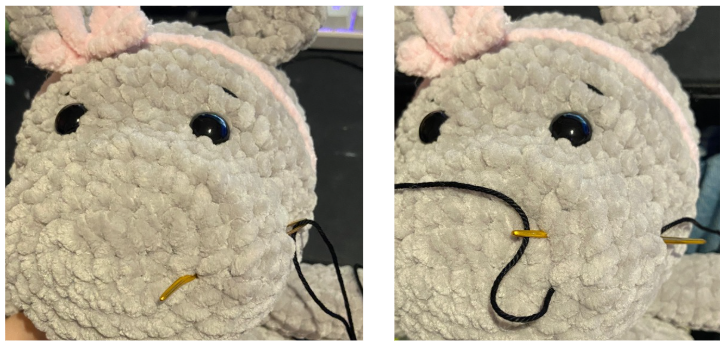
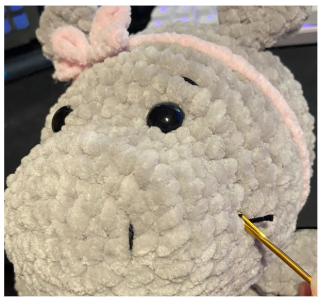
Using your thinner black cotton thread and a sewing needle, embroider sweet little eyebrows above the eyes and two small vertical stitches for the nostrils on the snout. Hide all knots inside the plush body.
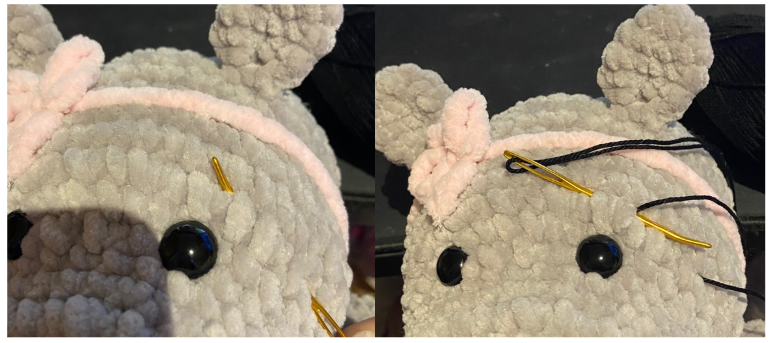
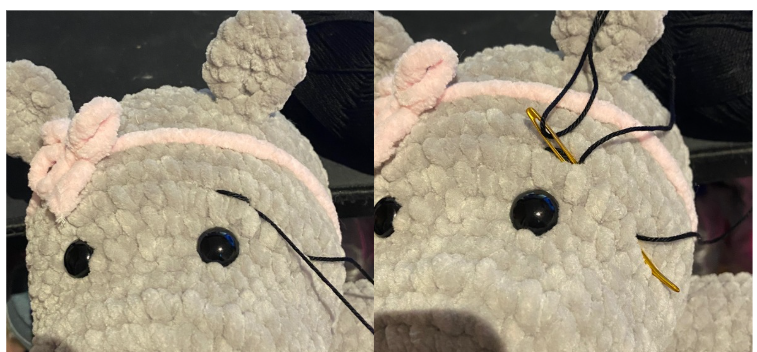
Finishing Touches and Safety Guidelines
Attach the small rounded ears on either side of the head, positioning them slightly behind the eye level. You can add sweet embroidered details, such as tiny pink nostrils on the snout or blush spots beneath the eyes, using embroidery floss or thin yarn.
Safety Note: If you are gifting or selling this plush hippo to babies, toddlers, or pets, we strongly recommend embroidering the eyes with black yarn instead of using plastic safety eyes to eliminate any potential choking hazard.
And that’s it!
I hope you enjoyed crocheting this free hippo crochet pattern just as much as I loved designing it. If you decide to make one, I would love to see how it turns out—don’t forget to tag me on Instagram (@crochetbysilvia) so I can admire your cute amigurumi!
Your support means the world and helps me keep creating and sharing more free patterns with you!
Don’t doubt to check our other free crochet patterns.
—Happy crocheting!
This pattern is for personal use only. You may not copy, reproduce, alter, publish, or distribute this pattern in any format (including video tutorials). If you wish to share this pattern, please share a link to it rather than reprinting it on your site or blog.
You are welcome to sell finished items made from this pattern in small quantities, but do NOT use my photos as your listing or promotional photos. Please credit Crochet by Silvia as the designer.
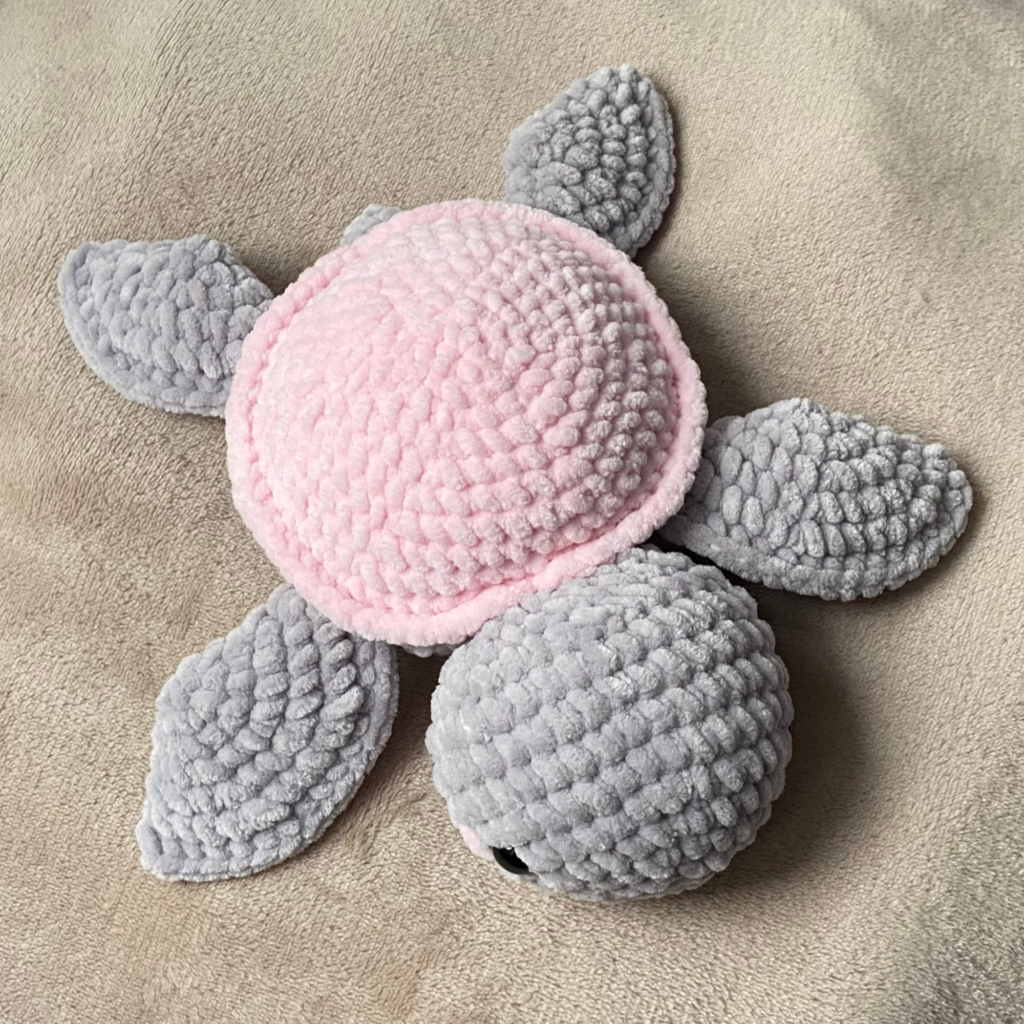
Want to make more cute amigurumi friends? Check out my free turtle crochet pattern or my free jellyfish crochet pattern!
Frequently Asked Questions About This Pattern
Yes! This pattern uses fundamental amigurumi stitches, including the magic ring, working around a chain, single crochet, increases, and decreases. It is an approachable project for beginners.
Thanks to the bulky plush yarn, most crocheters can complete a full hippo in about 1 to 1.5 hours.
Absolutely! You are welcome to sell physical plushies created using this free pattern at craft fairs, local markets, or online shops. Do not use the original photos as your listing pictures.