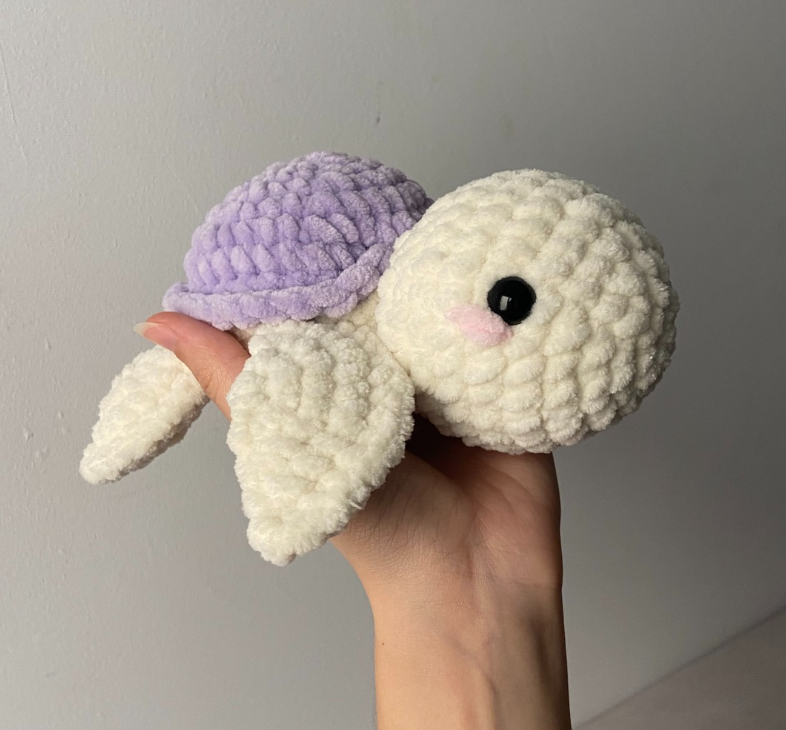
Looking for a quick, adorable, and pocket-sized project you can finish in under 30 minutes? This free mini turtle crochet pattern is the ultimate fast craft for amigurumi lovers! Scaling down the classic sea turtle into a tiny, squishy charm, this miniature plushie is ideal for keychains, desk companions, party favors, or market fillers.
Miniature amigurumi projects are incredibly popular because they allow you to practice shaping techniques without committing to long hours of crafting. Whether you are using fine cotton thread for a micro-plushie or standard plush yarn with a smaller hook, this step-by-step tutorial provides clear guidance to create a neat, perfectly formed little turtle with ease.
Why You Should Crochet a Mini Sea Turtle Today
Tiny plushies have a unique charm that makes them instantly appealing to crafters and market shoppers alike. Here is why this mini turtle pattern is a must-add to your pattern stash:
- The Ultimate Scrap Buster: Because this pattern requires only tiny amounts of yarn, it is the perfect solution for utilizing leftover yarn ends sitting in your craft room.
- Lightning-Fast Craft Time: You can easily complete a mini turtle in 20 to 30 minutes, making it a stress-free project when you want instant crafting gratification.
- High-Demand Market Item: Small, affordable keychains and bag charms sell exceptionally well at craft fairs, pop-ups, and school markets.
- Minimal Sewing Assembly: Designed with simplicity in mind, joining the small limbs and shell is fast, straightforward, and beginner-friendly.
Design and Technique Tips for Miniature Amigurumi
Crocheting small-scale plushies requires a touch of extra attention to detail to ensure the stitches stay neat and the internal stuffing remains contained.
Hook Sizing and Stitch Precision
When working on miniature pieces, maintaining a tight, uniform tension is essential. Using a hook size slightly smaller than usual (such as a 2.0 mm or 2.5 mm hook for worsted weight yarn) keeps the stitches compact. This prevents small gaps from forming around increases and decreases, keeping the white polyester fiberfill hidden inside the tiny shell.
Stuffing Small Shapes Lightly
It is easy to overstuff tiny amigurumi, which can stretch out the fabric and distort the rounded shape of the shell. Insert tiny, fluffy pinches of fiberfill gradually using tweezers or the back of your crochet hook to achieve a soft, balanced shape without overstretching the stitches.
Yarn Substitutions and Size Variations
One of the best features of this mini pattern is how drastically its final size changes depending on the yarn you choose:
- Cotton Embroidery or Lace Thread: Pair fine cotton thread with a 1.0 mm to 1.5 mm hook to craft micro-turtles that fit on the tip of your finger!
- Worsted Weight Cotton Yarn: Using standard cotton yarn with a 2.5 mm hook produces a sturdy, defined miniature turtle that is durable enough for daily use on a keychain.
- Plush Velvet Yarn: If you use super bulky chenille yarn with a 3.5 mm hook, you will get a mini squishy turtle that is compact yet velvety soft to touch.
More Patterns
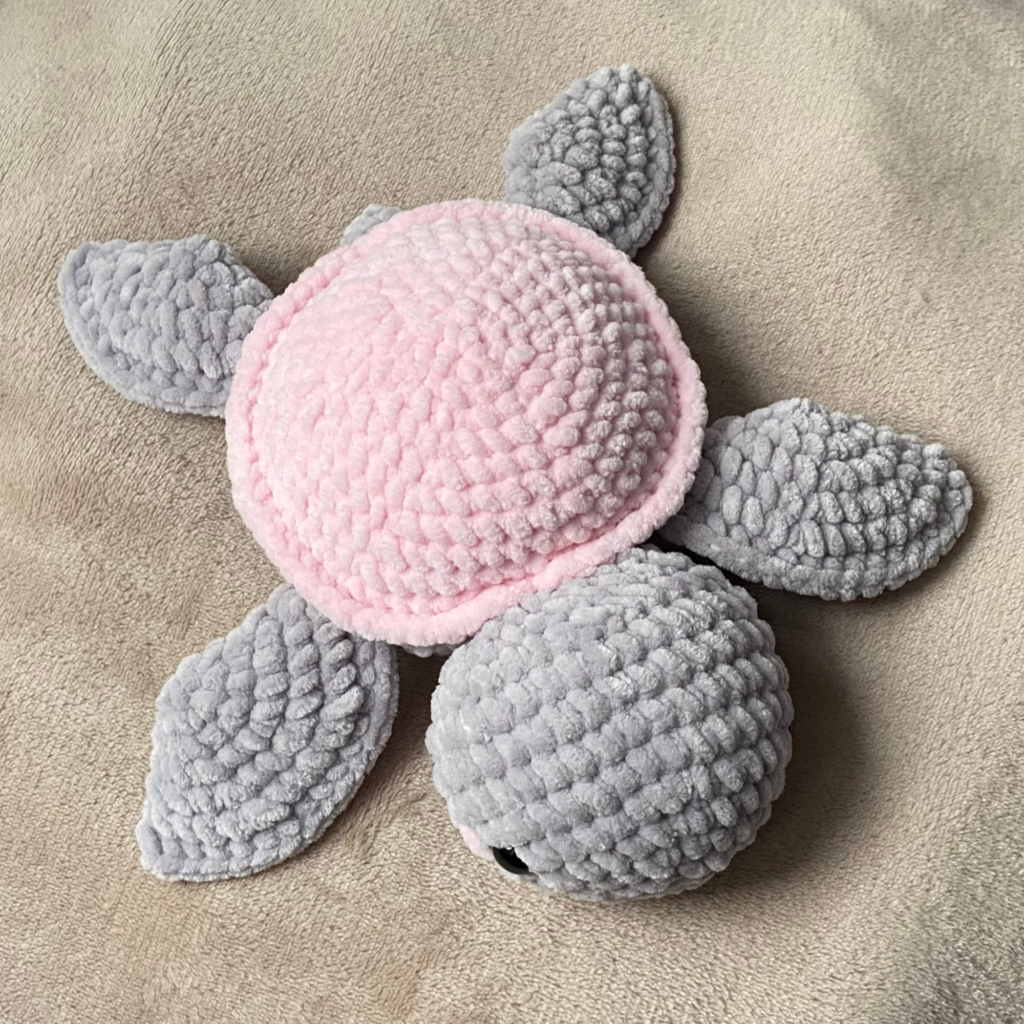
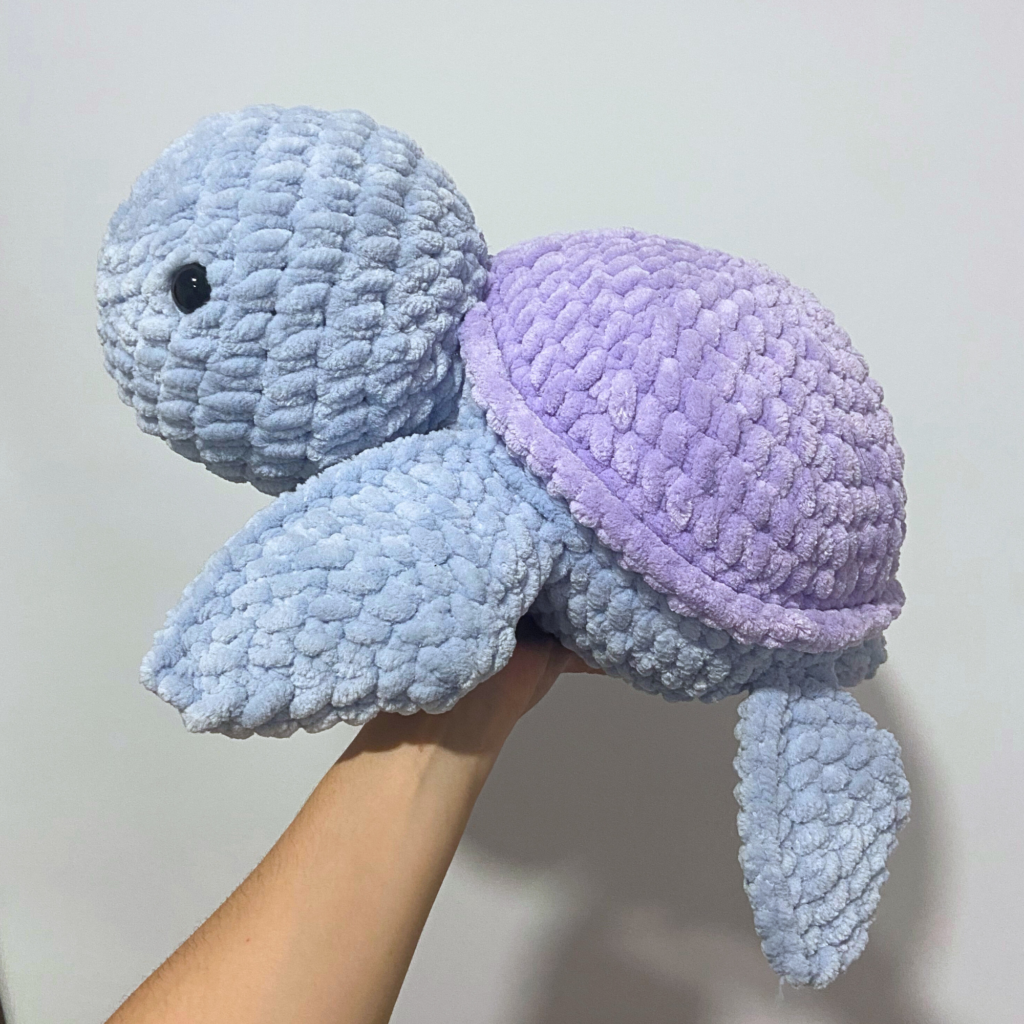
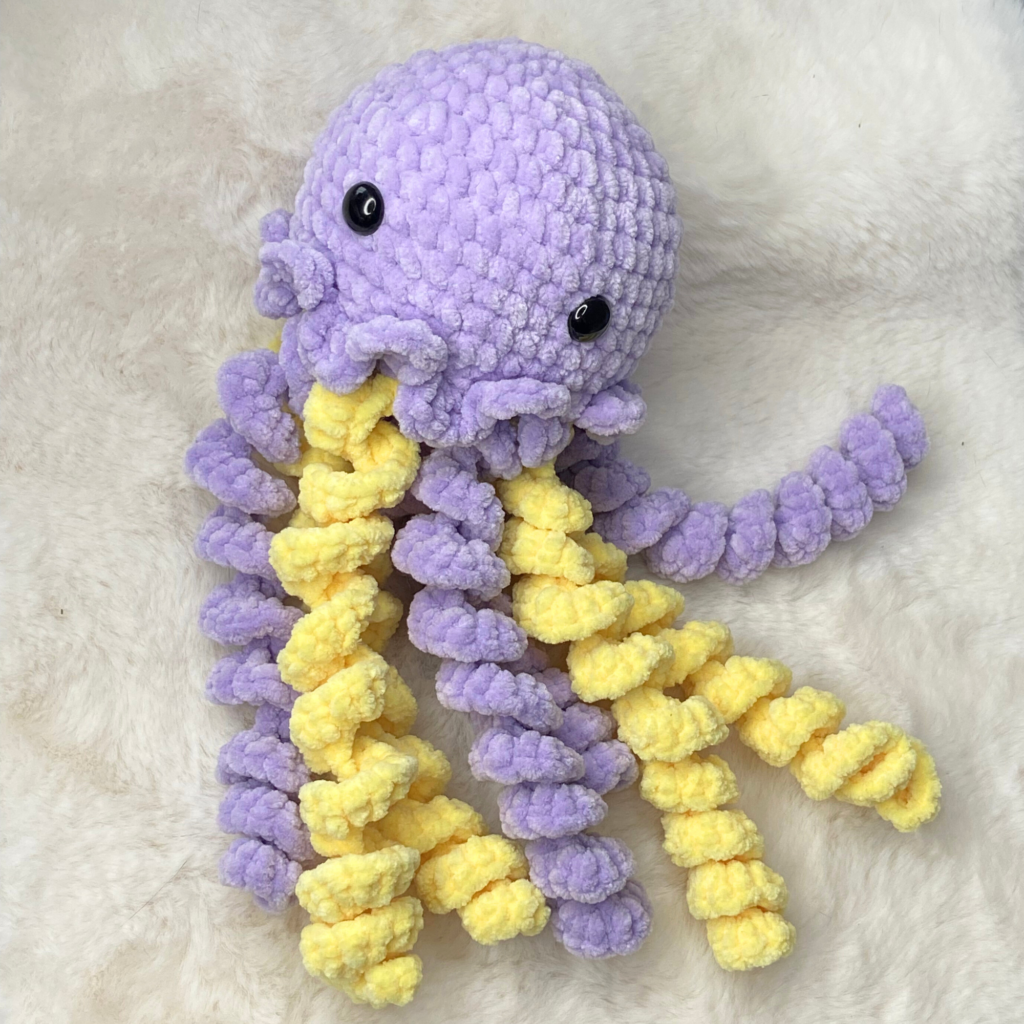
Take a look also on these ocean amigurumi patterns:
Materials Needed
- Super bulky plush velvet yarn (e.g., Himalaya Dolphin Baby or Bernat Blanket) in main color and shell color.
- Crochet Hook Size: 4.5 mm.
- Safety eyes: 4 mm.
- Polyfill stuffing
- Tapestry needle
- Scissors
- Stitch markers
Abbreviations (US Terminology)
- MR: magic ring
- Ch: chain
- St(s): stitch(es)
- Sc: single crochet
- Sk: skip (skip stitch)
- Sl st: slip stitch
- Inc: increase
- Dec: decrease
- CC: change colour
- FO: fasten off
- FLO: front loops only
- BLO: back loops only
Join the community & get a free pattern!
Free Mini Turtle Crochet Pattern
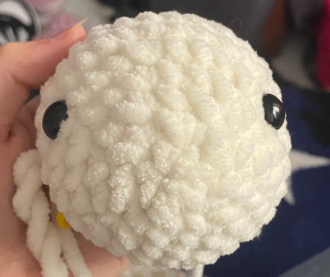
Crocheting the Head
Start with white yarn.
Round 1: 6 sc in a MR (6)
Round 2: 6x inc (12) (do one increase per each stitch)
Round 3: (1 sc, 1 inc) x6 (18)
Round 4: (2 sc, 1 inc) x6 (24)
Round 5: (3 sc, 1 inc) x6 (30)
Rounds 6–9 (4 rounds): 30 sc (30)
Round 10: (3 sc, 1 dec) x6 (24)
Insert safety eyes between R5 and R6, approximately 10 stitches apart.
Round 11: (2 sc, 1 dec) x6 (18)
Stuff the head firmly.
Round 12: (1 sc, 1 dec) x6 (12)
Sl st in the next st, FO, and leave a very long tail for sewing later.
Crocheting the Fins
Front Fins (Make 2)
Start in white yarn.
Round 1: MR 8 st (8)
Round 2: x8 inc (16)
Round 3: (1 sc, 1 inc) x8 (24)
Round 4: (2 sc, 1 inc) x8 (32)
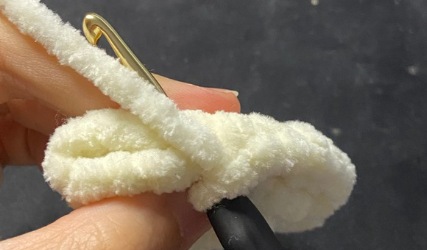
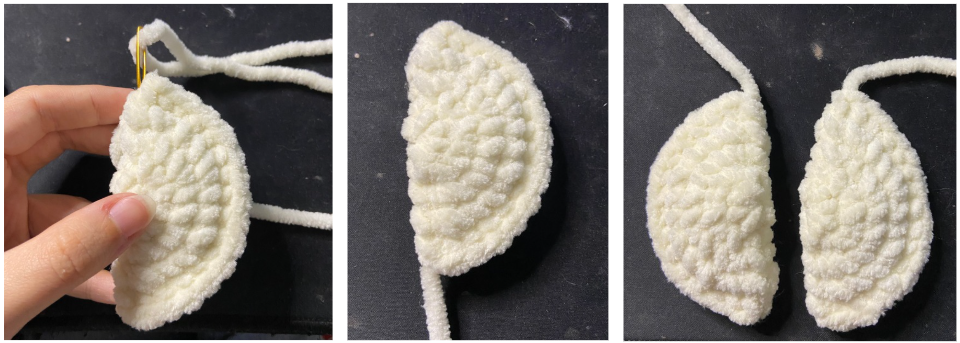
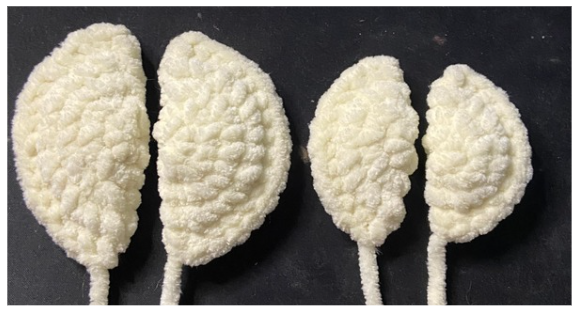
Fold the circle in half and work single crochets across the edge to close it. Leave a long tail for sewing.
Back Fins (Make 2)
Start in white yarn.
Round 1: 8 sc in a MR (8)
Round 2: x8 inc (16)
Round 3: (1 sc, 1 inc) x8 (24)
Fold the circle in half and work single crochets across the edge to close it. Leave a long tail for sewing.
Once you have made all four fins, use a tapestry needle to flip/reorient the yarn tail direction on 1 front fin and 1 back fin. This ensures you have two proper symmetrical pairs for the right and left sides of your turtle!
Crocheting the Tail
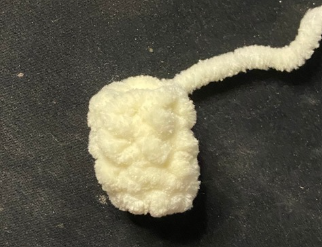
Round 1: 6 sc in a MR (6)
Rounds 2-4 (3 rows): 6 sc (6)
Sl st in the next st, pull through, and leave a tail for sewing.
Crocheting the Shell
Start in purple yarn.
Round 1: MR of 6 st (6).
Round 2: x6 inc (12).
Round 3: (1 sc, 1 inc) x6 (18).
Round 4: (2 sc, 1 inc) x6 (24).
Round 5: (3 sc, 1 inc) x6 (30).
Round 6: (4 sc, 1 inc) x6 (36).
Rounds 7-8 (2 rounds): 36 sc (36).
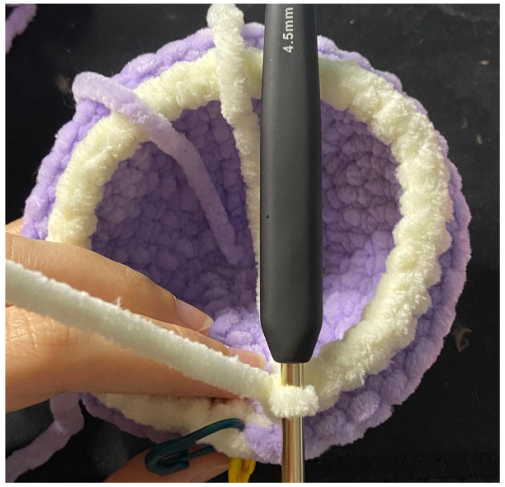
Round 9: 36 sc FLO (36). Place a stitch marker in the back loop of the very first stitch of this round, as you will need to come back to these unworked loops shortly!
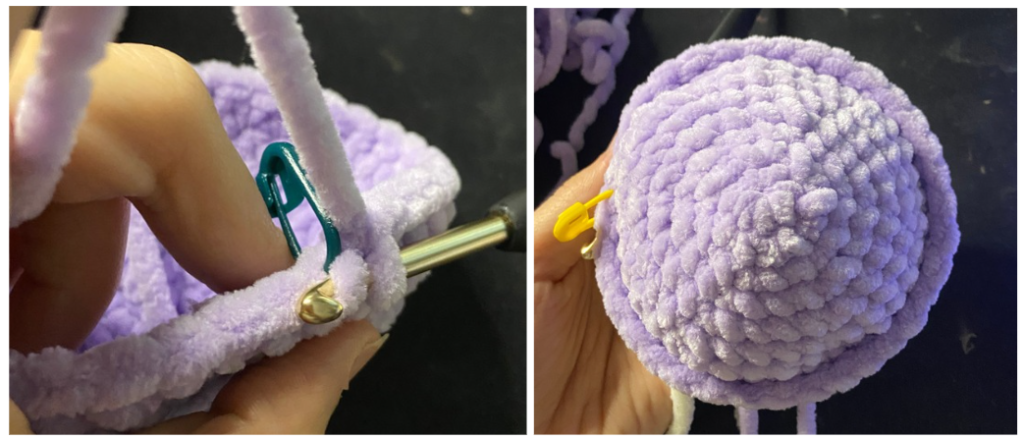
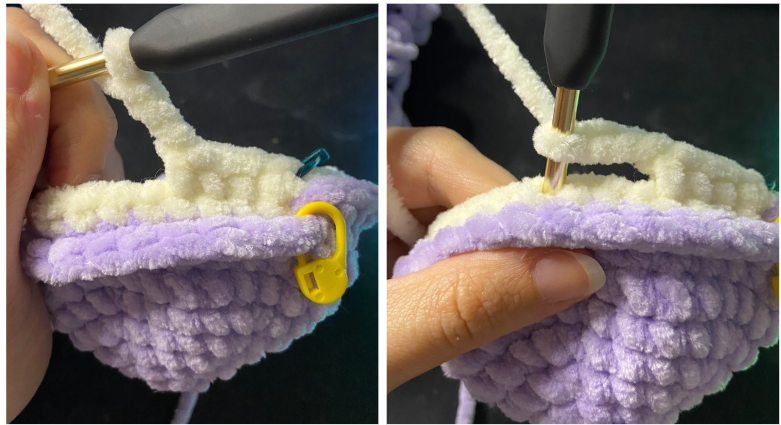
Round 10: CC in previous st to white yarn. Then make 36 sc in the unworked BLO left behind from Round 9 (36)
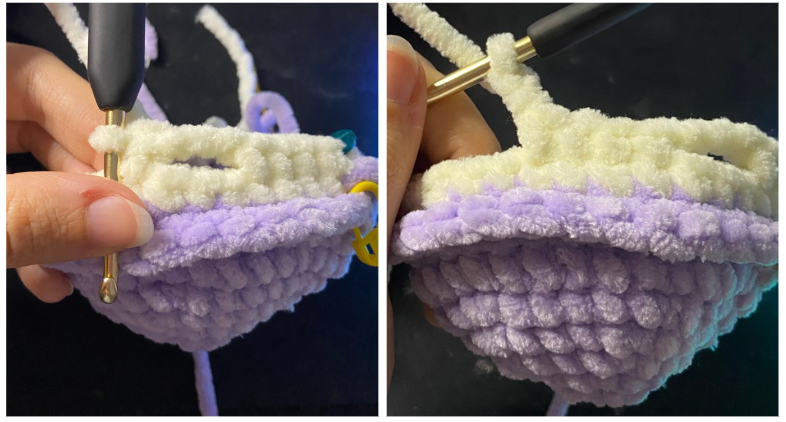
Round 11: 4 sc, ch3, sk 3, 4 sc, ch2, sk 2, 3 sc, ch3, sk 3, 3 sc, ch2, sk 2, 4 sc, ch3, sk 3, 5 sc [36]
Round 12: (4 sc, 1 dec) x6 (30) (When working over the chain spaces, simply work your single crochets into a single loop of the chain).
Round 13: (3 sc, 1 dec) x6 (24)
Attaching Fins and Tail to the Shell
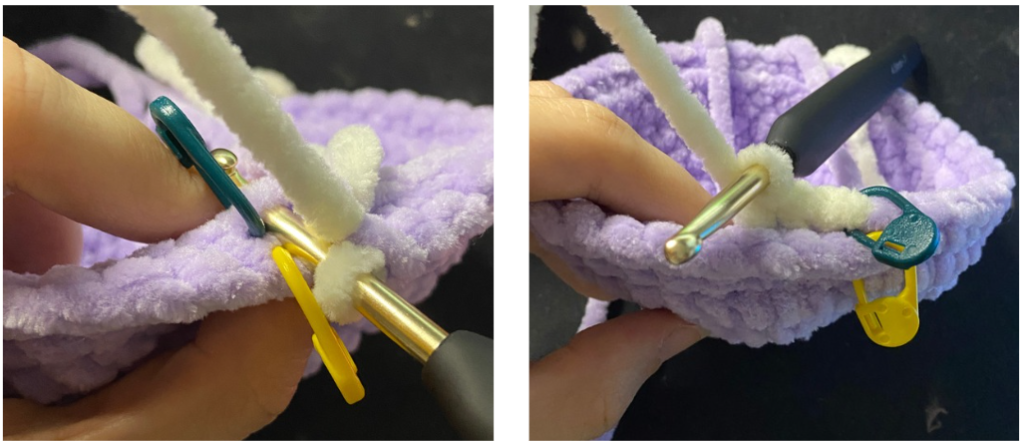
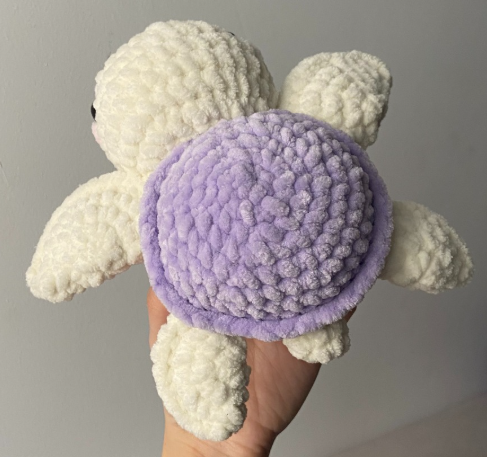
Before closing the body further, sew your fins and tail into the designated chain holes around the shell base. Place the tail in the center 3-stitch gap, flanked by the two small back fins in the adjacent holes. Place the two large front fins in the front holes.
(Note: Positioning the fins with the neat border stitches facing upwards gives the plushie a cleaner, more professional finish!)
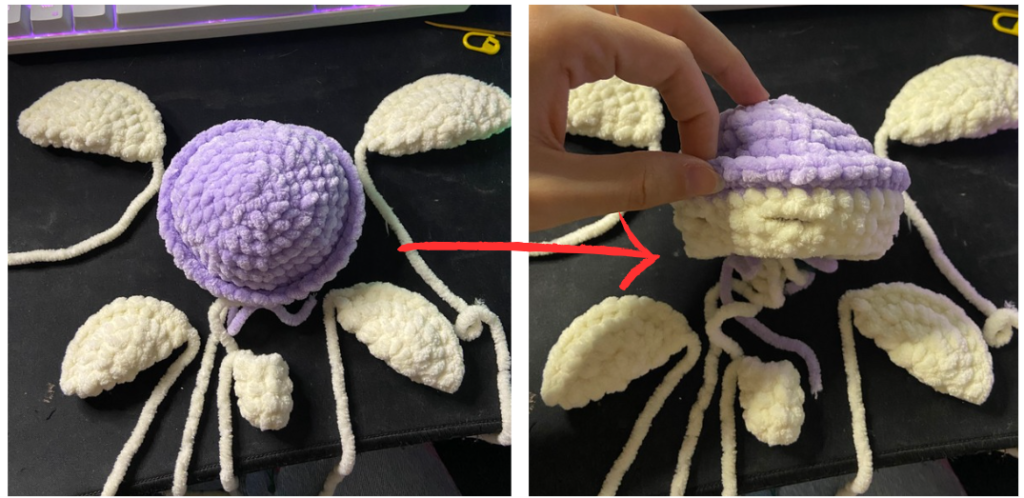
Continue decreasing to close the body:
Round 14: (2 sc, 1 dec) x6 (18) (Stuff the body firmly here).
Round 15: (1 sc, 1 dec) x6 (12)
Round 16: 6x dec (6)
Thread your tail through the front loops of the remaining 6 stitches, pull tight to close the gap completely, and weave the yarn tail securely inside the shell.
Final Assembly and Details
Attach the Head
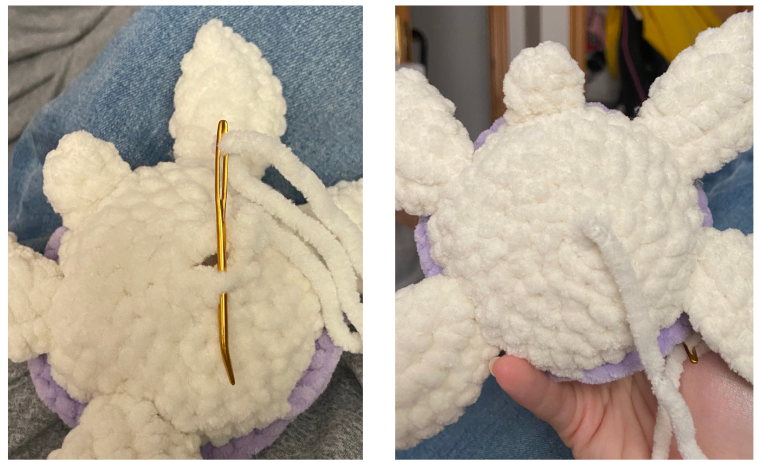
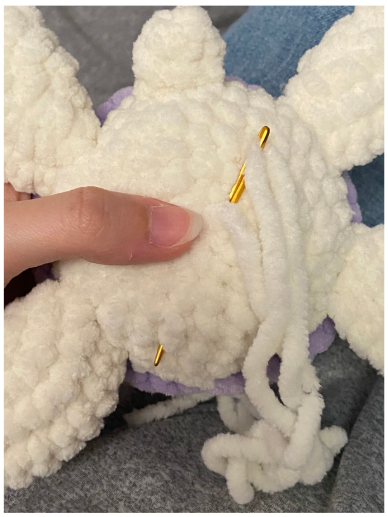
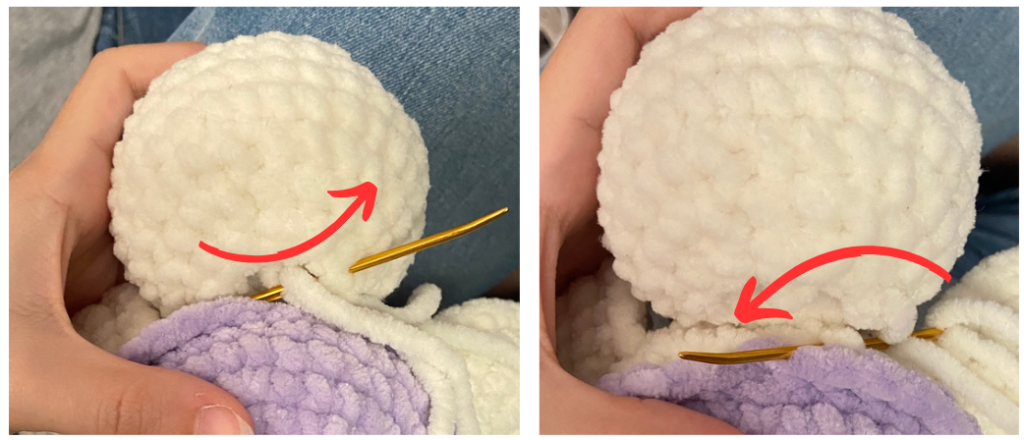
Sew the head securely to the front of the shell using an invisible stitch technique (alternating going upwards into the head stitches and downwards into the shell stitches). Knot and hide all ends inside.
Blush Details
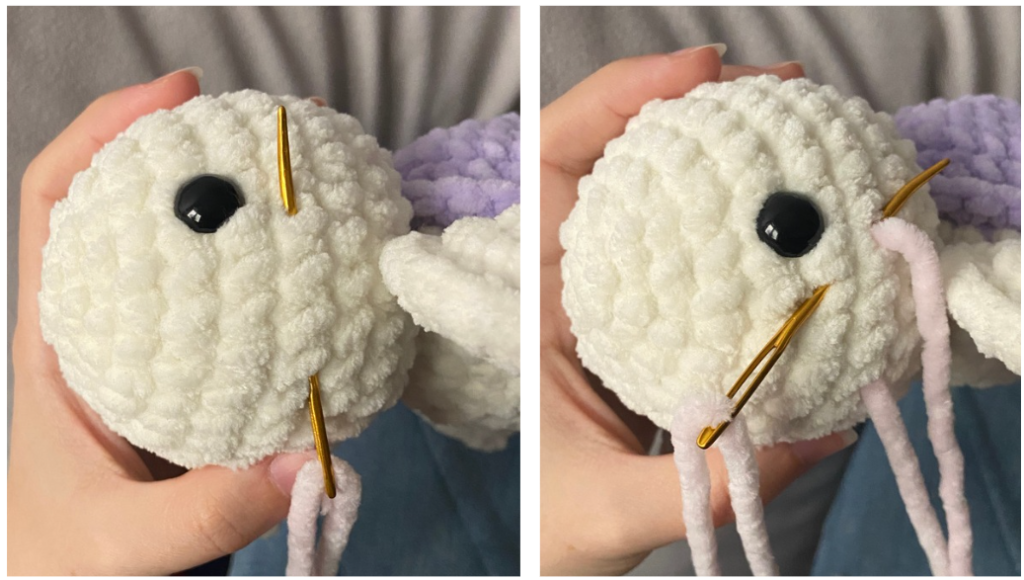
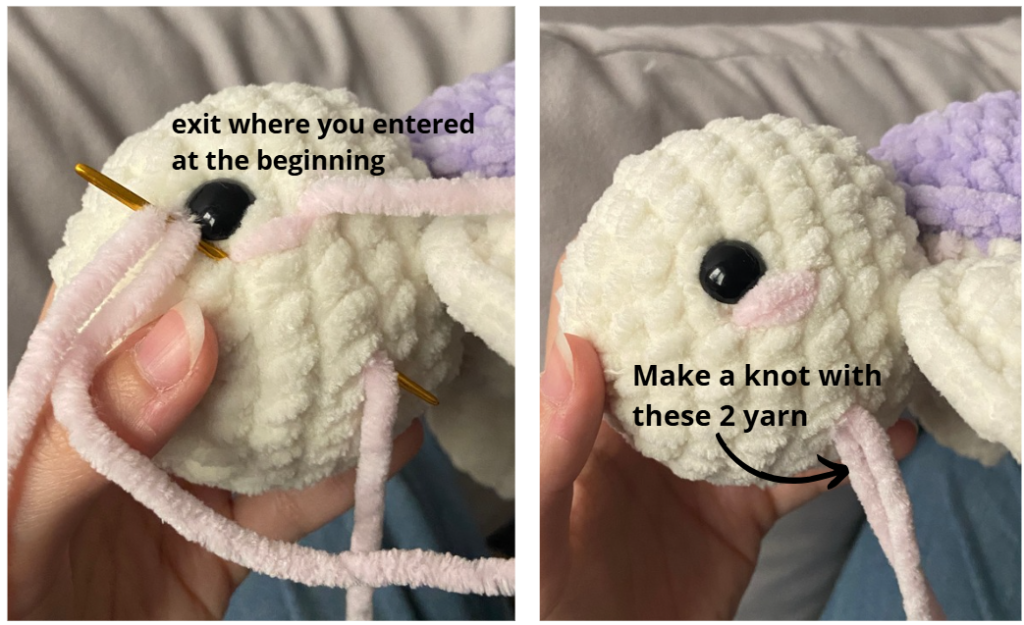
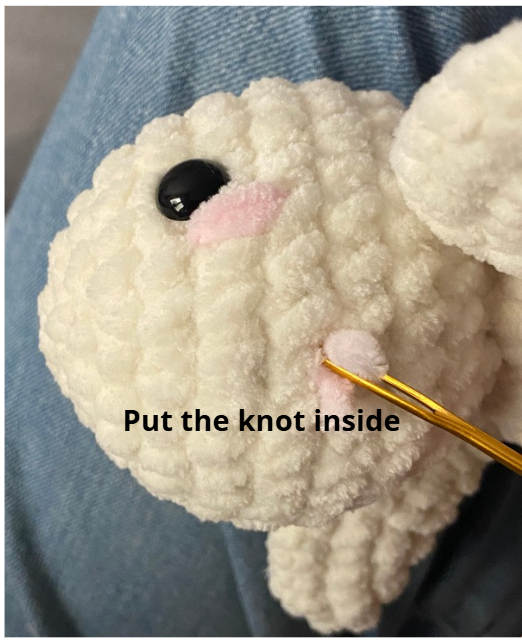
Using a strand of pink yarn, add cute little rosy cheeks just under the safety eyes using a simple surface embroidery stitch, tie a secure knot inside, and snip the excess.
Finishing Touches and Keychain Attachment
To transform your mini turtle into a functional accessory, secure a metal keychain ring or lobster clasp to the center-top of the shell using a double strand of matching yarn. Thread the tails internally through the body before knotting off securely to ensure the keychain withstands daily pull and wear.
Safety Note: Due to the small scale of this plushie, tiny safety eyes (4 mm to 6 mm) are typically used. If you are gifting or selling this mini turtle as a toy for young children, we strongly advise embroidering simple French knots or small stitches with black thread instead of using plastic eyes.
And that’s it!
I hope you enjoyed crocheting this free turtle crochet pattern just as much as I loved designing it. If you decide to make one, I would love to see how it turns out—don’t forget to tag me on Instagram (@crochetbysilvia) so I can admire your cute amigurumi!
Your support means the world and helps me keep creating and sharing more free patterns with you!
Don’t doubt to check our other free crochet patterns.
—Happy crocheting
This pattern is for personal use only. You may not copy, reproduce, alter, publish, or distribute this pattern in any format (including video tutorials). If you wish to share this pattern, please share a link to it rather than reprinting it on your site or blog.
You are welcome to sell finished items made from this pattern in small quantities, but do NOT use my photos as your listing or promotional photos. Please credit Crochet by Silvia as the designer.
Want to make more cute ocean friends? Check out my free medium turtle crochet pattern or my free squid crochet pattern!
Frequently Asked Questions About This Pattern
When made with worsted weight cotton yarn and a 2.5 mm hook, the finished turtle measures approximately 4 to 5 cm (about 2 inches) in length.
Yes! As long as you are comfortable working in rounds and handling smaller pieces, this simple pattern is a fantastic introduction to miniature amigurumi.
Absolutely! You are welcome to sell physical miniature plushies crafted using this free pattern at markets, pop-ups, or online shops. Don’t use the original photos as your listing pictures.