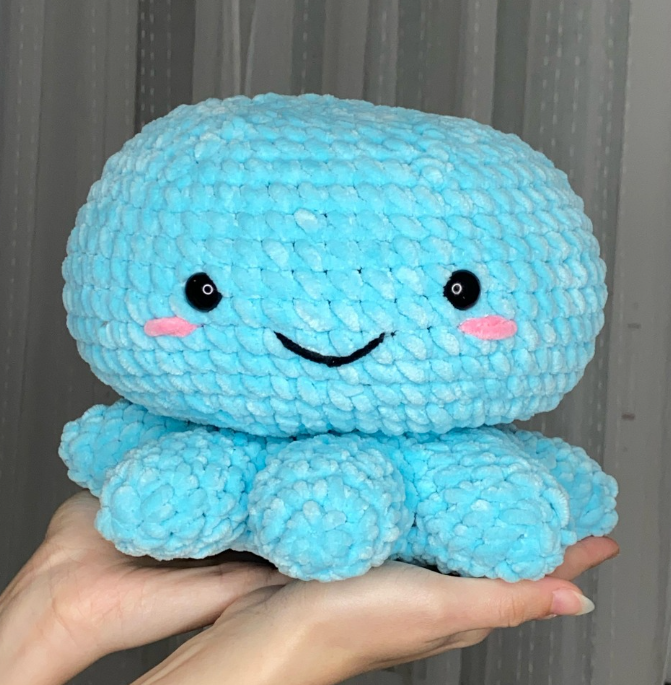
Looking for a fast, adorable, and squishy ocean project? This free crochet octopus pattern is an absolute must-try! With its chubby rounded head, expressive smiling face, and eight short, bobble-like tentacles fanning out around the base, this plush sea creature brings instant charm to any amigurumi collection. Whether you are prepping stock for summer craft fairs, making a cozy desk buddy, or crafting a quick handmade gift, this step-by-step tutorial will guide you smoothly from start to finish.
Chubby octopus plushies have taken the crafting world by storm because of their cute, dumpling-like shape. Working with soft plush chenille yarn gives the octopus a velvety, cloud-like texture that feels as comforting as it looks. In this comprehensive guide, you will find a full breakdown of materials, yarn substitution ideas, techniques for shaping plump rounded tentacles, and clear row-by-row instructions.
Keep scrolling for the free pattern, or grab the ad-free printable PDF on Etsy!
Want a printable PDF ad-free version? Get it here!Why You Should Crochet a Chubby Plush Octopus Today
Chubby plushies with short, rounded limbs are top-trending items in the handmade community. Here is why adding this design to your project queue is a brilliant choice:
- Proven Market Bestseller: Dumpling-style animals are huge head-turners at craft fairs, pop-ups, and online shops due to their super-cute kawaii look.
- Super Fast Craft Time: Because the tentacles are short rounded bumps rather than long individual chains, you can finish an entire plushie in about 20 to 30 minutes.
- Low-Sew Construction: The short bobble tentacles can be worked directly onto the bottom round of the body, eliminating tedious assembly.
- Great Desk Pet & Stress Ball: Its compact, rounded shape sits completely flat on surfaces, making it a perfect squishy desk companion.
Design and Technique Tips for Plump Rounded Tentacles
Achieving those cute, stubby tentacle bumps along the base relies on working bobble stitches or short rounded loops directly into the outer loops.
Crafting Stubby Bobble Tentacles
To create short, plush tentacles that sit flat against the table, the pattern uses short clusters or half-double crochet bobble stitches spaced evenly around the perimeter of the base. Keeping a firm tension while forming these stitches ensures each tentacle pops outward smoothly without warping the bottom disc.
Head Shaping and Base Stability
Stuff the upper dome firmly to maintain that iconic smooth, round head shape. Leave the lower section near the tentacles slightly flatter so the octopus rests securely without rolling over.
More Patterns
If you are looking for more, take a look on these crochet patterns:
Materials Needed
- Yarn: Yarn of preference. The designer used Melissa Arya Yarn (blue). You can use any color you prefer.
- Crochet Hook: 4.5 mm (or a hook suitable for your chosen yarn size).
- Stitch Markers
- Scissors
- Blunt Sewing Needle
- Security Eyes: 12 mm
- Synthetic Cotton Filler (Stuffing)
Abbreviations (US Terminology)
- MR: magic ring.
- St: stitch.
- Sc: single crochet.
- Inc: increase.
- Dec: decrease.
- FLO: front loops only.
Final Size
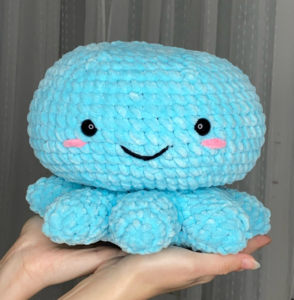
Octopus plushie size using a 4,5 mm hook measures approximately 20 x 18 cm (8 x 7 inches), though size may vary depending on your yarn and tension.
Join the community & get a free pattern!
Free Octopus Crochet Pattern
Crocheting the legs (Make 8)
Start with main color yarn (blue).
Round 1: 6 sc in a MR (6)
Round 2: x6 inc (12)
Rounds 3-5 (3 rounds): 12 sc (12)
Cut the yarn and weave in ends on seven of the legs. Do not cut yarn
in the eighth leg.
Round 6: Take the eighth leg, and make 6 single crochet.
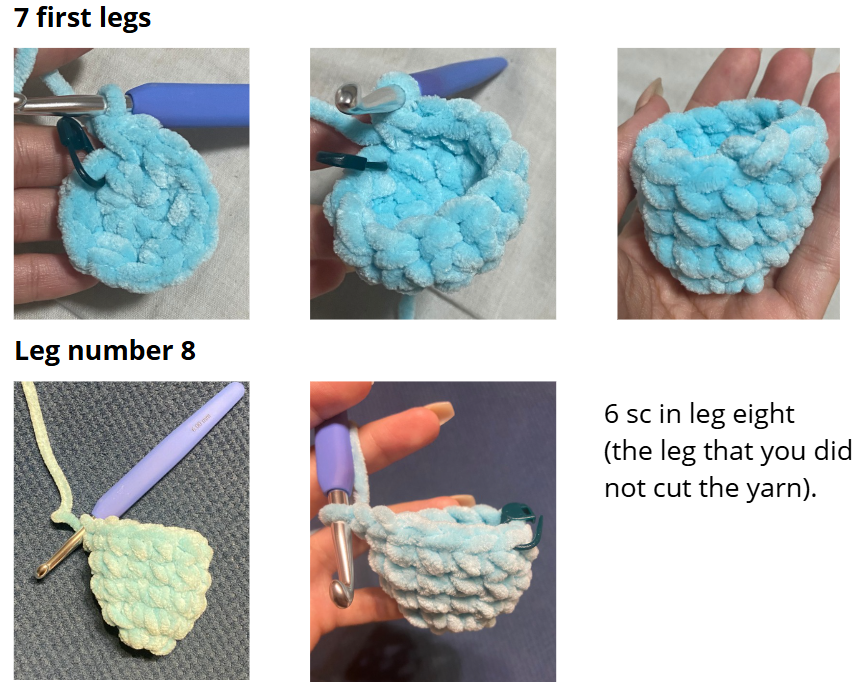
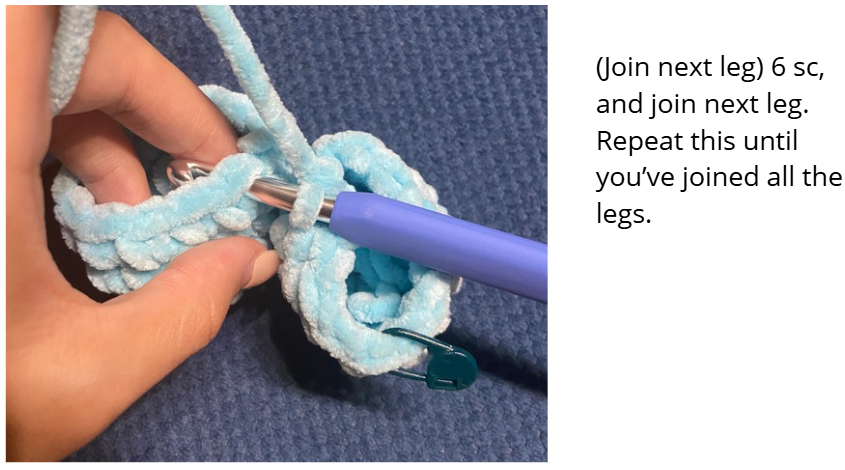
Continue directly by joining the next leg and make 6 single crochet. Repeat this around until all 8 legs are joined together (48). Join eighth leg to first leg with a sl st to close the round.
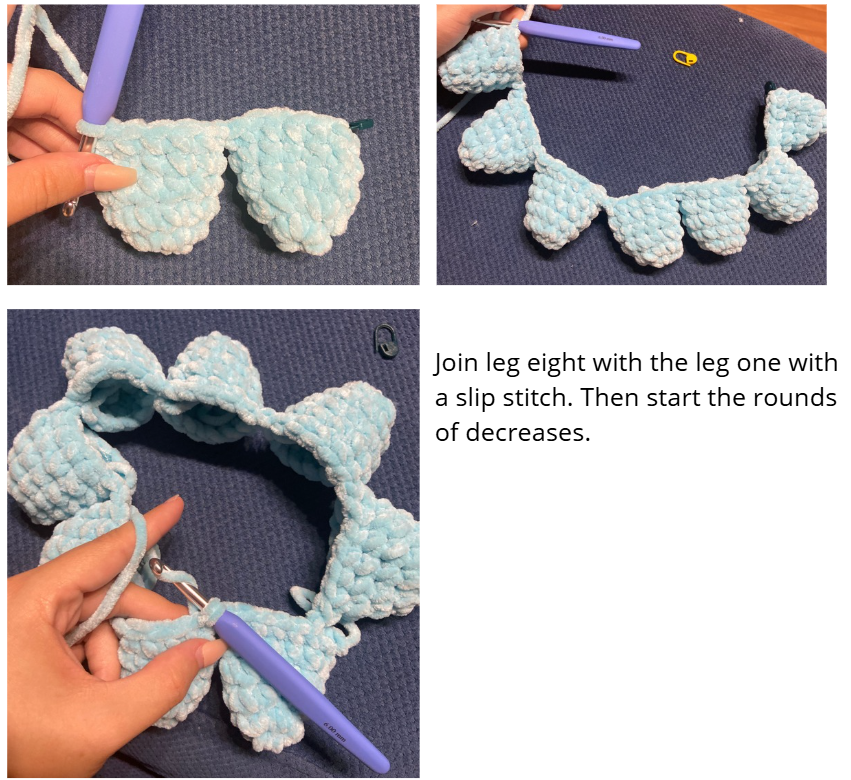
R7: sc all around BLO (48)
R8: dec all around (24)
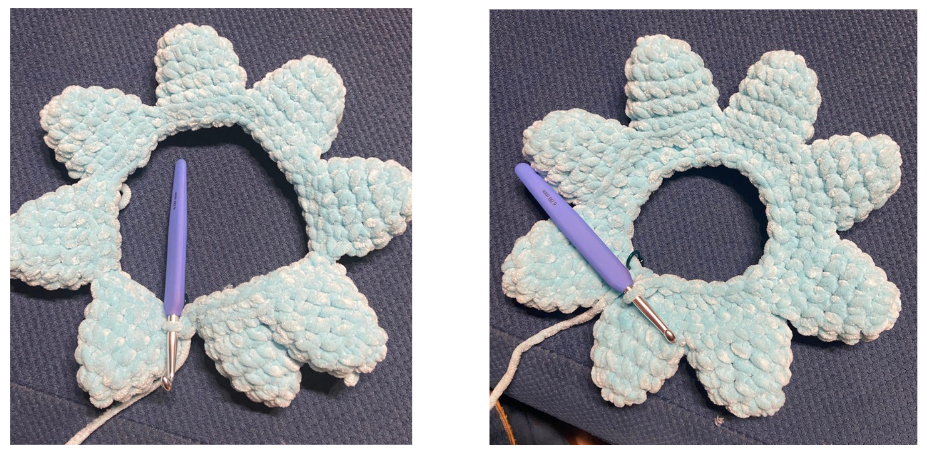
R9: (2 sc, 1 dec) x6 (18)
R10: (1 sc, 1 dec) x6 (12)
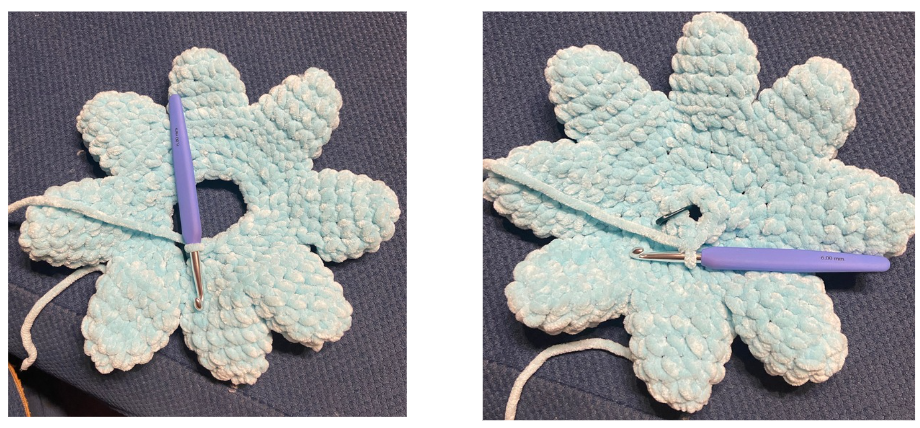
R11: x6 dec (6)
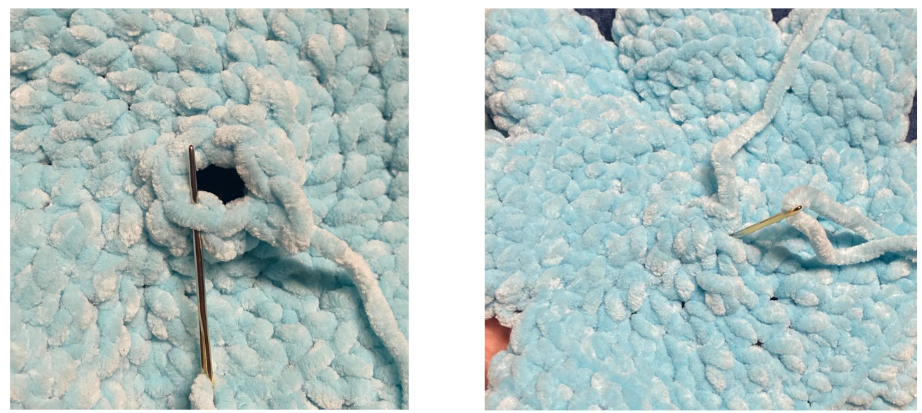
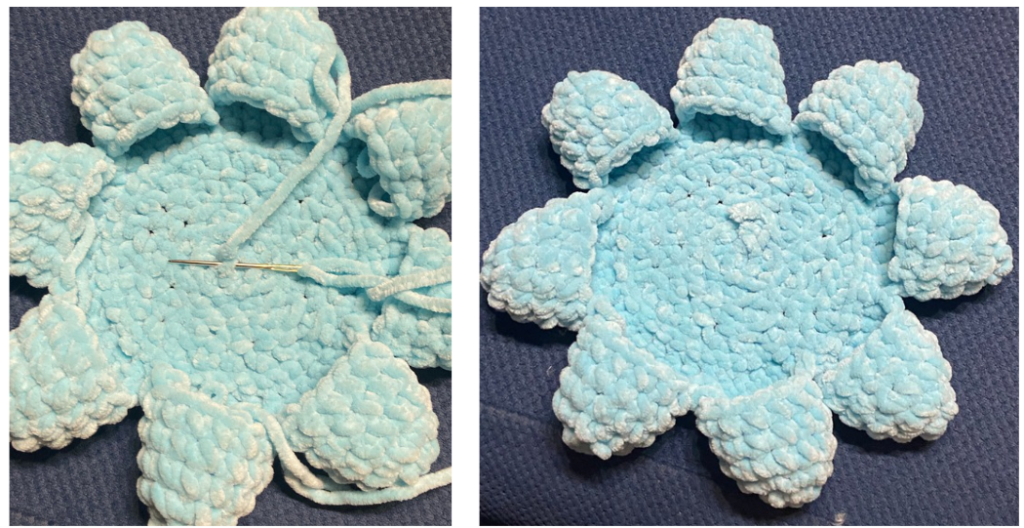
Cut the yarn, sew through the FLO of the remaining 6 sts with a needle, pull tight to close, and weave in the ends.
Crocheting the Body
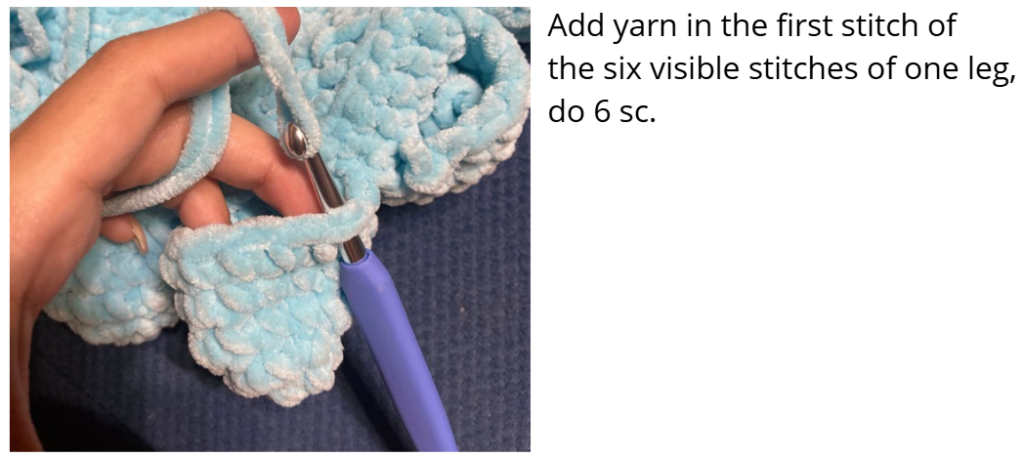
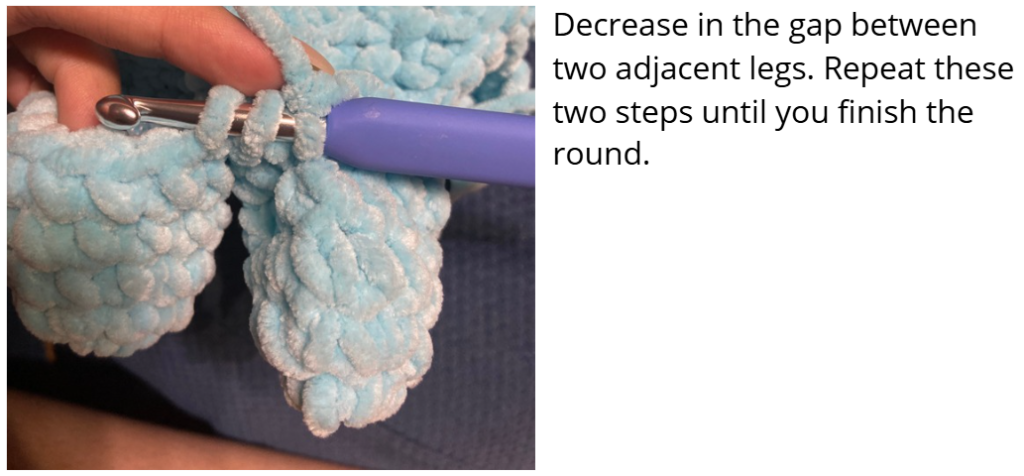
You will now work into the unworked stitches on the legs (the 6 stitches left unworked on each leg from R6). You will work decreases in the gaps between adjacent legs.
Join your yarn to the first unworked stitch of a leg:
Round 1: (6 sc, 1 dec) x8 (56). Note: work the 6 sc across the 6
stitches of each leg, and make a decrease in the gap between two legs by working through stitches of adjacent legs.
Round 2: (5 sc, 1 dec) x8 (48)
Round 3: dec around (24)
Round 4: (2 sc, 1 dec) x6 (18)
Round 5: (2sc, 1 inc) x6 (24)
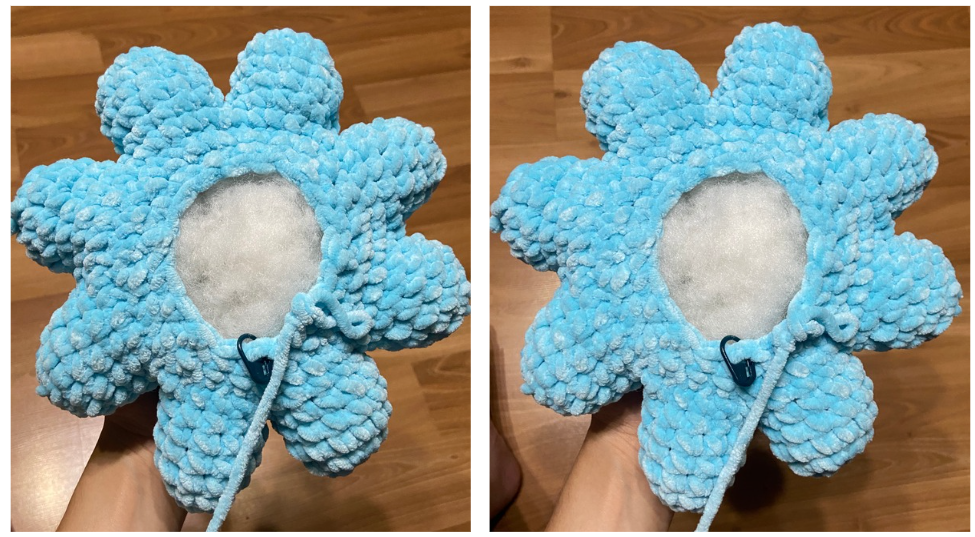
Round 6: (3 sc, 1 inc) x6 (30)
Round 7: (4 sc, 1 inc) x6 (36)
Round 8: (5 sc, 1 inc) x6 (42)
Round 9: (6 sc, 1 inc) x6 (48)
Round 10: (7 sc, 1 inc) x6 (54)
Round 11: (8 sc, 1inc) x6 (60)
Rounds 12-19 (8 rounds): x60 sc (60)
Place safety eyes between rounds 11 and 12, spaced about 8 stitches apart.
Round 20: (8 sc, 1 dec) x6 (54)
Round 21: (7 sc, 1 dec) x6 (48)
Round 22: (6 sc, 1 dec) x6 (42)
Round 23: (5 sc, 1 dec) x6 (36)
Round 24: (4 sc, 1 dec) x6 (30)
Round 25: (3 sc, 1 dec) x6 (24)
Stuff the body firmly.
Round 26: (2 sc, 1 dec) x6 (18)
Round 27: (1 sc, 1 dec) x6 (12)
Round 28: x6 dec (6)
Cut the yarn, sew through the front loops of the 6 stitches with a needle, pull tight to close, and weave in all remaining ends.
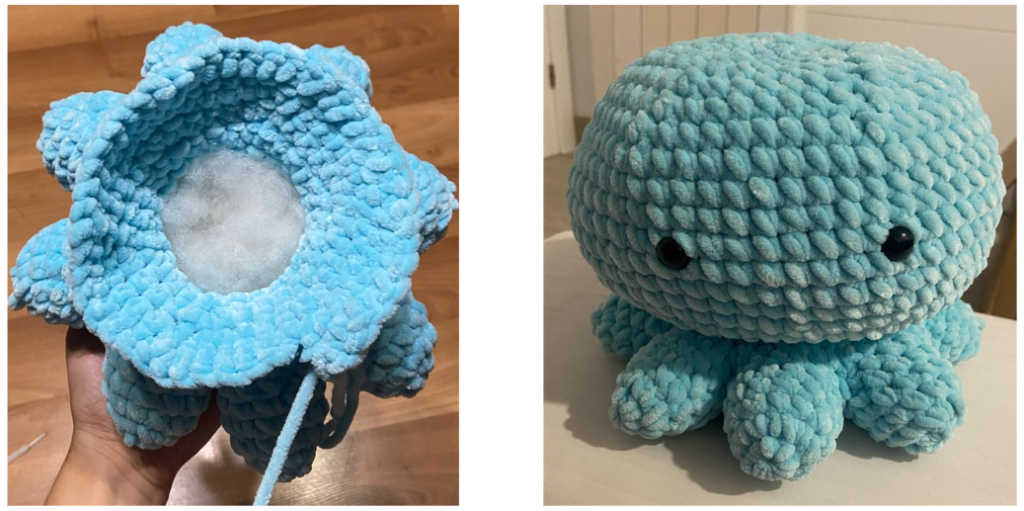
Finishing Touches: Blush and Mouth
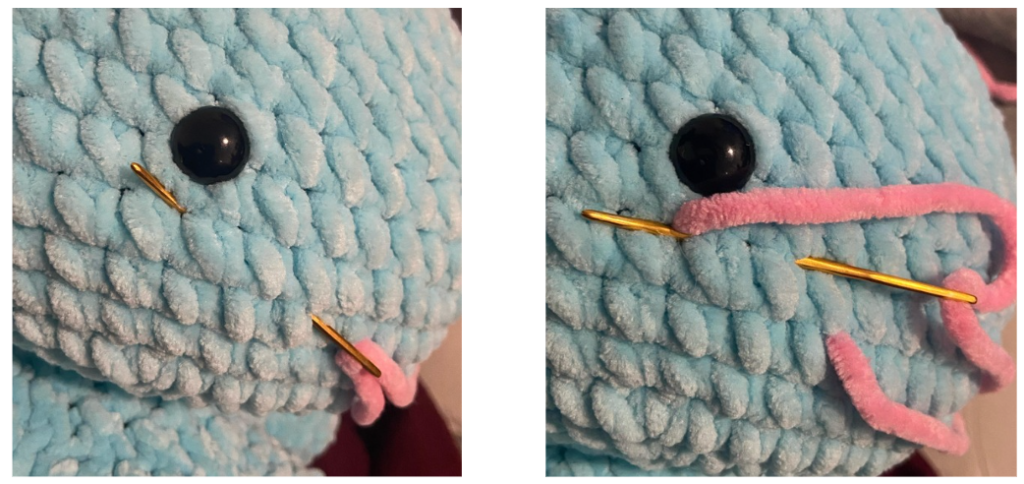
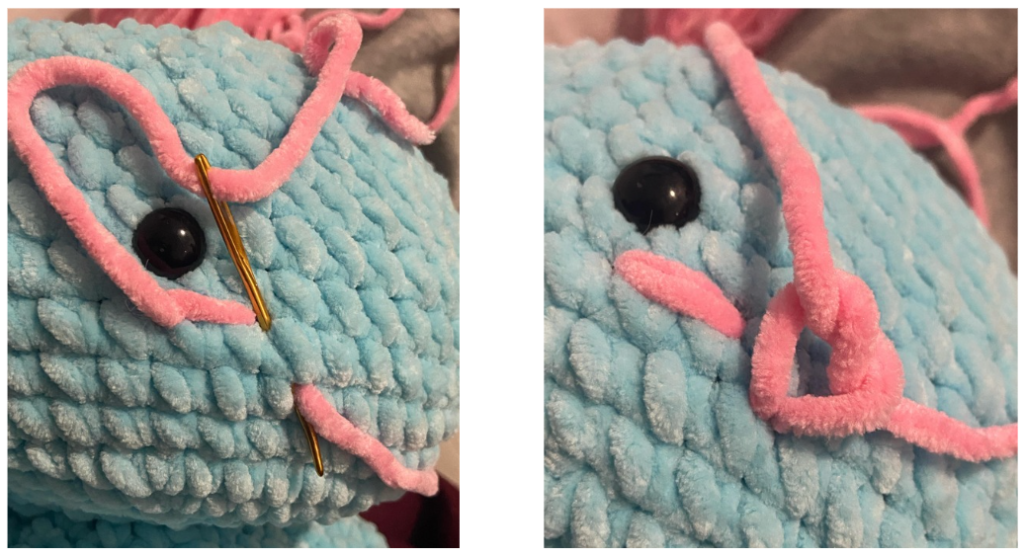
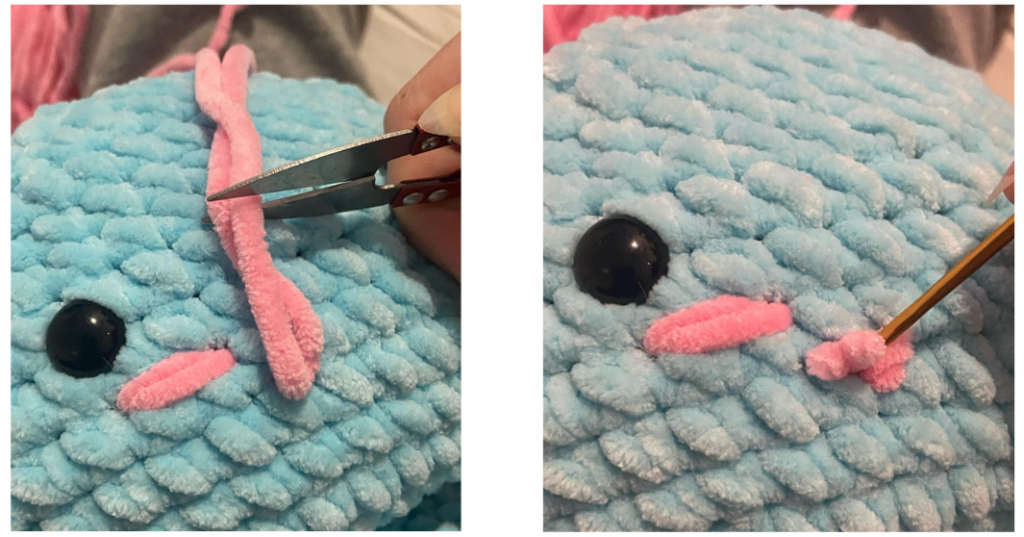
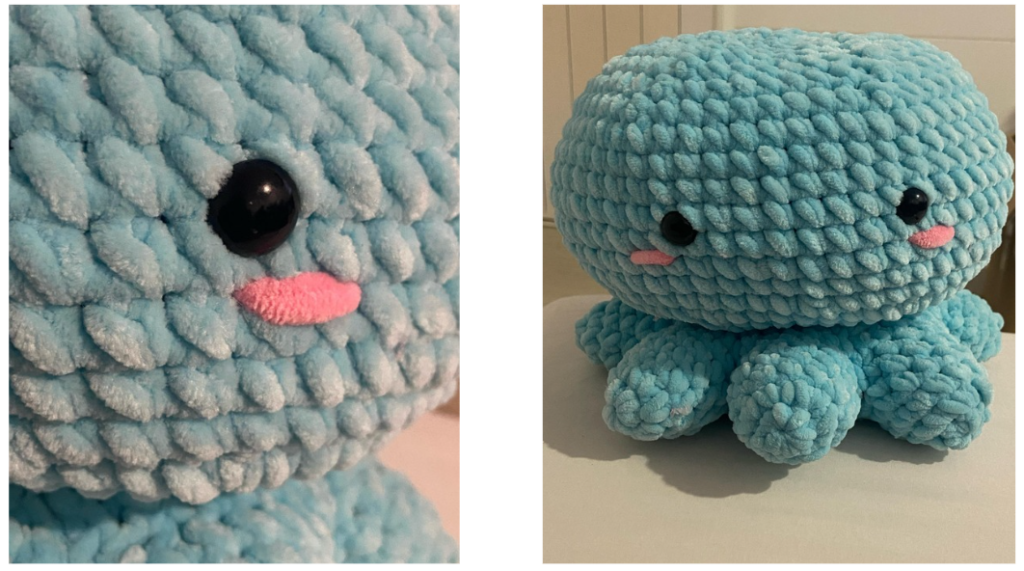
Blush:
Add a cute touch of pink under the safety eyes.
Mouth:
Embroider a smiling mouth shape using black yarn.
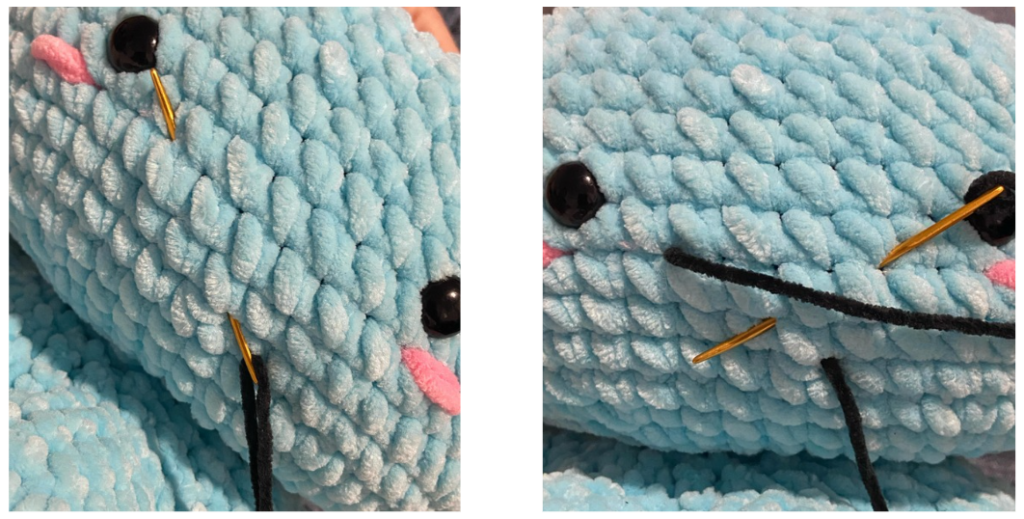
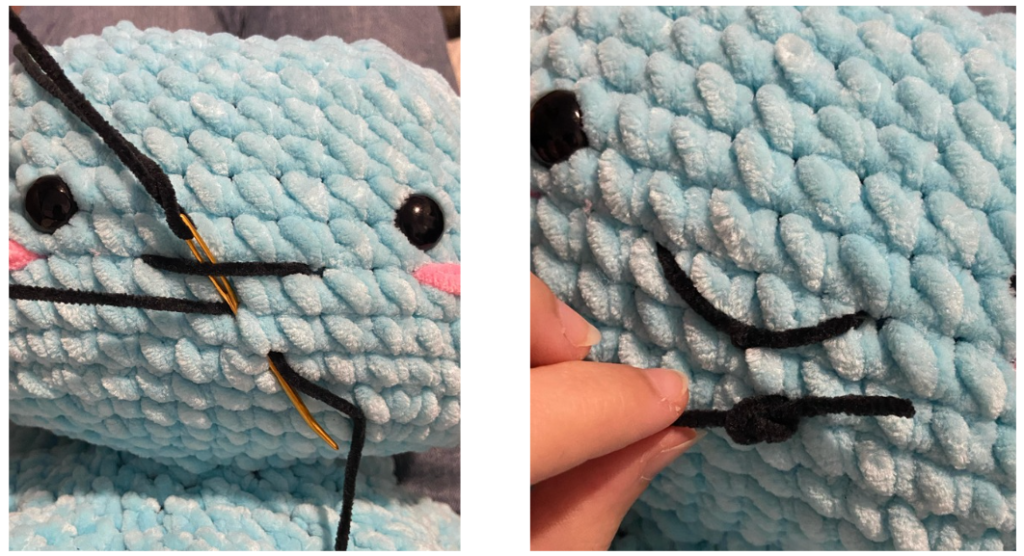
And that’s it!
I hope you enjoyed crocheting this free jumbo octopus crochet pattern just as much as I loved designing it. If you decide to make one, I would love to see how it turns out—don’t forget to tag me on Instagram (@crochetbysilvia) so I can admire your cute amigurumi!
Your support means the world and helps me keep creating and sharing more free patterns with you!
Don’t doubt to check our other free crochet patterns.
—Happy crocheting!
This pattern is for personal use only. You may not copy, reproduce, alter, publish, or distribute this pattern in any format (including video tutorials). If you wish to share this pattern, please share a link to it rather than reprinting it on your site or blog.
You are welcome to sell finished items made from this pattern in small quantities, but do NOT use my photos as your listing or promotional photos. Please credit Crochet by Silvia as the designer.
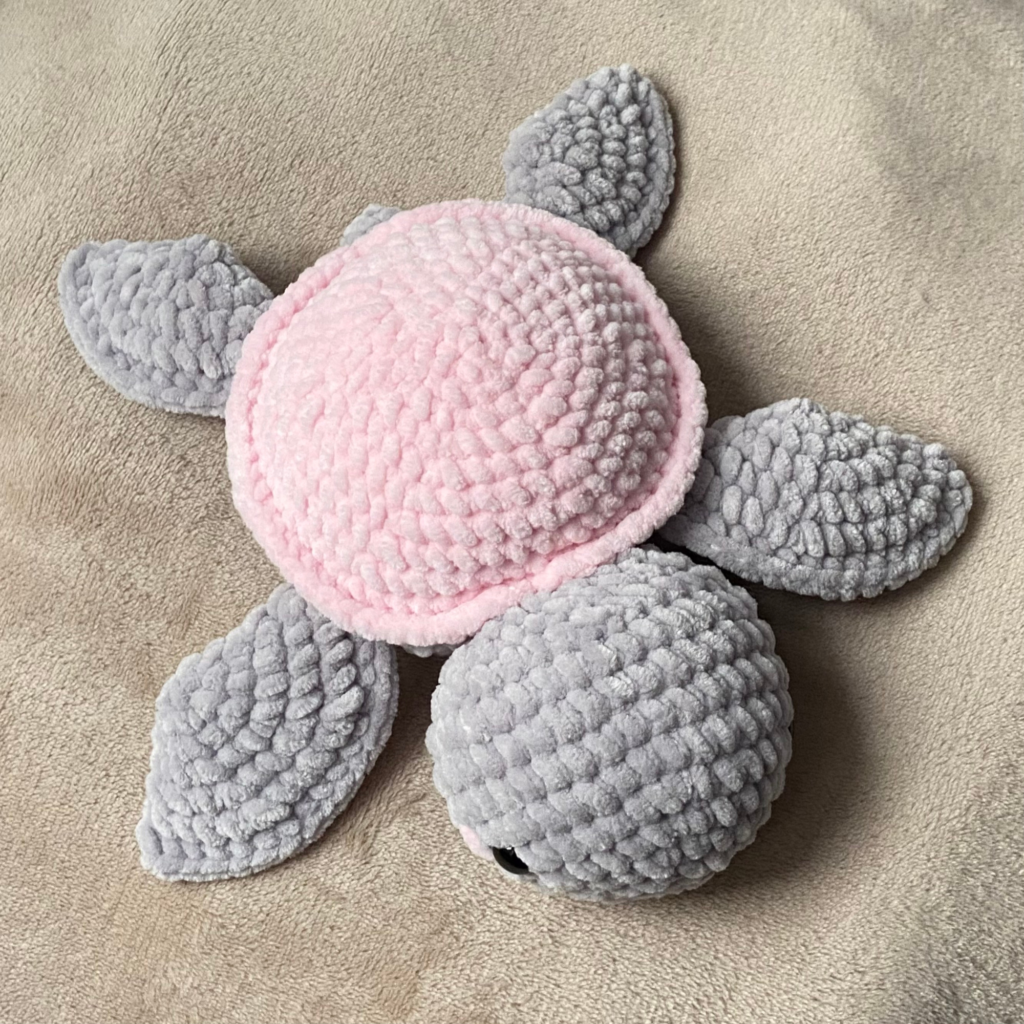
Want to make more cute ocean friends? Check out my free turtle crochet pattern or my free jellyfish crochet pattern!
Frequently Asked Questions About This Pattern
Yes! This pattern uses fundamental amigurumi stitches, including the magic ring, single crochet, chain stitches, increases, and simple decreases. It is a fantastic beginner project.
Thanks to the bulky plush yarn, most crocheters can finish a complete octopus in about 1 to 1.5 hours.
Absolutely! You are welcome to sell physical plushies created using this free pattern at craft fairs, local markets, or online shops. Do not use the original photos as your listing pictures.
Instead of long spiral chains, the short, chubby tentacles are created using small bobble stitches or short 3D loops worked directly around the bottom edge of the body. This creates a neat, rounded border with zero sewing needed!