
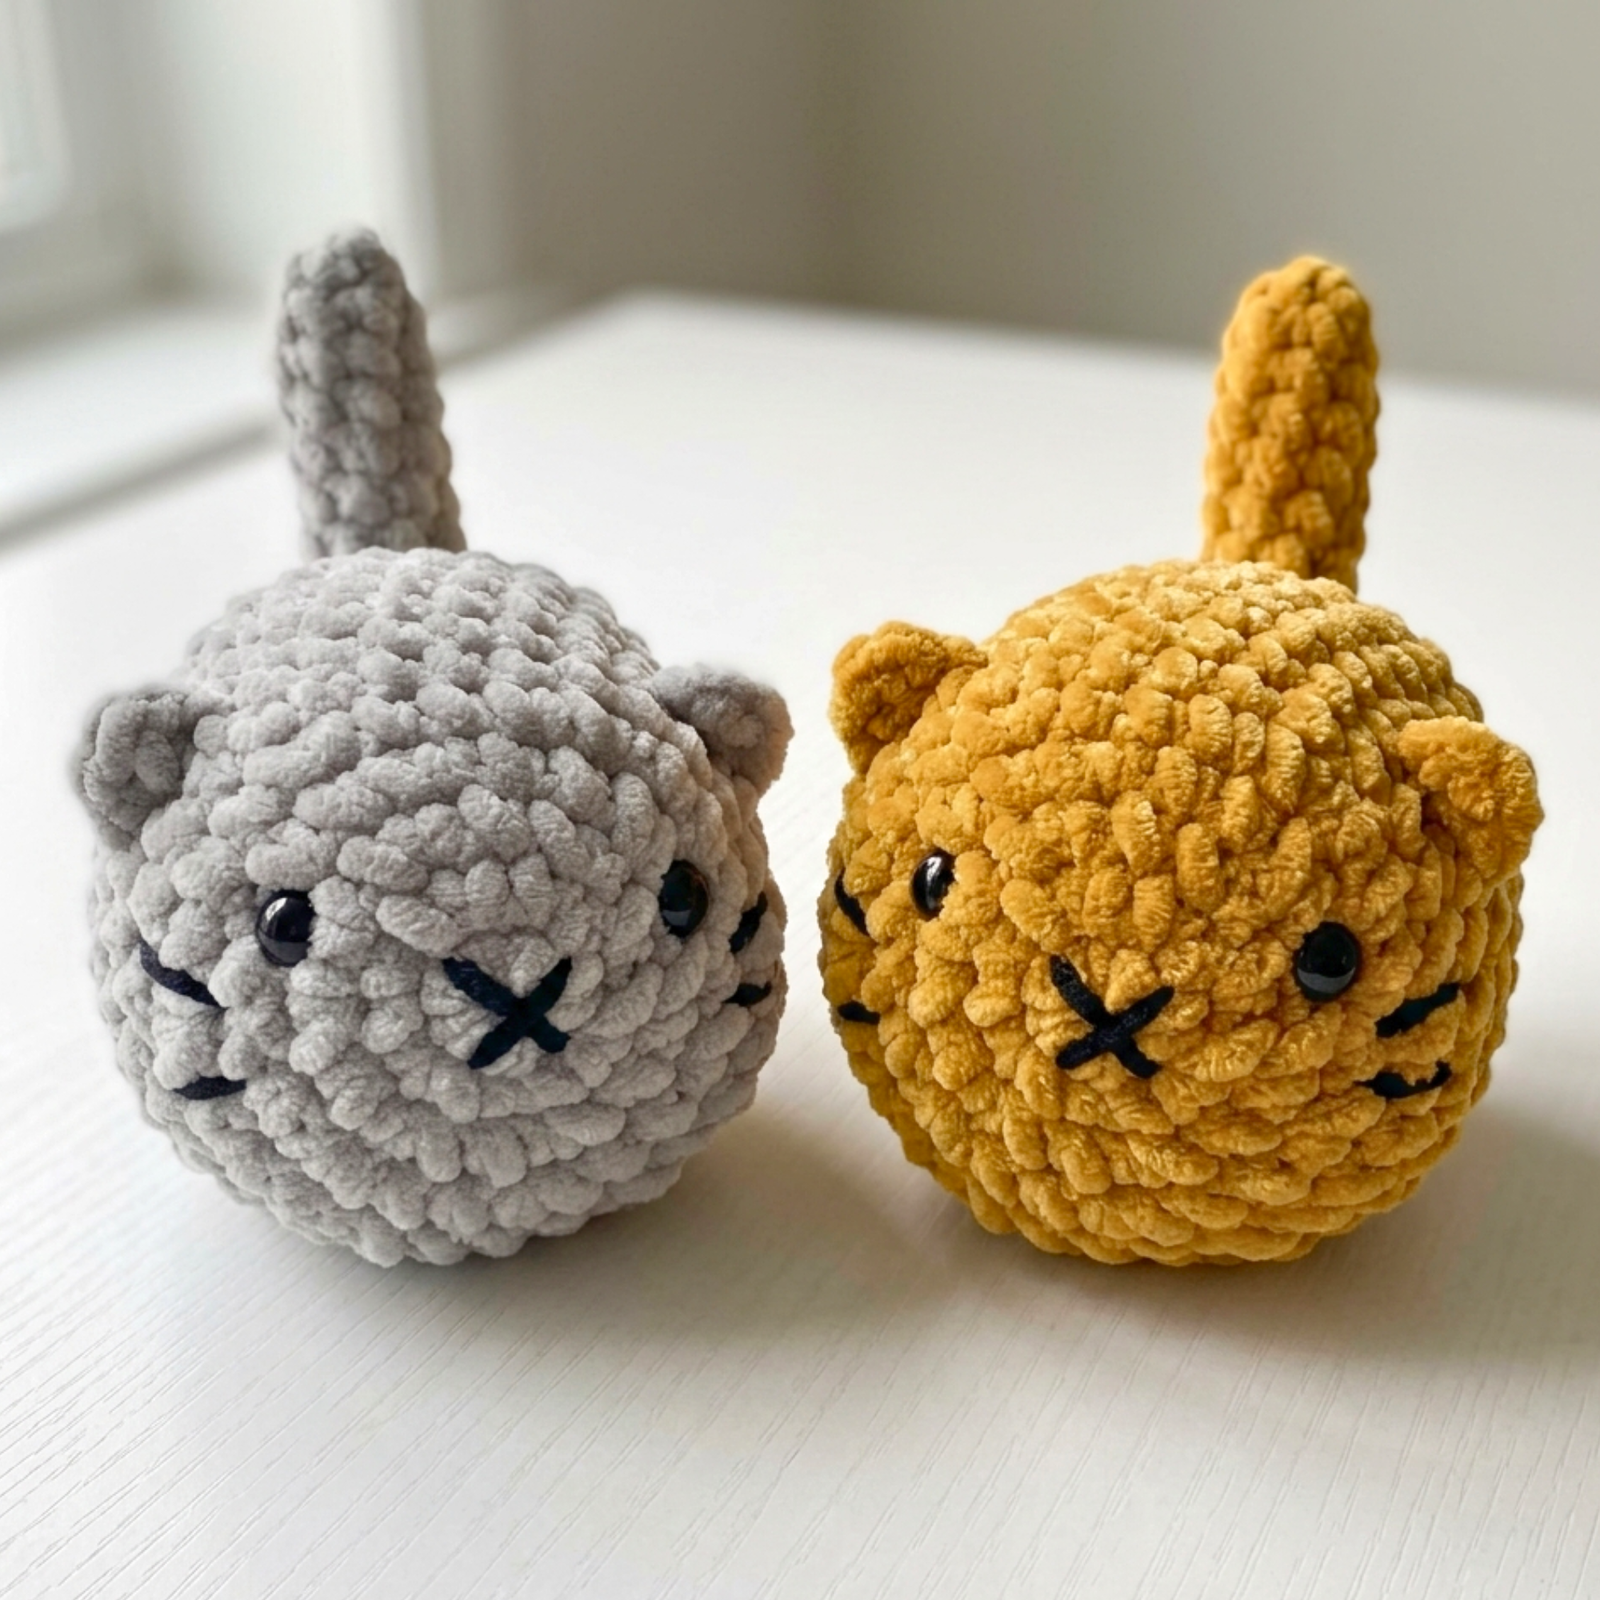
Looking for a quick, adorable, and squishy feline project? This free low-sew loaf cat crochet pattern is an absolute must-craft for cat lovers! Inspired by the hilarious and cozy pose cats adopt when tucking their paws underneath themselves like a loaf of bread, this plush kitten is as charming as it is satisfying to make. Whether you are prepping inventory for local markets, creating cozy room decor, or crafting a gift for a fellow cat parent, this step-by-step tutorial comes together smoothly.
Low-sew amigurumi patterns are a favorite among crafters because they minimize tedious tapestry needle work. With the ears and body worked continuously or attached as you go, assembly is fast, clean, and beginner-friendly. Working with plush velvet yarn gives the cat a velvety, cloud-like finish that makes it irresistible to cuddle. In this complete walkthrough, you will find detailed material suggestions, yarn substitution options, techniques for shaping a sturdy loaf body, and clear row-by-row instructions.
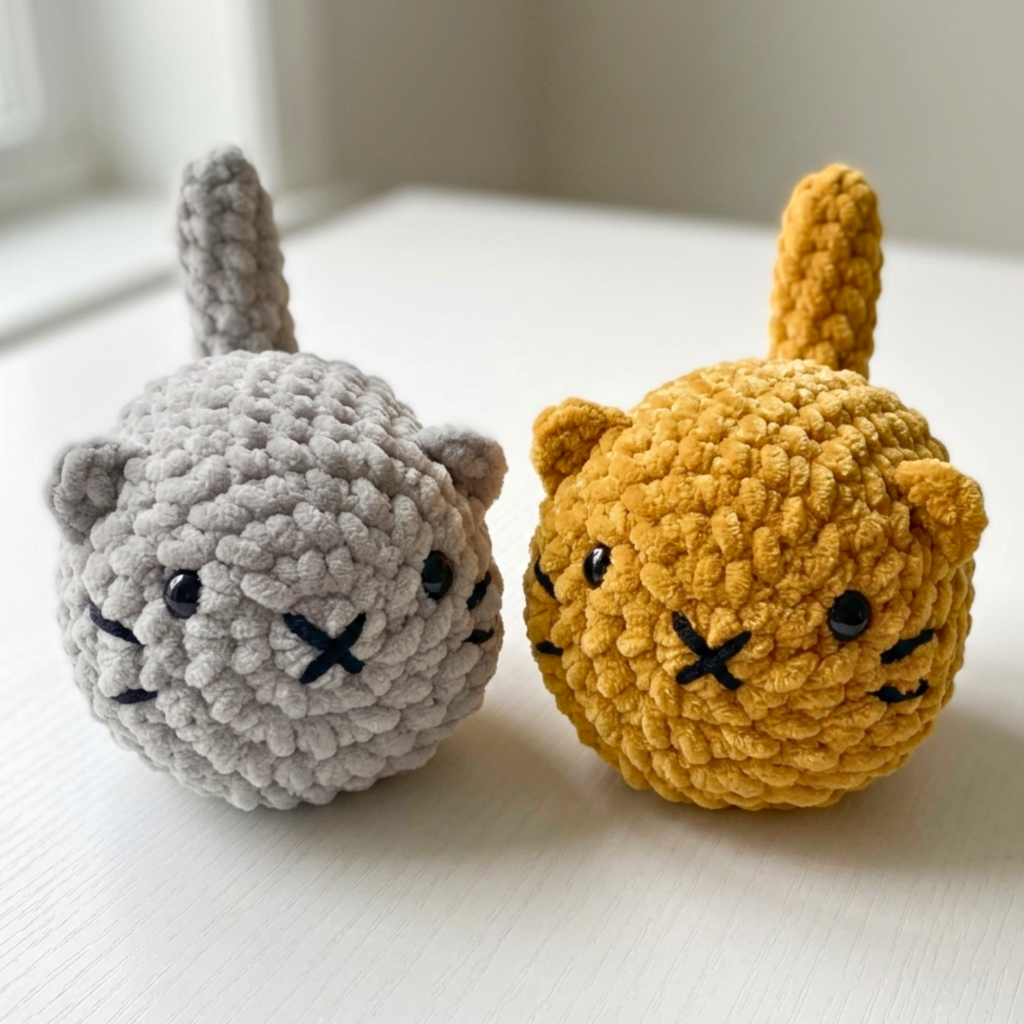
Keep scrolling for the free pattern, or grab the ad-free printable PDF on Etsy!
Want a printable PDF ad-free version? Get it here!Why You Should Crochet a Low-Sew Loaf Cat Today
Cat-themed plushies are constant top sellers in the handmade community. Here is why adding this loaf cat pattern to your project queue is a great choice:
- Iconic & Viral Trend: The “cat loaf” meme is universally recognized and adored across social media, making this design an instant head-turner.
- Low-Sew Assembly: Designed with minimal sewing in mind, the main body is worked in one continuous piece, saving you time and effort.
- Sits Flat on Surfaces: Thanks to its rectangular, flat-bottomed base, this loaf cat rests perfectly on desks, bookshelves, or nightstands as an adorable desk pet.
- Great Scrap Buster: Requiring modest amounts of main body yarn and tiny scraps for facial features, this pattern is ideal for using up leftover yarn skeins sitting in your stash.
Design and Technique Tips for the Perfect Loaf Shape
Achieving that signature oblong, bread-loaf silhouette relies on balanced increases and strategic stuffing techniques.
Maintaining a Flat Base
To keep your cat resting flat like a real loaf, avoid overstuffing the bottom center. When adding polyester fiberfill, focus on filling out the curved front corners (the head) and rear corners first. Gently press down on the bottom while filling to ensure the cat maintains a flat, stable base.
Attaching Ears and Tail Seamlessly
The triangular ears can be crocheted directly onto the head rounds using simple chain and slip-stitch combinations, or stitched down firmly with matching yarn. Keep your ear placement symmetrical on either side of the head, and curve the tail snugly against the lower back or side for a cozy curled-up look.
Yarn Substitutions and Cat Coat Variations
Customize your loaf cat’s coat style easily depending on the yarn weights and colorways you choose:
- Worsted Weight Cotton Yarn: Using cotton yarn with a 2.5 mm or 3.0 mm hook yields a compact, firm loaf cat with sharp stitch definition that makes a durable desk companion or keychain.
- Super Bulky Plush or Chenille Yarn: Swapping to plush velvet yarn with a 3.5 mm or 4.0 mm hook creates an ultra-soft, squishy cat plushie that feels velvety to touch.
- Custom Fur Colorways: Customize the pattern to match real-life pets! Try tuxedo combinations (black and white), orange tabby stripes, calico spots, or sleek solid black cats for spooky season.
Materials Needed
To make your own loaf cat, gather the following supplies:
- Yarn: Super bulky / chunky chenille yarn (your choice of color for the body)
- Crochet Hook: 4.5 mm (depending on your tension and yarn thickness)
- Safety Eyes: 8 mm
- Embroidery Floss: Black thread for the nose and whiskers
- Stuffing: Polyfill fiber stuffing
- Tapestry needle
- Stitch markers
- Scissors
Abbreviations (US Terminology)
- MR: magic ring.
- St(s): stitch(es).
- Sc: single crochet.
- Sl st: slip stitch.
- Ch: chain.
- Inc: increase (2 sc in the same stitch).
- Dec: invisible decrease.
- BO: bobble stitch (= popcorn stitch).
- FLO: front loop only.
- BLO: back loop only.
- FO: fasten off.
Final Size
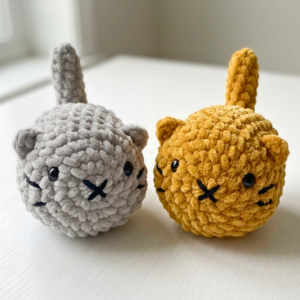
Loaf Cat Plushie Size using a 4.5 mm crochet hook, the finished cat measures approximately 12 x 8 cm (4.7 x 3.1 inches), though size may vary depending on your yarn and tension.
Join the community & get a free pattern!
Free Loaf Cat Crochet Pattern
Crocheting the Body
Start with gray yarn.
Round 1: 6 sc in a MR (6)
Round 2: x6 inc (12)
Round 3: (1 sc, 1 inc) x6 (18)
Round 4: 1 sc, 1 inc, (2 sc, 1 inc) x5, 1 sc (24)
Round 5: (3 sc, 1 inc) x6 (30)
Round 6: sc around (30)
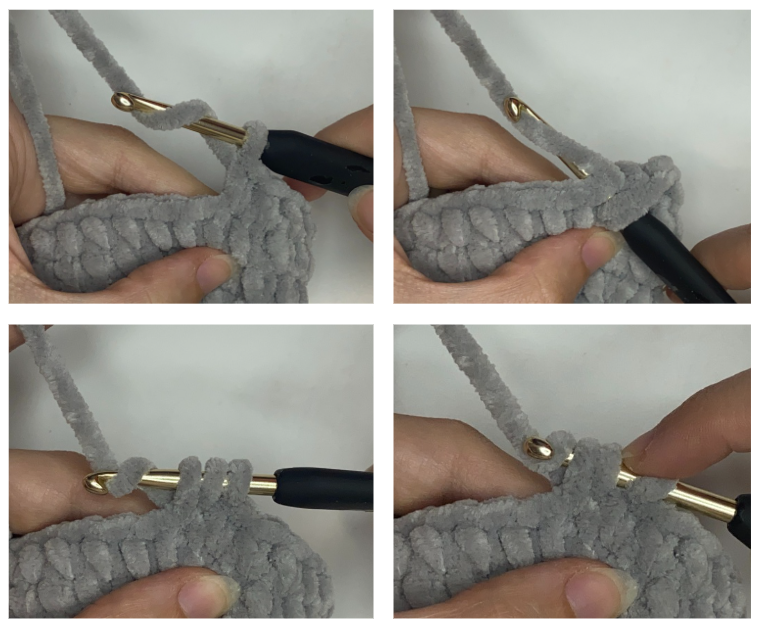
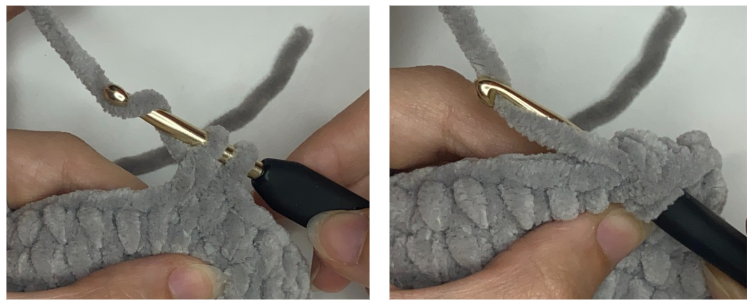
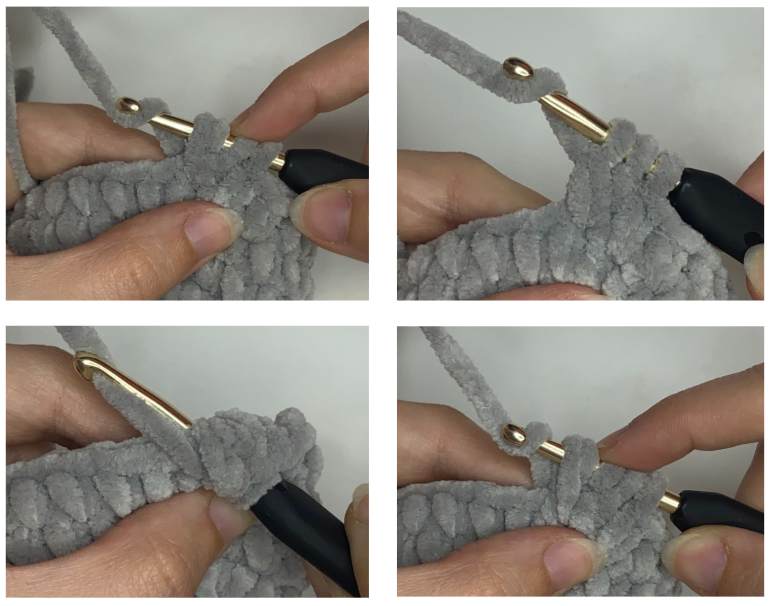
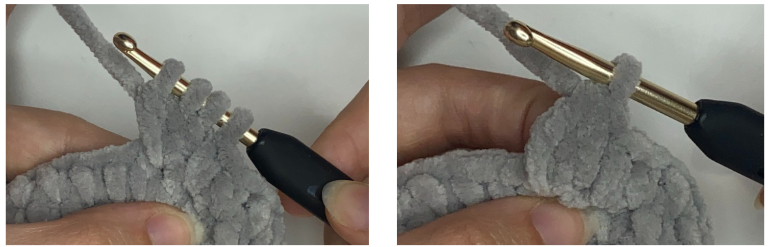
Round 7: 2 sc, FLO in next st: (sl st, sc, ch1, sc, sl st), 8 sc, FLO in next st: (sl st, sc, ch1, sc, sl st), 18 sc (30)
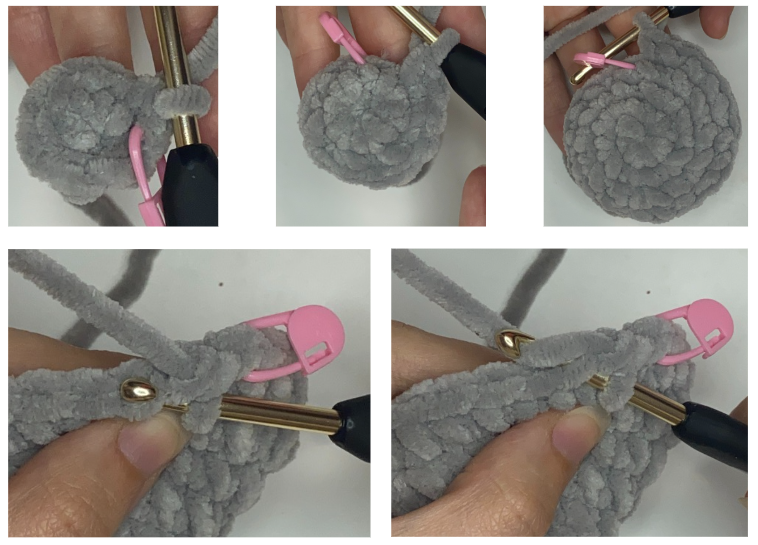
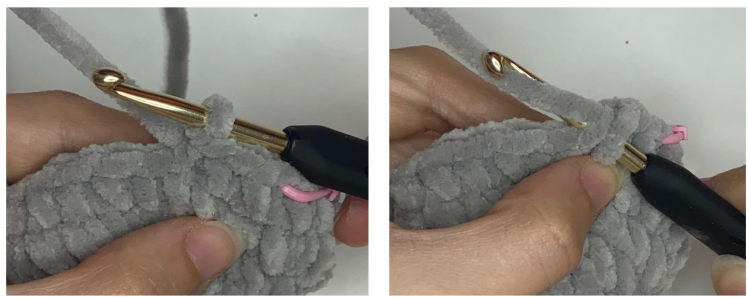
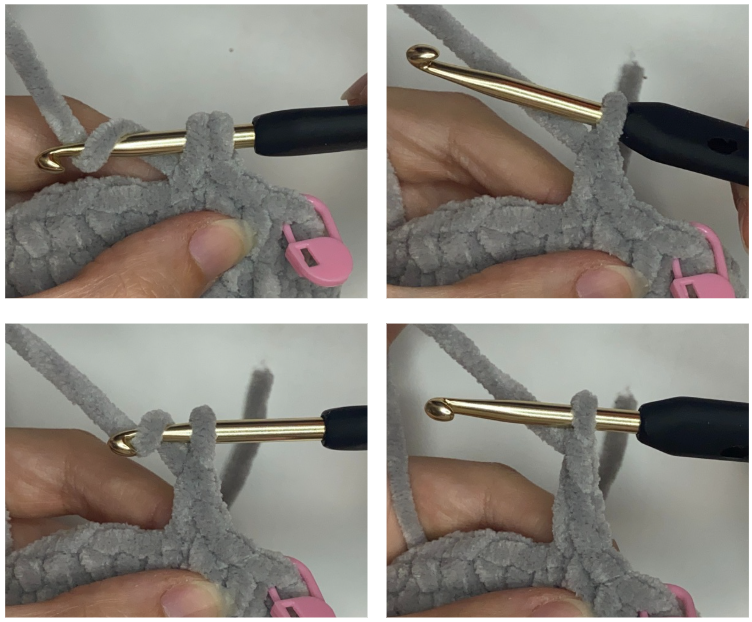
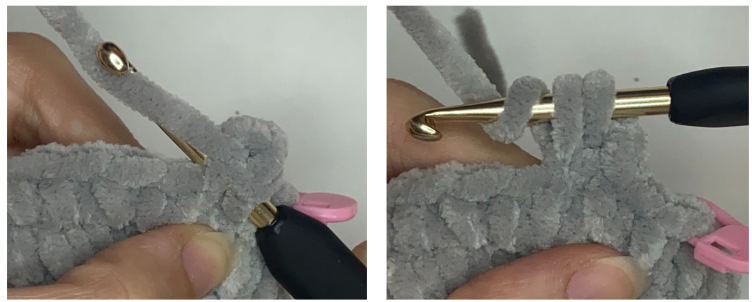
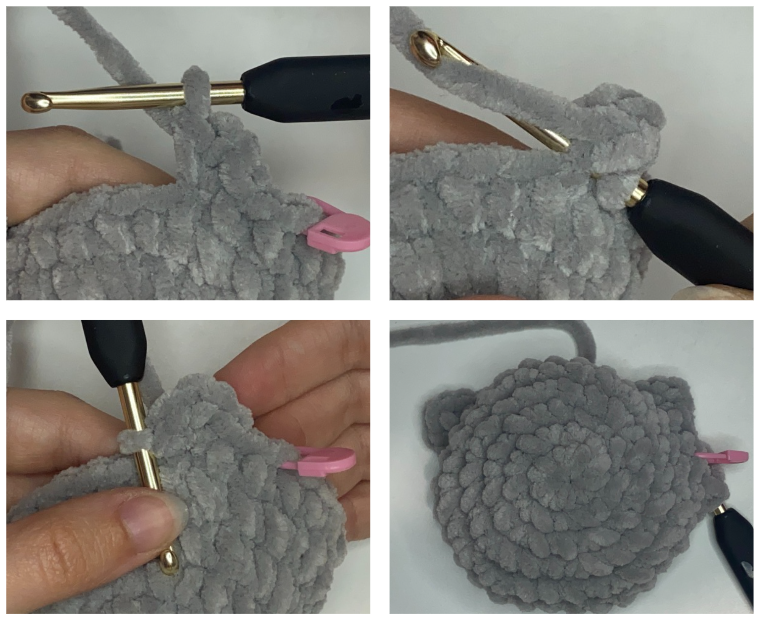
Round 8: 19 sc (note: in ear parts, crochet in the BLO you left before), BO of 4 loops, 4 sc, BO of 4 loops, 5 sc (30)
Place safety eyes between Rounds 3 and 4, aligned with ears.
Rounds 9-12 (4 rounds): sc around (30)
Round 13: 20 sc, BO of 4 loops, 5 sc, BO of 4 loops, 3 sc (30)
Round 14: sc around (30)
Round 15: (3 sc, 1 dec) x6 (24)
Round 16: 1 sc, 1 dec, (2 sc, 1 dec) x5, 1 sc (8)
Stuff firmly.
Round 17: (1 sc, 1 dec) x6 (12)
Round 18: dec around (6)
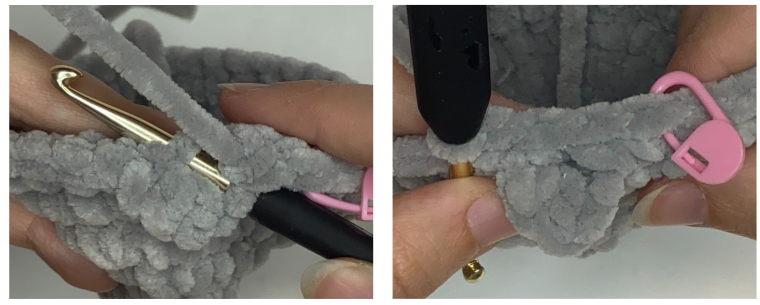
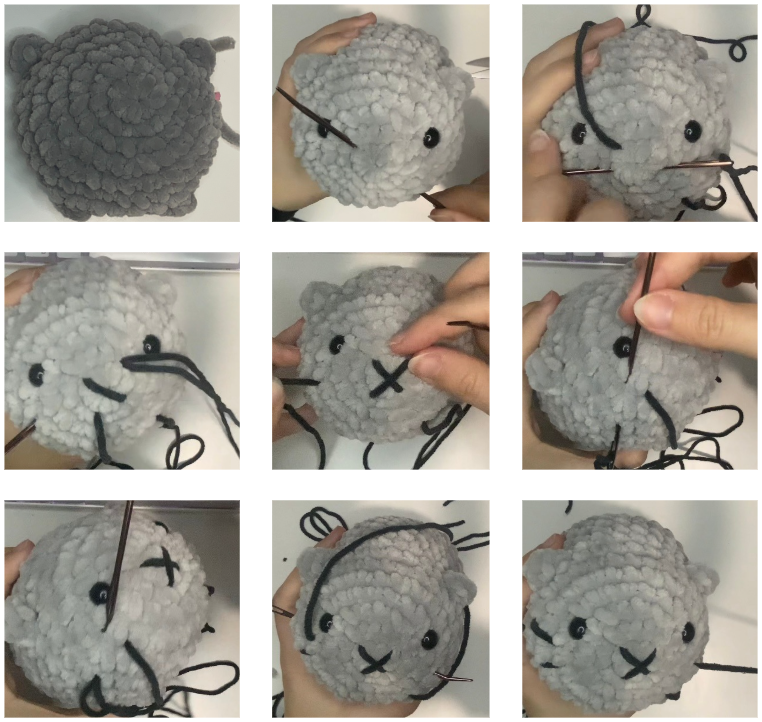
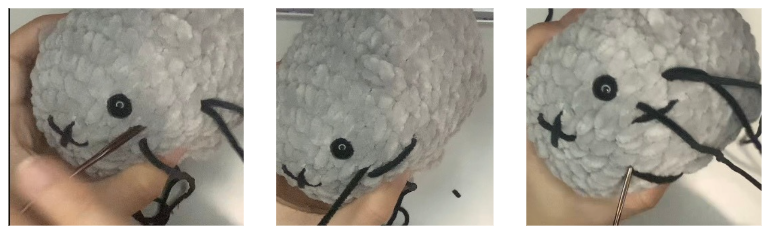
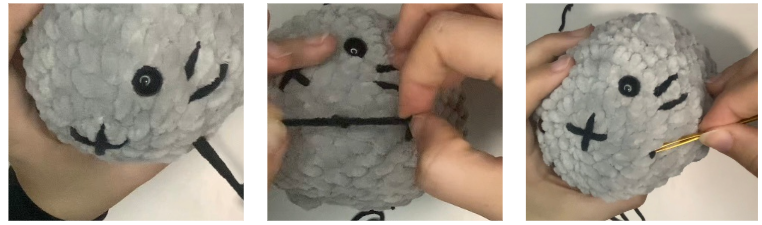
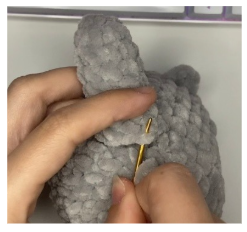
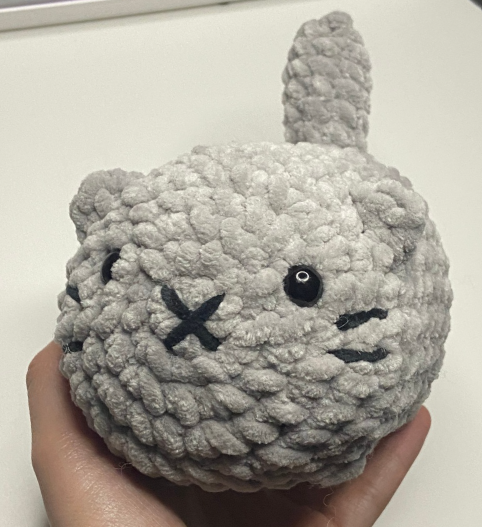
Cut yarn leaving a tail, fasten off, weave the yarn tail through the FLO of the last round, pull to close the hole. Hide the yarn inside the plushie. Embroider the face with black thread: Sew the mouth and whiskers (follow the guide photos below).
Crocheting the Tail
Round 1: 4 sc in a MR (4)
Round 2: inc in each st around (8)
Rounds 3-7 (5 rounds): sc around (8)
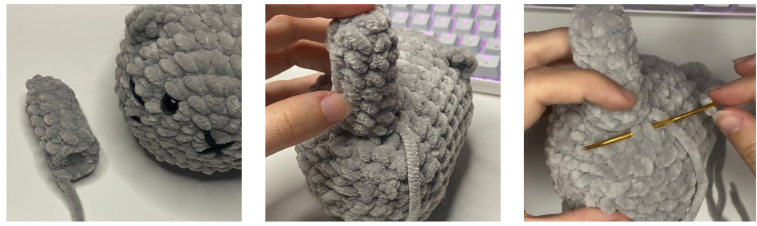
Stuff firmly. Sl st in next stitch, leave a tail for sewing. Sew the tail securely to the back lower section so it curves nicely against the loaf shape.
Finishing Touches and Facial Detail Guide
Embroidering sweet facial details gives your loaf cat its distinct personality. Use black embroidery floss or thin yarn to stitch an inverted “V” for the nose and mouth, and add cute white whisker lines on the cheeks if desired. You can also add pink felt spots or fabric blush under the eyes for a extra kawaii touch.
Safety Note: If you are gifting or selling this plush cat to babies, toddlers, or pets, we strongly advise embroidering closed sleeping eyes or open eyes with black thread instead of using plastic safety eyes to eliminate choking risks.
And that’s it!
I hope you enjoyed crocheting this free and low sew loaf cat crochet pattern just as much as I loved designing it. If you decide to make one, I would love to see how it turns out—don’t forget to tag me on Instagram (@crochetbysilvia) so I can admire your cute amigurumi!
Your support means the world and helps me keep creating and sharing more free patterns with you!
Don’t doubt to check our other free crochet patterns.
—Happy crocheting!
This pattern is for personal use only. You may not copy, reproduce, alter, publish, or distribute this pattern in any format (including video tutorials). If you wish to share this pattern, please share a link to it rather than reprinting it on your site or blog.
You are welcome to sell finished items made from this pattern in small quantities, but do NOT use my photos as your listing or promotional photos. Please credit Crochet by Silvia as the designer.
Want to make more cute amigurumi friends? Check out my free turtle crochet pattern or my free jellyfish crochet pattern!
Frequently Asked Questions About This Pattern
Yes! This pattern uses fundamental amigurumi stitches, including the magic ring, single crochet, increases, and simple decreases. The low-sew design makes it very accessible for beginners.
Thanks to the bulky plush yarn and low-sew construction, most crocheters can finish a complete loaf cat in about 35 to 50 minutes.
Absolutely! You are welcome to sell physical plushies created using this free pattern at craft fairs, local markets, or online shops. Do not use the original photos as your listing pictures.